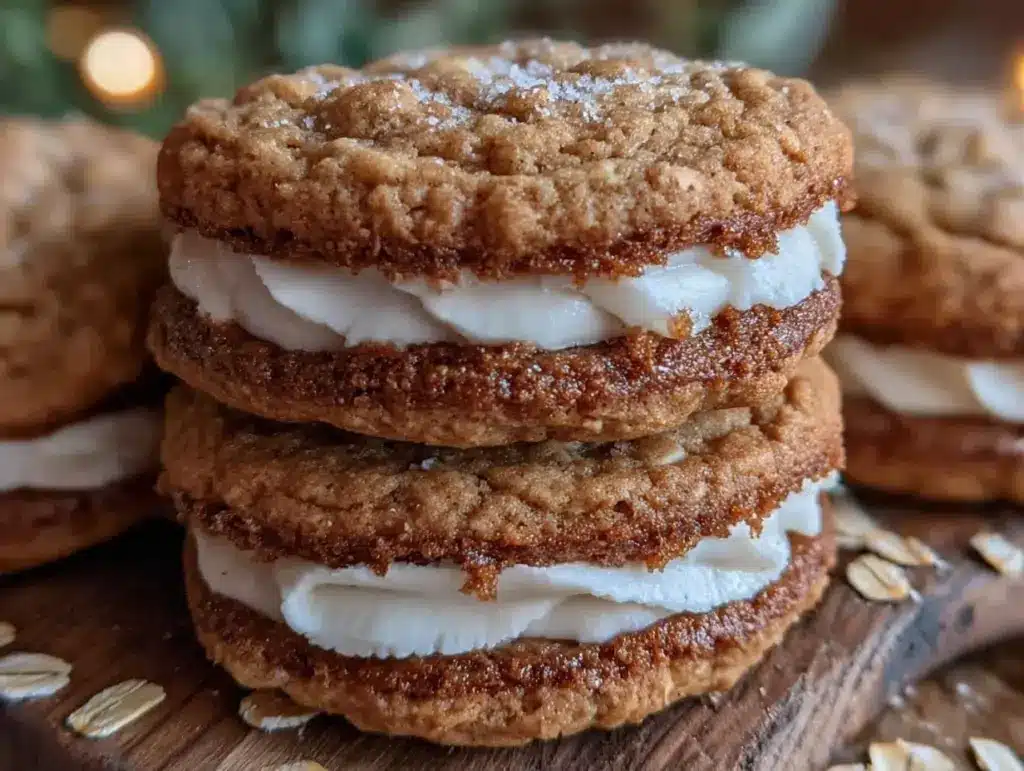
The smell of fresh oatmeal cream pie cookies baking in the oven, with that sweet vanilla cream filling teasing your senses, honestly takes me right back to my childhood. I still remember the first time I attempted these soft & chewy delights—turns out, making a homemade version is just as comforting as the classic snack, but way better. As someone who’s baked these cookies more times than I can count, I can say this recipe hits that perfect balance between nostalgia and fresh-from-the-oven goodness.
Oatmeal cream pie cookies aren’t just any treat—they’re the kind of dessert that makes you pause whatever you’re doing, grab one (or two), and smile with your eyes closed. I’ve tweaked this recipe over time to get that soft texture you want without the dryness that sometimes sneaks into oatmeal cookies. Plus, the creamy filling is just sweet enough to make the whole thing a real crowd-pleaser.
Whether you’re baking for your family, sending treats to work, or just craving a cozy dessert, these oatmeal cream pie cookies won’t disappoint. They’re easy enough for a weekday bake but impressive enough to bring to any gathering. Trust me, after baking this recipe over and over, I’m convinced it’s the best homemade oatmeal cream pie cookie recipe out there—you’ll see why once you try it!
Why You’ll Love This Recipe
If you’re wondering why this oatmeal cream pie cookies recipe has become a favorite in my kitchen, here’s the scoop:
- Quick & Easy: From mixing to baking, you’ll have these soft cookies ready in about 30 minutes—perfect for last-minute sweet tooth moments.
- Simple Ingredients: No need to hunt down fancy stuff; most are pantry staples like oats, butter, and vanilla extract.
- Perfect for Any Occasion: Whether it’s a cozy night in, a school treat, or a holiday party, these cookies fit right in.
- Crowd-Pleaser: Kids, adults, picky eaters—you name it, everyone asks for seconds.
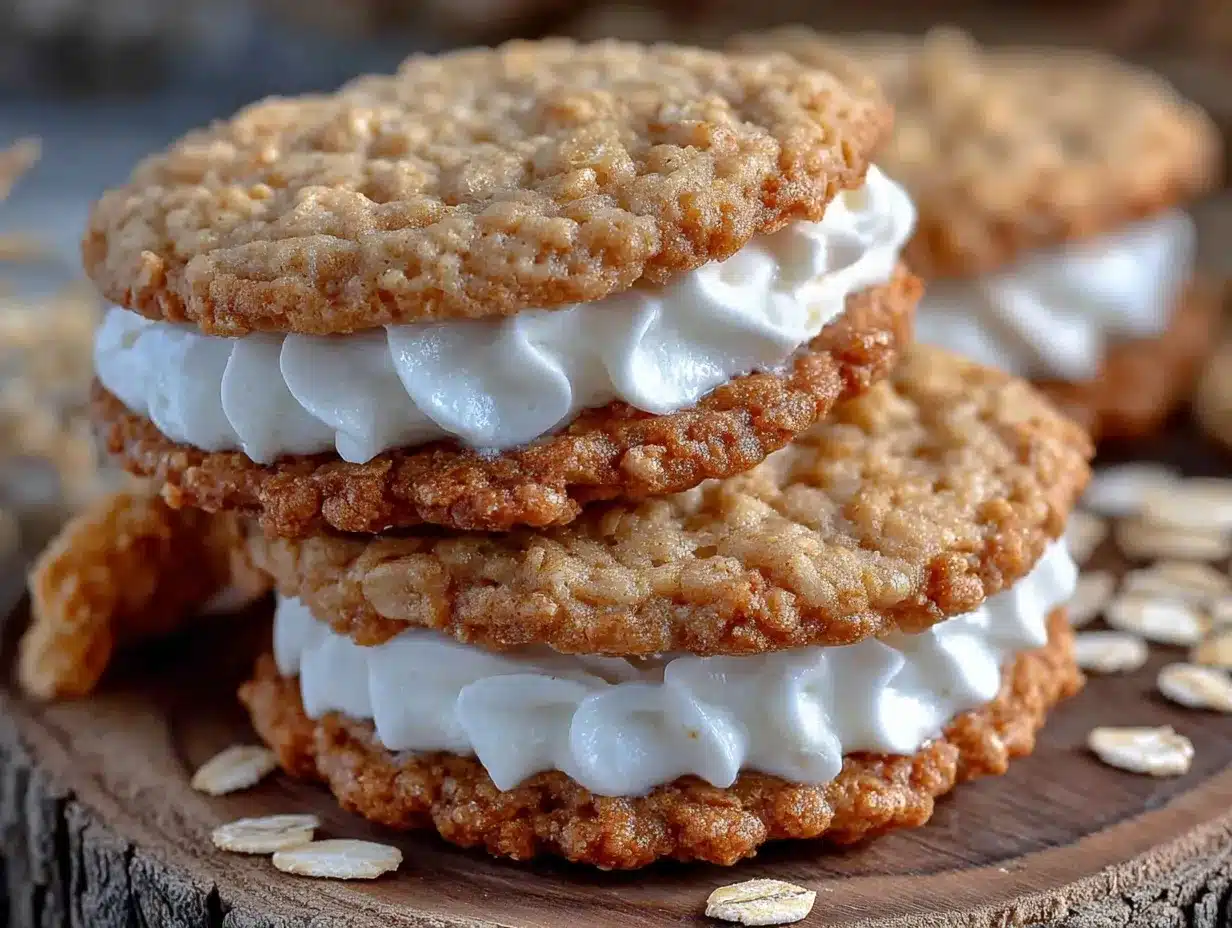
- Unbelievably Delicious: The soft oatmeal cookie with the creamy, sweet filling is a combo that just works every single time.
What sets this apart? Honestly, it’s the creamy filling whipped just right—light, fluffy, and not too sweet. And the cookies themselves stay soft for days thanks to a little trick I picked up: underbaking just slightly to keep them chewy. Plus, I like to toast the oats just a touch before mixing, which brings out a deep, nutty flavor you don’t get in store-bought versions. This isn’t just a cookie—it’s a little slice of comfort that feels homemade and special.
What Ingredients You Will Need
This recipe uses simple, wholesome ingredients to deliver bold flavor and that satisfying soft & chewy texture without any fuss. I always keep these on hand because, well, you never know when a cookie craving will hit!
- Old-Fashioned Rolled Oats (1 ½ cups / 135g) – Adds hearty texture and chewiness. I prefer Bob’s Red Mill for consistent quality.
- All-Purpose Flour (1 cup / 120g) – The base for the cookie dough.
- Baking Soda (½ teaspoon) – Helps the cookies rise slightly and stay soft.
- Ground Cinnamon (1 teaspoon) – Adds warm, cozy flavor.
- Salt (¼ teaspoon) – Balances sweetness and enhances flavor.
- Unsalted Butter (½ cup / 113g, softened) – For richness and moisture.
- Brown Sugar (½ cup / 100g, packed) – Gives a deep, caramel-like sweetness.
- Granulated Sugar (¼ cup / 50g) – Balances the brown sugar for the perfect sweetness level.
- Egg (1 large, room temperature) – Binds everything together.
- Vanilla Extract (1 teaspoon) – For that classic vanilla warmth.
- For the Cream Filling:
- Unsalted Butter (¼ cup / 57g, softened) – The creamy base.
- Powdered Sugar (1 ½ cups / 180g) – Sweet and smooth texture.
- Marshmallow Fluff (2 tablespoons) – Adds lightness and that nostalgic cream pie feel.
- Vanilla Extract (½ teaspoon) – To round out the filling flavor.
If you want to make a dairy-free version, swapping butter for vegan margarine works well. For gluten-free, using a gluten-free all-purpose flour blend keeps the cookies soft without changing the flavor much. Pro tip: When selecting oats, go for rolled oats rather than quick oats for that perfect chew.
Equipment Needed
- Mixing Bowls: One large and one medium bowl to keep things organized. I use glass bowls because they’re easy to clean and don’t retain odors.
- Electric Mixer (Handheld or Stand Mixer): This is your best friend for whipping up the cream filling light and fluffy without tiring your arms.
- Measuring Cups & Spoons: Accurate measurements make all the difference! I recommend a set with both metric and US units.
- Spatula: For folding in oats and scraping the bowl clean.
- Baking Sheets: Standard 9×13 inch (23×33 cm) pans work perfectly. Line with parchment paper to avoid sticking and ease cleanup.
- Cooling Rack: Essential for letting cookies cool evenly so they don’t get soggy on the bottom.
If you don’t have an electric mixer, a sturdy whisk will do for the cream filling, but be prepared to get a bit of an arm workout. For budget-friendly gear, a silicone spatula and a basic baking sheet from your local store will get the job done just fine. Always make sure your baking sheets are flat and not warped; uneven pans can cause cookies to bake unevenly.
Detailed Preparation Method
- Preheat the Oven: Set your oven to 350°F (175°C). Line two baking sheets with parchment paper to prevent sticking.
- Toast the Oats: In a dry skillet over medium heat, toast the oats for 3-4 minutes until fragrant and slightly golden. This step adds depth of flavor—don’t skip it!
- Mix Dry Ingredients: In a medium bowl, whisk together the all-purpose flour, baking soda, ground cinnamon, and salt. Set aside.
- Cream Butter and Sugars: In a large bowl, use your mixer to cream the softened butter, brown sugar, and granulated sugar until light and fluffy. This should take about 3-4 minutes on medium speed.
- Add Egg and Vanilla: Beat in the egg and vanilla extract until fully combined. The mixture might look slightly curdled—that’s okay.
- Combine Wet and Dry: Gradually add the dry ingredients to the wet mixture, mixing on low speed just until incorporated. Avoid overmixing to keep cookies tender.
- Fold in Toasted Oats: Using a spatula, gently fold in the toasted oats until evenly distributed.
- Form Cookies: Using a tablespoon or cookie scoop, drop rounded spoonfuls onto the prepared baking sheets, spacing them about 2 inches apart.
- Bake: Bake for 10-12 minutes. The edges should be set and lightly golden, but the centers will look slightly underbaked. That’s the secret to soft, chewy cookies.
- Cool: Let the cookies cool on the baking sheet for 5 minutes before transferring to a cooling rack to cool completely.
- Make the Cream Filling: While the cookies cool, beat together the softened butter, powdered sugar, marshmallow fluff, and vanilla extract until smooth and fluffy—about 4-5 minutes with a mixer.
- Assemble the Cookies: Once the cookies are completely cool, spread or pipe a generous dollop of cream filling onto the flat side of one cookie, then sandwich with another cookie. Press gently to spread the filling evenly.
- Chill (Optional): For a firmer filling, refrigerate the assembled cookies for 30 minutes before serving.
Common hiccup: If your cookies spread too much, your butter might be too soft or your oven temperature too low. Try chilling the dough for 15 minutes next time. You want a slightly glossy cookie surface but not puddles of dough.
Cooking Tips & Techniques
Here’s what I’ve learned after baking oatmeal cream pie cookies more times than I can count:
- Don’t Overmix the Dough: Mix just until the flour disappears. Overmixing activates gluten and can make cookies tough.
- Soft Butter is Key: Butter should be soft but not melting. Too warm and your cookies will spread too thin.
- Use Fresh Baking Soda: It’s easy to forget, but expired baking soda can lead to flat cookies. A quick test: drop a pinch in vinegar—if it fizzes, you’re good!
- Toast the Oats: This simple step adds a nutty depth that’s totally worth the few extra minutes.
- Underbake Slightly: Pull cookies out when the edges are set but centers are still soft. They’ll firm up as they cool and stay chewy.
- Make the Filling Light: Beat the filling long enough to incorporate air—this keeps it from being dense or overly sweet.
- Multitasking Tip: While cookies bake, whip up the filling so you’re ready to assemble quickly. Saves time and keeps the filling fresh.
One time, I forgot to toast the oats and honestly, the cookies were missing that special something. It’s a small extra step that makes a big difference, so don’t skip it!
Variations & Adaptations
Want to switch things up? Here are some fun ways to customize these oatmeal cream pie cookies:
- Chocolate Chip Twist: Add ½ cup (90g) of semi-sweet chocolate chips to the cookie dough for a classic combo.
- Gluten-Free Version: Use a gluten-free all-purpose flour blend in place of regular flour and make sure your oats are certified gluten-free.
- Vegan Adaptation: Swap butter for vegan margarine and use a flax egg (1 tablespoon ground flaxseed + 3 tablespoons water) instead of the regular egg. Use dairy-free marshmallow fluff or skip it for a simple vanilla buttercream filling.
- Spiced Up: Add a pinch of nutmeg and ground ginger to the dry ingredients for a warming spice mix that’s perfect for fall.
- Fruit-Filled: Mix ¼ cup (40g) dried cranberries or raisins into the dough for a chewy burst of sweetness.
Personally, I love adding a handful of toasted pecans when I’m feeling fancy—it adds a nice crunch that contrasts with the soft cookie and creamy filling.
Serving & Storage Suggestions
These oatmeal cream pie cookies are best served at room temperature so the filling stays perfectly creamy and the cookies remain soft. They look adorable stacked on a plate or wrapped in parchment paper for gifting.
Pair them with a glass of cold milk, a cup of tea, or even a scoop of vanilla ice cream for a decadent dessert experience. If you want to get creative, serve alongside fresh fruit or a light coffee for brunch.
To store, keep the cookies in an airtight container at room temperature for up to 3 days—though honestly, they rarely last that long! For longer storage, refrigerate for up to a week or freeze assembled cookies for up to 3 months. When freezing, wrap each cookie individually in plastic wrap and place in a freezer-safe container.
To reheat, let frozen cookies thaw at room temperature. If you want a freshly baked feel, warm them in a 300°F (150°C) oven for 5 minutes, but watch closely so the filling doesn’t melt too much.
The flavors actually meld beautifully if you let the cookies sit overnight, so if you can wait, I recommend making them a day ahead for max deliciousness.
Nutritional Information & Benefits
Each oatmeal cream pie cookie (sandwiched, standard size) is roughly estimated to have about 180-200 calories, with 7 grams of fat, 28 grams of carbs, and 2 grams of protein. The oats add fiber and slow-release energy, making these treats a bit more satisfying than your average cookie.
Oats bring heart-healthy benefits, including beta-glucan fiber that can help lower cholesterol. The cinnamon adds a touch of antioxidants and warmth without sugar. While these cookies are definitely a sweet treat, using real butter and natural sugars (plus that marshmallow fluff for fluffiness) means you’re not just biting into artificial flavors or preservatives.
If you’re mindful of allergens, note these contain gluten, dairy, and eggs, but substitutions can be made to fit vegan or gluten-free diets. I love that this recipe offers flexibility while still tasting like an indulgence—perfect for a balanced approach to treats.
Conclusion
In a nutshell, these irresistible oatmeal cream pie cookies bring soft, chewy, and creamy together like a perfect little package of happiness. They’re simple to make, use ingredients you probably have, and deliver flavor that makes you want to savor every bite. Whether you’re baking for fun, gifting to someone special, or just treating yourself, this recipe is a winner.
Feel free to tweak the spices, add your favorite mix-ins, or even try different fillings to make it your own. I love that this recipe is a blank canvas for creativity. Honestly, these oatmeal cream pie cookies have become my go-to comfort bake, and I hope they find a spot in your kitchen, too.
Give this recipe a try and tell me how it goes! I’d love to hear your favorite variations or any tips you discover along the way. Don’t be shy—drop a comment, share with friends, or save it for your next baking adventure. Happy baking!
Frequently Asked Questions
How long do oatmeal cream pie cookies stay fresh?
Stored in an airtight container at room temperature, they stay fresh and soft for about 3 days. Refrigerating extends freshness up to a week.
Can I make the cookies ahead of time?
Yes! You can bake the cookies and prepare the filling separately, then assemble just before serving or chill assembled cookies overnight for best flavor.
What’s the best way to keep the cookies soft?
Avoid overbaking and store cookies with a slice of bread in the container—it helps keep them moist.
Can I freeze these oatmeal cream pie cookies?
Definitely! Freeze them individually wrapped for up to 3 months. Thaw at room temperature before enjoying.
Is there a dairy-free version of the cream filling?
You can substitute vegan butter and use dairy-free marshmallow fluff or a simple vegan vanilla frosting for a dairy-free filling.
Pin This Recipe!
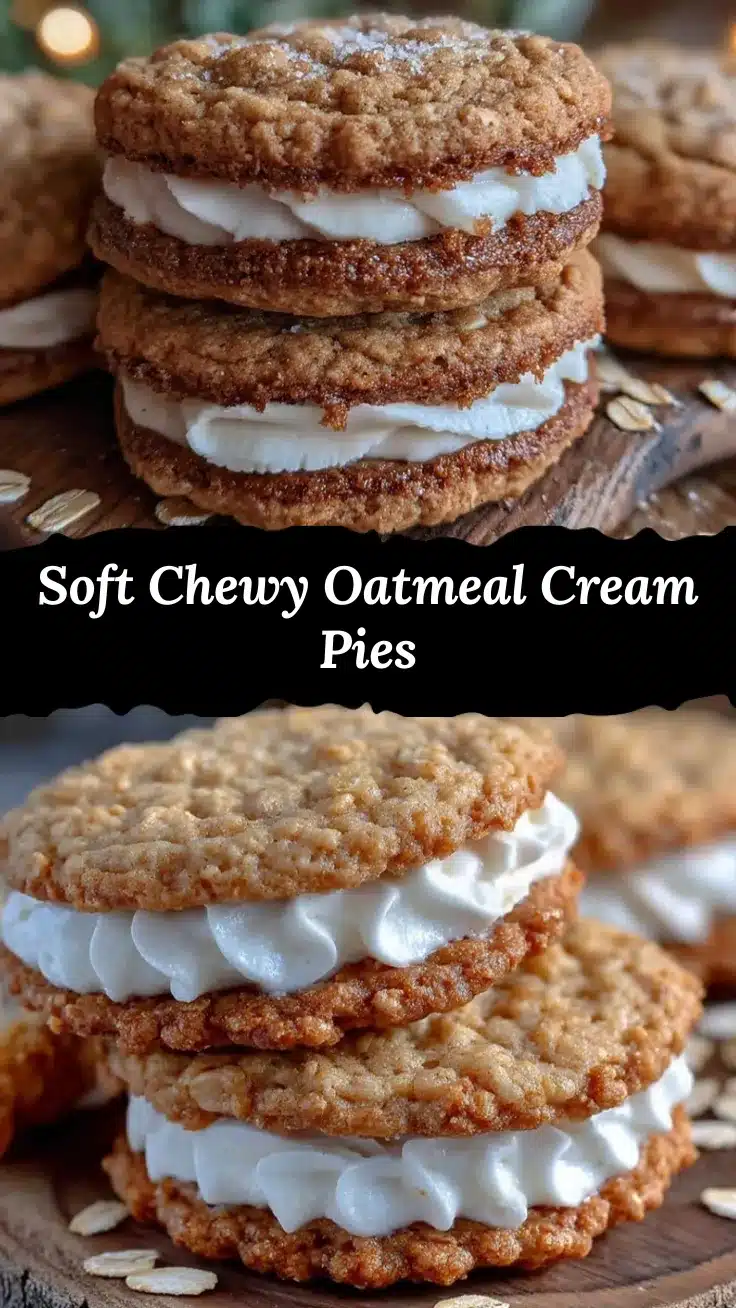
Irresistible Oatmeal Cream Pie Cookies Recipe Easy Soft Chewy Treats

Soft and chewy oatmeal cream pie cookies with a light, fluffy vanilla cream filling. A nostalgic treat that’s quick and easy to make with simple pantry ingredients.
- Prep Time: 15 minutes
- Cook Time: 12 minutes
- Total Time: 27 minutes
- Yield: 24 cookies (12 sandwiches) 1x
- Category: Dessert
- Cuisine: American
Ingredients
- 1 ½ cups old-fashioned rolled oats (135g)
- 1 cup all-purpose flour (120g)
- ½ teaspoon baking soda
- 1 teaspoon ground cinnamon
- ¼ teaspoon salt
- ½ cup unsalted butter, softened (113g)
- ½ cup packed brown sugar (100g)
- ¼ cup granulated sugar (50g)
- 1 large egg, room temperature
- 1 teaspoon vanilla extract
- For the cream filling:
- ¼ cup unsalted butter, softened (57g)
- 1 ½ cups powdered sugar (180g)
- 2 tablespoons marshmallow fluff
- ½ teaspoon vanilla extract
Instructions
- Preheat the oven to 350°F (175°C). Line two baking sheets with parchment paper.
- Toast the oats in a dry skillet over medium heat for 3-4 minutes until fragrant and slightly golden.
- In a medium bowl, whisk together the flour, baking soda, cinnamon, and salt.
- In a large bowl, cream the softened butter, brown sugar, and granulated sugar with a mixer until light and fluffy, about 3-4 minutes.
- Beat in the egg and vanilla extract until fully combined.
- Gradually add the dry ingredients to the wet mixture, mixing on low speed just until incorporated.
- Fold in the toasted oats using a spatula until evenly distributed.
- Drop rounded spoonfuls of dough onto the prepared baking sheets, spacing about 2 inches apart.
- Bake for 10-12 minutes until edges are set and lightly golden but centers still look slightly underbaked.
- Let cookies cool on the baking sheet for 5 minutes, then transfer to a cooling rack to cool completely.
- While cookies cool, beat together softened butter, powdered sugar, marshmallow fluff, and vanilla extract until smooth and fluffy, about 4-5 minutes.
- Spread or pipe a generous dollop of cream filling onto the flat side of one cookie, then sandwich with another cookie. Press gently to spread filling evenly.
- Optional: Refrigerate assembled cookies for 30 minutes for a firmer filling.
Notes
Toast the oats to enhance flavor. Underbake slightly for soft, chewy cookies. Use soft but not melting butter to prevent spreading. Fresh baking soda ensures proper rise. Chill dough if cookies spread too much. Beat filling long enough to keep it light and fluffy. Refrigerate assembled cookies for firmer filling if desired.
Nutrition
- Serving Size: 1 sandwich cookie
- Calories: 190
- Sugar: 15
- Sodium: 120
- Fat: 7
- Saturated Fat: 4
- Carbohydrates: 28
- Fiber: 2
- Protein: 2
Keywords: oatmeal cream pie cookies, soft cookies, chewy cookies, homemade cookies, cream filling, easy dessert, nostalgic treat


