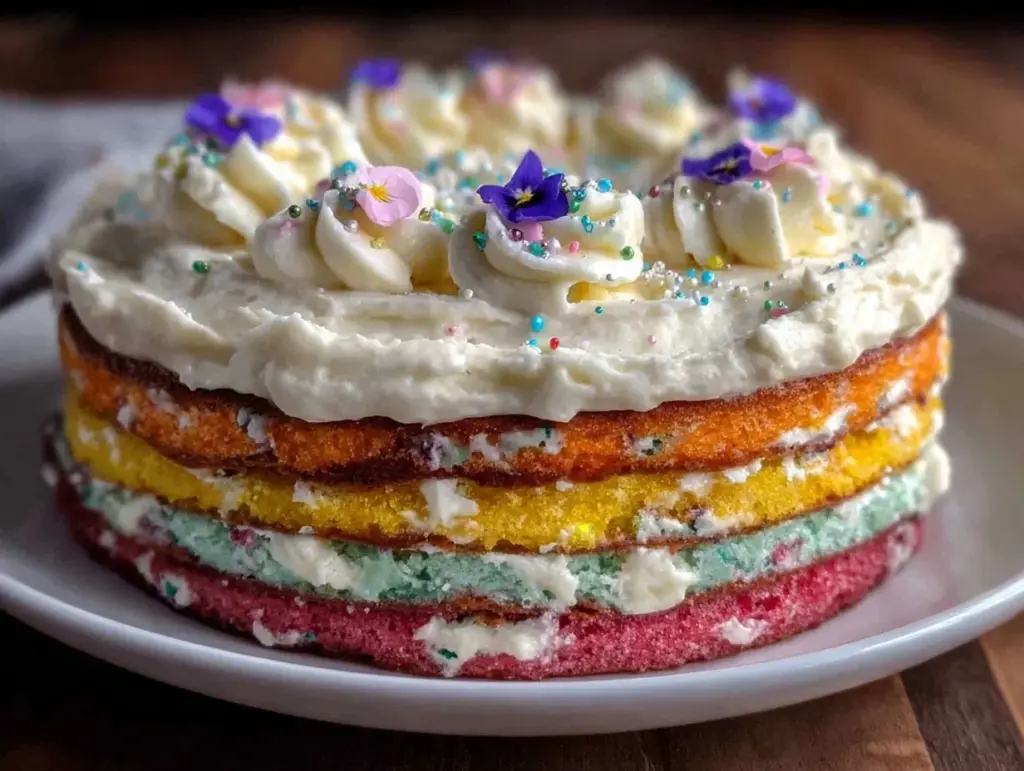
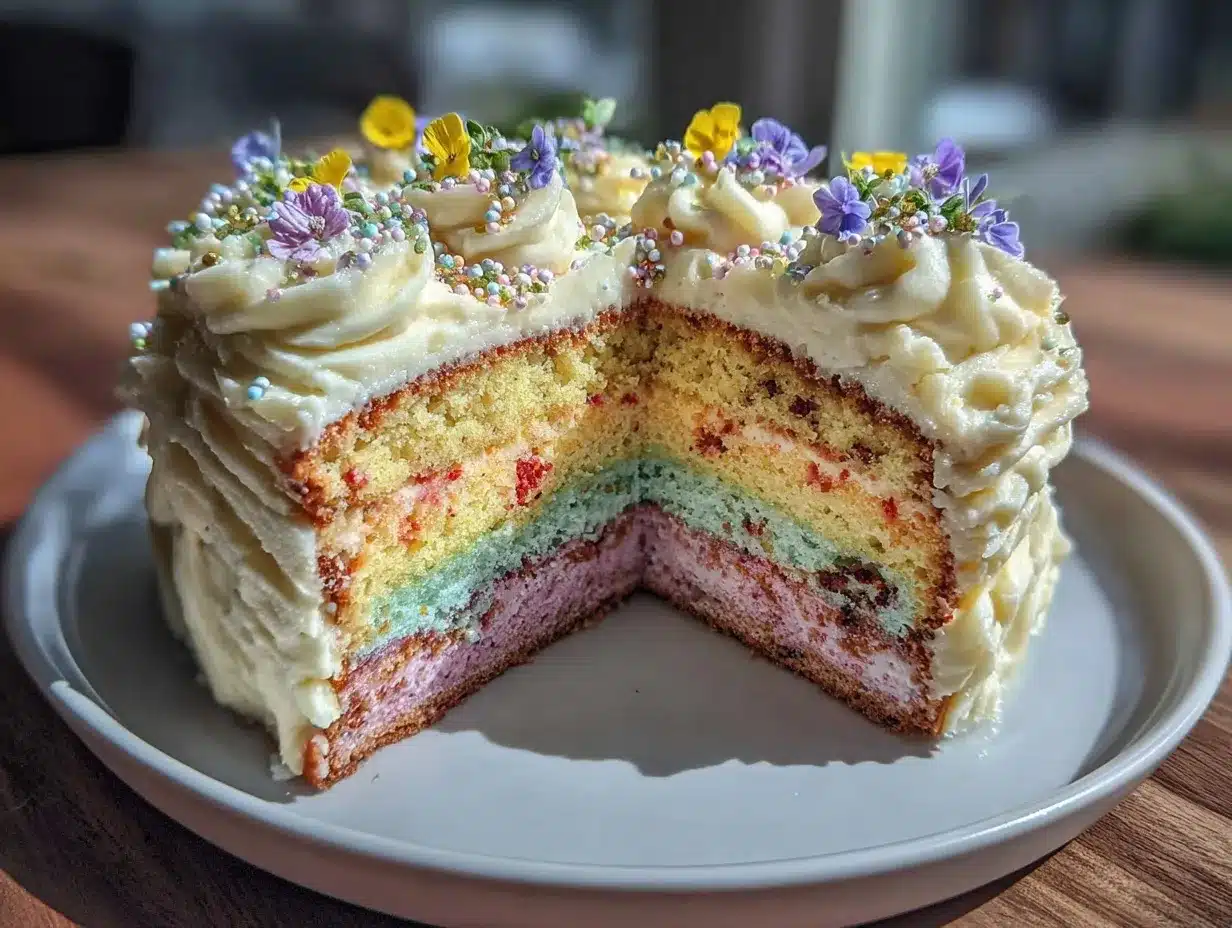
The moment you slice into a stunning spring rainbow layer cake, you’re met with a burst of colors and flavors that instantly lift your spirits. Honestly, the sight of those vibrant layers stacked perfectly with fluffy frosting has become one of my favorite ways to celebrate the season. I first baked this cake a few springs ago when I wanted something cheerful for a friend’s birthday, and it quickly turned into a crowd favorite at every gathering since.
What’s cool about this stunning spring rainbow layer cake recipe is how it combines simple ingredients with a playful presentation. It’s not just a dessert; it’s kind of like a little party on a plate. You know that feeling when you bite into something that tastes as good as it looks? That’s exactly what this cake delivers every single time.
After making this cake several times, tweaking the layers and the frosting, I’m convinced it’s one of the best ways to welcome spring. Whether you’re baking for kids, a festive brunch, or just because you want to brighten up your week, this 5-layer dessert tutorial has you covered. Plus, it’s not as intimidating as it sounds – I’ll walk you through every step with tips I’ve gathered from my own kitchen wins and occasional mishaps.
Why You’ll Love This Recipe
- Quick & Easy: The batter comes together in under 30 minutes, making it perfect for last-minute celebrations or weekend baking marathons.
- Simple Ingredients: You probably have most of these in your pantry already—flour, sugar, eggs, and a splash of vanilla. No need for exotic stuff!
- Perfect for Spring Occasions: Whether it’s a picnic, Easter brunch, or a cheerful birthday, this cake screams springtime fun and freshness.
- Crowd-Pleaser: Kids and adults alike go wild for those bright, colorful layers and creamy frosting—it’s a guaranteed hit.
- Unbelievably Delicious: The moist, tender crumb paired with a lightly sweet buttercream makes this more than just a pretty face. It’s comfort food with a joyful twist.
This isn’t just any rainbow cake. I’ve found that blending the batter thoroughly for each colored layer ensures a smooth texture that’s not too dense or crumbly. The frosting recipe is a personal favorite, balancing sweetness with a subtle tang that cuts through the richness. Honestly, it’s the kind of cake that makes you want to close your eyes on the first bite and savor every crumb.
From my experience, this recipe hits the sweet spot between impressive and doable. You don’t have to be a pro baker to nail it, but it looks like you are.
What Ingredients You Will Need
This recipe uses simple, wholesome ingredients to deliver bold flavor and a satisfying texture without the fuss. Most are pantry staples, and you can often swap a few for dietary preferences or what you have on hand.
- For the Batter:
- 2 ¾ cups (345g) all-purpose flour – I prefer King Arthur for consistent results
- 1 tablespoon baking powder
- ½ teaspoon salt
- 1 cup (225g) unsalted butter, softened – room temperature for easy creaming
- 2 cups (400g) granulated sugar
- 4 large eggs, room temperature
- 1 tablespoon pure vanilla extract
- 1 ¼ cups (300ml) whole milk, room temperature (or buttermilk for a tangier taste)
- Gel food coloring in vibrant spring colors: pink, yellow, green, blue, purple (gel works best for vivid layers)
- For the Frosting:
- 1 ½ cups (340g) unsalted butter, softened
- 5 cups (600g) powdered sugar, sifted for smoothness
- ¼ cup (60ml) heavy cream
- 1 tablespoon vanilla extract
- Pinch of salt
For substitutions, you can use almond or oat milk if you’re dairy-free, and coconut oil instead of butter, though the texture will shift a bit. If you want gluten-free, a 1-to-1 baking flour blend usually works well here. Just keep in mind, colors might blend differently depending on your base.
Equipment Needed
- Five 8-inch (20cm) round cake pans – if you don’t have five, you can bake layers in batches, just allow extra time.
- Mixing bowls – a medium and a large one will do.
- Electric mixer – a stand mixer or hand mixer speeds up creaming the butter and sugar.
- Measuring cups and spoons – precise measurements make a big difference.
- Spatulas – for folding and scraping down the bowl.
- Cake leveler or serrated knife – to even out the layers if needed.
- Offset spatula – great for spreading frosting smoothly.
- Cooling racks – to cool your cake layers evenly and quickly.
If you don’t have five pans, I’ve baked this with just two and it worked fine; just remember to cool layers fully before stacking. A budget-friendly tip: silicone spatulas are easy to clean and last forever. Also, if you’re using a hand mixer, make sure the beaters are clean and dry to avoid frosting mishaps.
Detailed Preparation Method
- Preheat and Prep: Heat your oven to 350°F (175°C). Grease and flour your cake pans or line them with parchment paper. This step is crucial to prevent layers from sticking — trust me, I’ve learned the hard way!
- Mix Dry Ingredients: In a bowl, whisk together 2 ¾ cups (345g) flour, 1 tablespoon baking powder, and ½ teaspoon salt. Set aside.
- Cream Butter and Sugar: Using your mixer, beat 1 cup (225g) softened butter and 2 cups (400g) sugar on medium speed until light and fluffy, about 4-5 minutes. This step builds the cake’s structure and tenderness.
- Add Eggs and Vanilla: Beat in 4 room temperature eggs, one at a time, mixing well after each addition. Then stir in 1 tablespoon vanilla extract. The batter should be smooth and slightly thick.
- Alternate Adding Dry Ingredients and Milk: Reduce mixer speed to low. Add the dry ingredients in three additions, alternating with 1 ¼ cups (300ml) milk, starting and ending with the dry mix. Mix just until combined—overmixing can make the cake tough.
- Divide and Color Batter: Evenly divide the batter into five bowls (about 1 to 1 ¼ cups per bowl). Add a few drops of gel food coloring to each bowl, stirring until you get your desired vibrant hues.
- Pour into Pans: Pour each colored batter into its prepared pan and smooth the tops with a spatula.
- Bake: Place pans in the oven and bake for 18-22 minutes. Check for doneness by inserting a toothpick in the center; it should come out clean or with a few moist crumbs.
- Cool: Let the cakes cool in their pans for 10 minutes, then turn out onto wire racks to cool completely. Patience here is key for frosting that doesn’t melt or slide.
- Make the Frosting: Beat 1 ½ cups (340g) softened butter on medium speed until creamy. Gradually add 5 cups (600g) powdered sugar, alternating with ¼ cup (60ml) heavy cream. Mix in 1 tablespoon vanilla and a pinch of salt. Beat on high for about 3 minutes until fluffy.
- Assemble the Cake: Place the purple layer on your cake board or plate. Spread an even layer of frosting on top (about ¾ cup). Repeat stacking layers in order: blue, green, yellow, and pink, frosting between each. Use remaining frosting to cover the sides and top smoothly.
- Chill and Serve: Refrigerate the cake for at least 30 minutes before slicing to let the frosting set. This helps keep those layers neat and makes cutting easier.
Pro tip: If your frosting feels too soft, pop it in the fridge for 10 minutes and then give it a quick whip before frosting. It’s saved me several times from a messy finish!
Cooking Tips & Techniques
- Room Temperature Ingredients: Make sure your butter, eggs, and milk are all at room temperature. It helps them blend better, resulting in a smoother batter and more even bake.
- Measuring Flour Right: Spoon flour into your measuring cup and level it off with a knife to avoid packing it down. Too much flour can dry out your cake.
- Coloring: Use gel food coloring over liquid for vibrant, not runny batter. Add color gradually—you can always add more, but you can’t take it out!
- Even Layers: For consistent thickness, weigh each bowl of batter before pouring. Around 7 oz (200g) of batter per pan usually works well.
- Cooling: Don’t rush cooling. Cake layers that are still warm will melt your frosting and create a mess.
- Frosting Consistency: If frosting is too stiff, add a teaspoon of cream or milk at a time. If too soft, a bit more powdered sugar or chilling helps.
- Stacking: Use a flat spatula to spread frosting evenly between layers. This avoids leaning or uneven cakes.
- Patience Pays Off: I’ve learned that chilling the cake after assembly makes slicing cleaner and the layers stay nicely defined.
Variations & Adaptations
- Dietary Options: Swap all-purpose flour with gluten-free blend for a gluten-free cake. Use dairy-free butter and coconut milk in frosting for a vegan spin.
- Flavor Twists: Add lemon zest to the batter for a fresh spring zing or a teaspoon of almond extract for a nutty note. You can also fold in tiny chocolate chips for extra fun.
- Seasonal Themes: Instead of rainbow layers, try pastel tones by using softer shades of coloring or swap the purple layer for a strawberry or raspberry puree layer for natural color and flavor.
- Cooking Methods: If you lack multiple pans, bake layers sequentially; wrap cooled layers in plastic wrap and freeze if needed to save time.
- Personal Favorite: I once made this cake with a cream cheese frosting instead of buttercream—slightly tangier but equally delightful!
Serving & Storage Suggestions
This stunning spring rainbow layer cake shines best served at room temperature—pull it out of the fridge about 30 minutes before slicing. It pairs wonderfully with a cup of light tea or a chilled glass of sparkling lemonade for that extra spring vibe.
Store leftover cake covered tightly with plastic wrap or in an airtight container in the fridge for up to 4 days. For longer storage, you can freeze individual slices wrapped well in plastic and foil for up to 3 months. Thaw in the fridge overnight and bring to room temperature before enjoying.
One thing I’ve noticed: the flavors seem to meld beautifully after a day, making it even more delicious. So if you can wait, it’s worth planning ahead!
Nutritional Information & Benefits
Each slice (assuming 12 servings) has roughly 350-400 calories, with about 15g of fat and 50g of carbohydrates. It’s a treat, but the use of real butter and fresh eggs adds wholesome richness without artificial additives.
The inclusion of whole milk makes the cake moist and tender, and you get some protein from the eggs. If you swap to buttermilk, you add a slight tang and tender crumb, which can be easier to digest for some people.
For those mindful of allergens, this recipe contains gluten, dairy, and eggs, but as mentioned earlier, there are easy substitutions to accommodate many dietary needs.
Conclusion
If you’re looking for a show-stopping dessert that’s surprisingly straightforward, this stunning spring rainbow layer cake recipe is your go-to. It’s colorful, flavorful, and perfect for bringing a little sunshine to your table, no matter the occasion.
I love how it combines a classic cake feel with a playful twist that’s so fun to make and share. Honestly, it’s become a tradition in my house every spring, and I hope you find as much joy baking it as I do.
Give it a try, tweak it to your taste, and don’t forget to share your versions! I’d love to hear how your colorful creation turns out—drop a comment or tag me if you post it online.
Happy baking and here’s to sweet, colorful moments!
FAQs About the Stunning Spring Rainbow Layer Cake
How do I prevent the colors from bleeding into each other?
Make sure each layer is completely cool before stacking and frosting. Also, use a thick frosting that acts as a barrier to keep colors separate.
Can I make this cake ahead of time?
Absolutely! You can bake the layers a day or two in advance and store them wrapped tightly in the fridge. Assemble and frost on the day you want to serve for best freshness.
What if I don’t have gel food coloring?
You can use liquid food coloring, but use less as it can thin your batter. Natural colorings like beet juice or spinach powder work, but colors may be more muted.
Can I use boxed cake mix instead of from scratch?
You can, but the texture and flavor won’t be as rich or tender. If using box mix, add an extra egg or some sour cream to boost moisture.
How do I store leftover cake to keep it fresh?
Cover the cake with plastic wrap or store slices in an airtight container in the fridge for up to 4 days. For longer storage, freeze wrapped slices and thaw before serving.
Pin This Recipe!
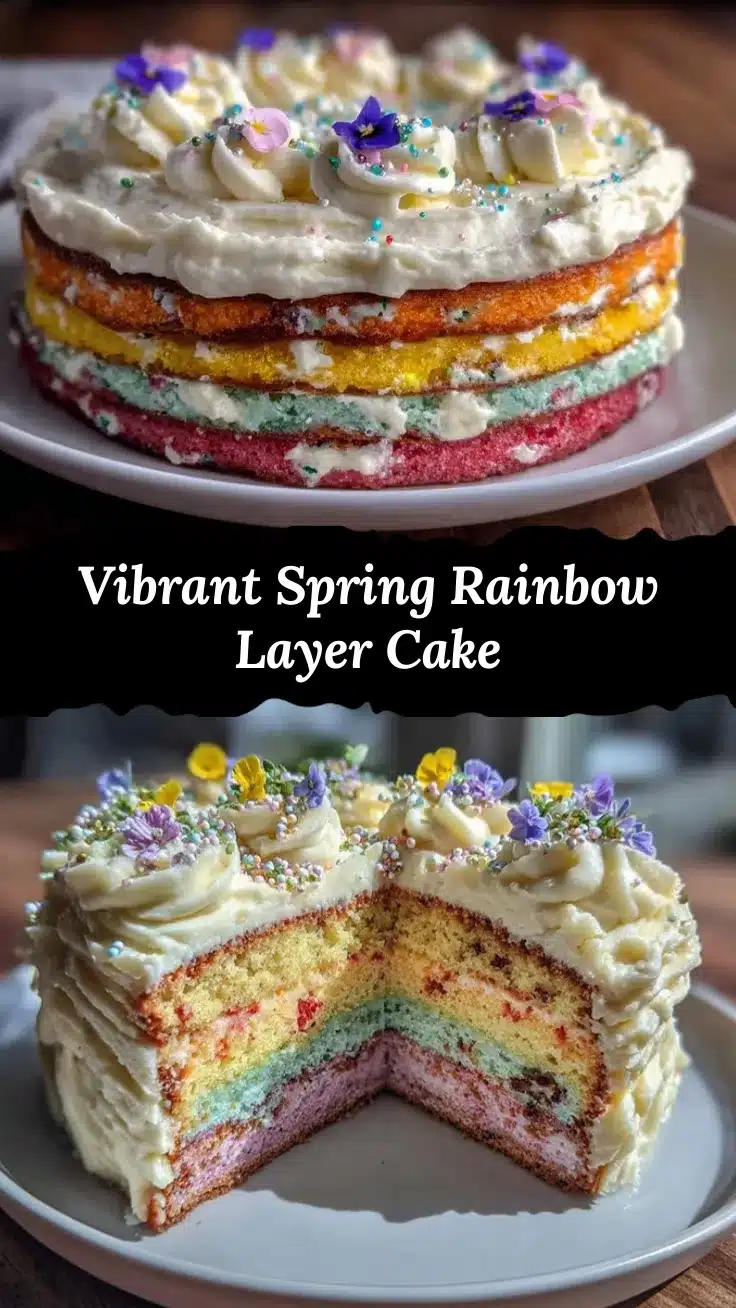
Stunning Spring Rainbow Layer Cake

A vibrant and cheerful 5-layer rainbow cake perfect for spring celebrations, featuring moist layers and a lightly sweet buttercream frosting.
- Prep Time: 30 minutes
- Cook Time: 22 minutes
- Total Time: 52 minutes
- Yield: 12 servings 1x
- Category: Dessert
- Cuisine: American
Ingredients
- 2 ¾ cups (345g) all-purpose flour
- 1 tablespoon baking powder
- ½ teaspoon salt
- 1 cup (225g) unsalted butter, softened
- 2 cups (400g) granulated sugar
- 4 large eggs, room temperature
- 1 tablespoon pure vanilla extract
- 1 ¼ cups (300ml) whole milk, room temperature (or buttermilk)
- Gel food coloring in pink, yellow, green, blue, purple
- 1 ½ cups (340g) unsalted butter, softened (for frosting)
- 5 cups (600g) powdered sugar, sifted
- ¼ cup (60ml) heavy cream
- 1 tablespoon vanilla extract (for frosting)
- Pinch of salt
Instructions
- Preheat oven to 350°F (175°C). Grease and flour five 8-inch cake pans or line with parchment paper.
- Whisk together flour, baking powder, and salt in a bowl; set aside.
- Beat 1 cup softened butter and 2 cups sugar on medium speed until light and fluffy, about 4-5 minutes.
- Add eggs one at a time, beating well after each addition, then stir in 1 tablespoon vanilla extract.
- Reduce mixer speed to low; add dry ingredients in three additions alternating with milk, starting and ending with dry ingredients. Mix until just combined.
- Divide batter evenly into five bowls (about 1 to 1 ¼ cups each). Add gel food coloring to each and stir until vibrant.
- Pour each colored batter into prepared pans and smooth tops.
- Bake for 18-22 minutes or until a toothpick inserted in the center comes out clean or with a few moist crumbs.
- Cool cakes in pans for 10 minutes, then turn out onto wire racks to cool completely.
- For frosting, beat 1 ½ cups softened butter until creamy. Gradually add powdered sugar alternating with heavy cream. Mix in vanilla and salt. Beat on high for 3 minutes until fluffy.
- Assemble cake by placing purple layer on plate, spreading about ¾ cup frosting on top. Repeat stacking layers in order: blue, green, yellow, pink, frosting between each.
- Use remaining frosting to cover sides and top smoothly.
- Refrigerate cake for at least 30 minutes before slicing to set frosting.
Notes
Use gel food coloring for vibrant layers. Ensure all ingredients are at room temperature for best results. Cool layers completely before frosting to prevent melting. If frosting is too soft, chill for 10 minutes and re-whip. For gluten-free or vegan options, substitute flour and dairy accordingly.
Nutrition
- Serving Size: 1 slice (1/12 of cak
- Calories: 375
- Sugar: 38
- Sodium: 180
- Fat: 15
- Saturated Fat: 9
- Carbohydrates: 50
- Fiber: 1
- Protein: 4
Keywords: rainbow cake, spring cake, layer cake, colorful cake, buttercream frosting, easy cake recipe, festive dessert


