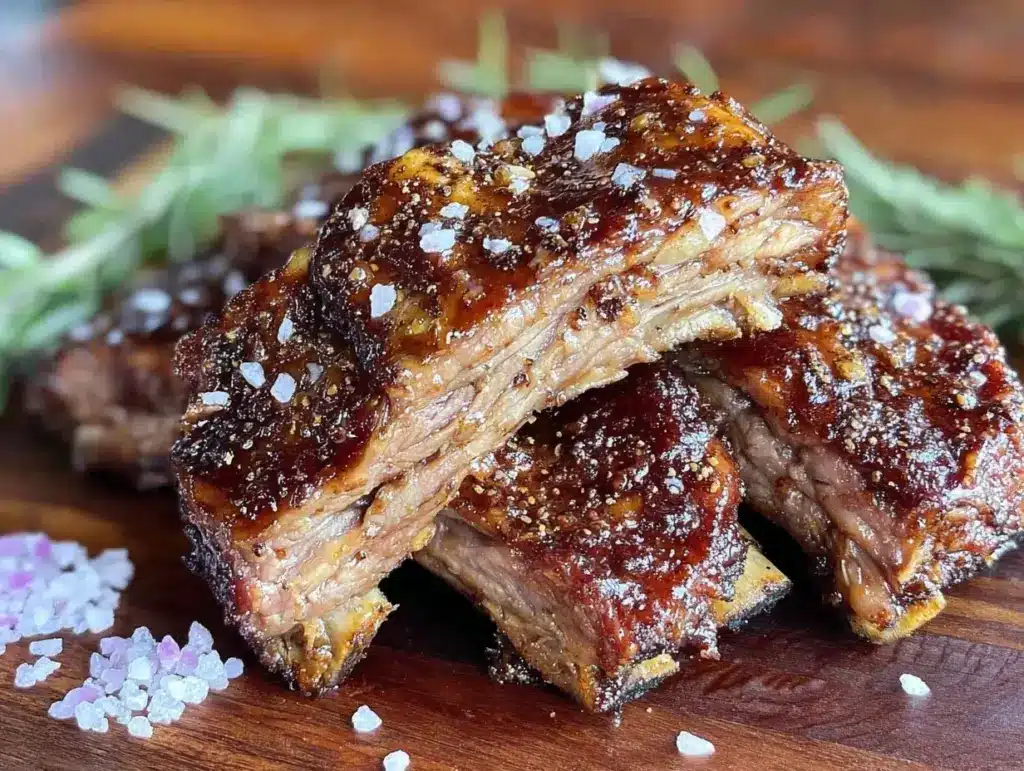
The smell of baby back ribs sizzling with a bold dry rub is honestly one of those scents that instantly transports me to backyard barbecues and lazy summer evenings. I first whipped up this baby back ribs recipe with bold dry rub during a weekend cookout when I wanted something packed with flavor yet simple enough to not keep me tied to the grill all day. The result? Jaw-dropping ribs with a perfect crust and tender meat that falls right off the bone every single time.
What makes this baby back ribs recipe stand out for me is how the dry rub—full of smoky, spicy, and slightly sweet notes—creates a crust that’s both irresistible and packed with personality. Plus, it’s a great way to enjoy ribs without drowning them in sauce, letting the seasoning shine through. Whether you’re a ribs rookie or a seasoned pitmaster, I’ve tested this method more times than I can count, tweaking the rub and cooking steps to nail that balance of bold flavor and tender texture.
If you’re craving ribs that bring the wow factor but don’t want to fuss with complicated marinades or endless basting, this recipe’s got your back. It’s perfect for weekend gatherings, family dinners, or whenever you want to treat yourself to a meaty, smoky feast. Trust me, once you try this baby back ribs recipe with bold dry rub, you’ll be making it again and again.
Why You’ll Love This Recipe
- Quick & Easy: The dry rub comes together in minutes, and with just 5 easy steps, you’re on your way to rib heaven.
- Simple Ingredients: No need for exotic spices—just pantry staples that pack a punch.
- Perfect for Any Occasion: Whether it’s a casual family dinner or a weekend BBQ, these ribs fit right in.
- Crowd-Pleaser: Kids and adults alike go crazy for these ribs—the bold flavors never disappoint.
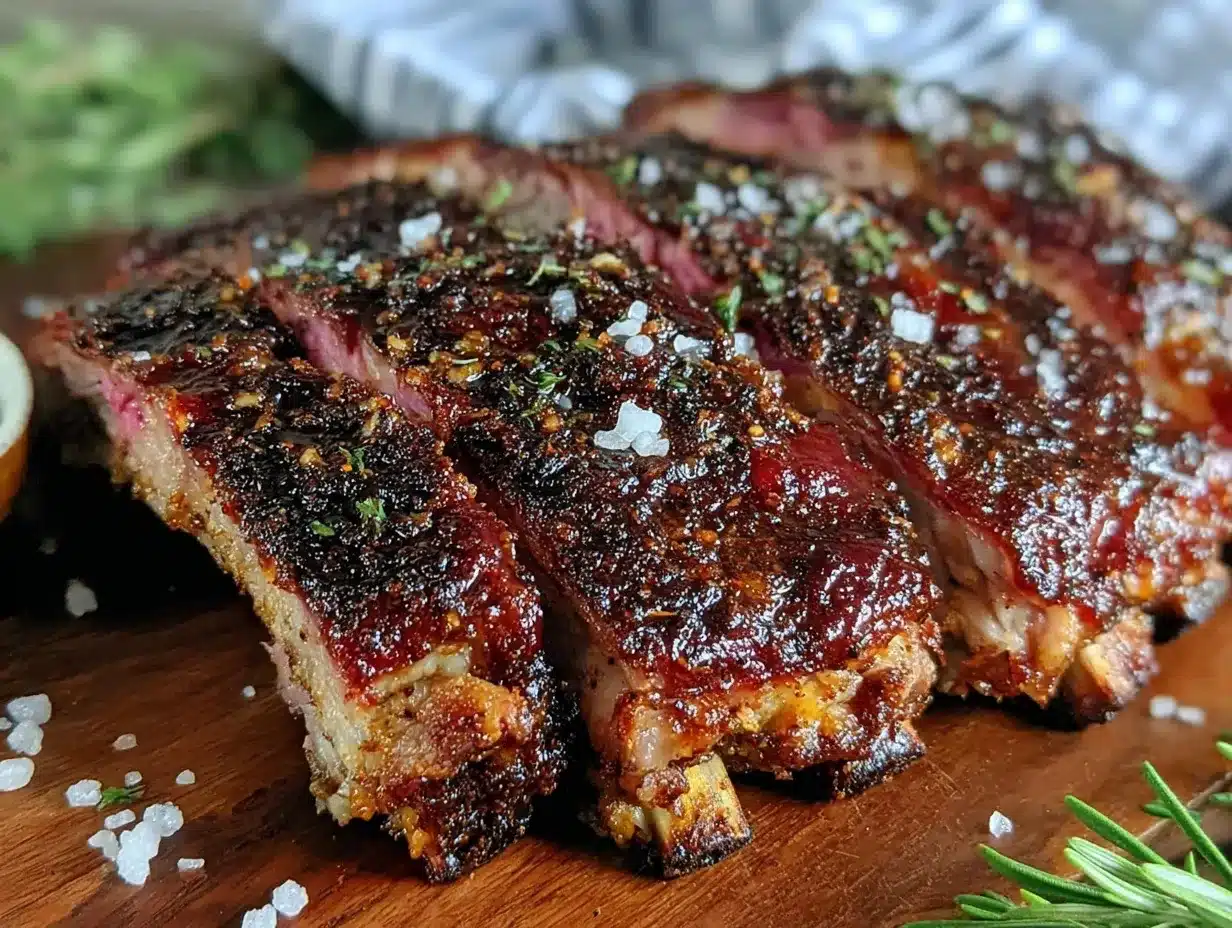
- Unbelievably Delicious: The dry rub forms a crispy, flavorful crust, while the meat stays juicy and tender inside.
What really sets this baby back ribs recipe apart is the dry rub’s magic. I’ve played around with various rub blends, but this one nails the perfect combo of smoky paprika, a hint of heat, and a touch of brown sugar sweetness. It’s not just seasoning—it’s flavor layering that makes each bite sing. Plus, the recipe’s forgiving nature means you can adjust spice levels or swap ingredients to suit your taste without losing that signature boldness.
Honestly, it’s the kind of recipe that makes you close your eyes and savor every bite. It’s comfort food with a kick—easy to prep, full of character, and guaranteed to impress without any stress.
What Ingredients You Will Need
This baby back ribs recipe uses straightforward, wholesome ingredients that you probably have on hand. The dry rub combines smoky, spicy, and sweet notes to create that crave-worthy crust, while the ribs themselves are the star of the show. Here’s what you’ll need:
- Baby back ribs: 2 racks (about 3-4 pounds / 1.4-1.8 kg), trimmed of excess fat (look for meaty but not too thick racks for even cooking)
- Paprika: 2 tablespoons (smoked paprika is best for deep flavor)
- Brown sugar: 2 tablespoons (adds subtle sweetness and helps with caramelization)
- Garlic powder: 1 tablespoon (for that savory punch)
- Onion powder: 1 tablespoon (balances the garlic with mild sweetness)
- Cayenne pepper: 1 teaspoon (adjust to taste for heat)
- Black pepper: 1 teaspoon (freshly ground is ideal)
- Salt: 1 tablespoon (kosher salt preferred for better seasoning)
- Dried oregano: 1 teaspoon (adds earthy herbal notes)
- Mustard powder: 1 teaspoon (gives a subtle tang and depth)
- Olive oil: 2 tablespoons (to help the rub stick and promote browning)
For those who want to switch things up, here are some substitution ideas:
- Use coconut sugar or maple sugar instead of brown sugar for a different sweetness profile.
- Swap smoked paprika for regular paprika if you prefer milder smokiness.
- Try chili powder for extra complexity or add a pinch of ground cumin for warmth.
- For a gluten-free dry rub, just double-check your spices have no additives.
I personally like using McCormick smoked paprika and Domino brown sugar for consistent flavor and texture. Also, getting good quality baby back ribs from your local butcher makes a noticeable difference in tenderness and taste. Firm, fresh ribs with minimal bone fragments will save you from any unpleasant surprises.
Equipment Needed
- Oven or grill: You can cook these ribs in your oven or on a grill. I usually use my oven for consistent heat control, but a charcoal grill adds fantastic smoky notes.
- Baking sheet or roasting pan: For oven cooking, lined with aluminum foil for easy cleanup.
- Wire rack: To elevate ribs on the baking sheet, promoting even cooking and crispiness.
- Mixing bowl: To combine the dry rub ingredients thoroughly.
- Brush or spoon: For spreading olive oil on ribs before applying the rub.
- Kitchen thermometer: Highly recommended to check for doneness without guessing (aim for internal temp around 190°F / 88°C for fall-off-the-bone ribs).
- Aluminum foil: To tent ribs during resting, keeping them moist and warm.
For those on a budget, a simple baking sheet and a wire rack can be found pretty cheaply at most stores or online. I’ve tried cooking ribs directly on foil without a rack, but the rack really helps avoid soggy bottoms. If you don’t have a kitchen thermometer, you can test doneness by gently pulling the meat away from the bone—it should come apart easily but not be mushy.
Detailed Preparation Method
- Prep the ribs (10 minutes): Start by removing the thin membrane on the back of each baby back rib rack. This step is key for tender ribs and better rub absorption. Use a butter knife to loosen the membrane, then grab it with a paper towel and peel it off.
- Make the dry rub (5 minutes): In a mixing bowl, combine 2 tablespoons smoked paprika, 2 tablespoons brown sugar, 1 tablespoon garlic powder, 1 tablespoon onion powder, 1 teaspoon cayenne pepper, 1 teaspoon black pepper, 1 tablespoon kosher salt, 1 teaspoon dried oregano, and 1 teaspoon mustard powder. Stir well to blend evenly.
- Apply the rub and oil (5 minutes): Lightly brush each rack of ribs with 1 tablespoon olive oil on both sides. Then generously coat the ribs with the dry rub, pressing it into the meat. Don’t be shy here—the rub forms the flavor-packed crust.
- Rest the ribs (optional but recommended, 30 minutes to overnight): For deeper flavor, wrap the ribs in plastic wrap and chill for at least 30 minutes or up to overnight. If you’re short on time, you can cook immediately but resting helps the seasoning penetrate.
- Cook the ribs (2 to 2.5 hours): Oven method: Preheat oven to 275°F (135°C). Place ribs bone-side down on a wire rack set inside a baking sheet. Cover loosely with foil and bake for 2 to 2.5 hours. Grill method: Set up indirect heat at medium-low (about 275°F / 135°C), place ribs bone-side down away from direct heat, and cook covered for 2 to 2.5 hours. Rotate occasionally for even cooking.
- Check doneness and finish (10 minutes): The ribs are done when the meat pulls back from the bones by about 1/4 inch and feels tender when poked. If you want extra crust, remove foil and increase heat to 400°F (205°C) for the last 10 minutes or move ribs over direct heat on the grill, watching closely to avoid burning.
- Rest and serve (10 minutes): Tent ribs with foil and let rest for 10 minutes before slicing between the bones. This helps juices redistribute for moist ribs.
Pro tip: If your ribs come out a little dry, try adding a light mop sauce or brushing with apple cider vinegar during cooking to keep them juicy. Also, don’t rush the low-and-slow cook; patience is key for tender ribs.
Cooking Tips & Techniques
- Membrane removal: Skipping this step can lead to chewy ribs. Taking it off lets the rub penetrate and creates tender meat.
- Low and slow: Cooking at 275°F (135°C) slowly breaks down collagen, making ribs tender without drying out. Higher temps dry ribs out fast.
- Use a wire rack: Elevating ribs allows heat to circulate evenly, preventing soggy undersides.
- Resting is crucial: Let ribs rest after cooking to let juices settle—cutting right away makes meat dry.
- Don’t overdo the cayenne: It’s easy to overpower the rub. Start with 1 teaspoon and adjust next time if you want more heat.
- Try foil wrapping (the “Texas crutch”): If you want fall-off-the-bone softness faster, wrap ribs tightly in foil halfway through cooking.
- Personal lesson: I once skipped oiling the ribs before the rub and ended up with a dry crust that didn’t stick well. A thin coat of olive oil really makes that rub cling and brown perfectly.
Variations & Adaptations
- Gluten-Free Version: This dry rub is naturally gluten-free, but double-check your spices to avoid hidden gluten. Use coconut sugar instead of brown sugar if preferred.
- Spicy Kick: Add extra cayenne or a pinch of chipotle chili powder for smoky heat.
- Sweet & Tangy Twist: After cooking, brush the ribs with a mix of honey and apple cider vinegar for a sticky glaze.
- Slow Cooker Adaptation: Rub ribs as usual, then place in the slow cooker with a splash of broth or beer. Cook on low 6-8 hours, finish under the broiler for crust.
- Personal favorite: I sometimes add ground coffee to the dry rub for a deep, earthy note that surprises guests every time.
Serving & Storage Suggestions
Serve these baby back ribs warm, sliced between the bones, on a large platter to impress your crew. They pair beautifully with classic sides like coleslaw, baked beans, or grilled corn on the cob. For drinks, a cold beer or a tangy iced tea complements the bold flavors perfectly.
To store leftovers, wrap ribs tightly in foil or place in an airtight container and refrigerate for up to 3 days. For longer storage, freeze wrapped ribs for up to 3 months. When reheating, gently warm in the oven at 300°F (150°C) covered with foil to keep moist, or microwave covered with a damp paper towel for quick meals.
Flavors often mellow and deepen after resting overnight, so ribs can taste even better the next day. Just be sure to reheat gently to keep them juicy and tender.
Nutritional Information & Benefits
Each serving (about 1/4 rack) of these baby back ribs provides roughly 450 calories, 35 grams of protein, and 30 grams of fat, depending on trimming and cooking method. The high protein makes them a satisfying option for meat lovers.
Key ingredients like paprika and garlic powder offer antioxidants and anti-inflammatory properties. Using olive oil adds heart-healthy fats. Opting for a dry rub instead of heavy sauces cuts down on sugar and unnecessary calories, making this a balanced choice for those watching intake.
Note: This recipe contains allergens such as mustard and is not gluten-free if spices are cross-contaminated, so be mindful if cooking for sensitive eaters.
Conclusion
This baby back ribs recipe with bold dry rub is a winner in my book because it brings big flavor without complicated prep or all-day grilling. It’s easy enough for weeknights but special enough to wow guests. I love how the dry rub forms a flavorful crust that’s balanced with tender, juicy meat inside—comfort food that feels like a treat.
Feel free to tweak the spice levels or try some of the variations to make it your own. I’d love to hear how your ribs turn out or any twists you add!
Give this recipe a shot, share it with friends, and drop a comment below telling me your favorite way to enjoy ribs. Happy cooking—the perfect baby back ribs are just 5 easy steps away!
FAQs
How long should I cook baby back ribs for?
Cook baby back ribs low and slow at 275°F (135°C) for about 2 to 2.5 hours until tender and the meat pulls back from the bones.
Can I make this recipe on the grill instead of the oven?
Absolutely! Use indirect heat on a grill set to medium-low (around 275°F / 135°C) and cook covered for the same time, rotating occasionally.
Do I need to remove the membrane from the ribs?
Yes, removing the membrane is important for tender ribs and better dry rub absorption. It’s a quick step that really pays off.
Can I prepare the dry rub in advance?
Definitely! The dry rub can be made and stored in an airtight container for weeks, making it super convenient for future rib sessions.
What’s the best way to reheat leftover ribs?
Reheat ribs gently in the oven at 300°F (150°C) covered with foil to keep moist, or microwave with a damp paper towel for a faster option.
Pin This Recipe!

Baby Back Ribs Recipe 5 Easy Steps for Bold Dry Rub Perfection

This baby back ribs recipe features a bold dry rub that creates a flavorful crust and tender, juicy meat that falls off the bone. Perfect for backyard barbecues and family dinners, it’s easy to prepare and packed with smoky, spicy, and sweet notes.
- Prep Time: 20 minutes
- Cook Time: 2 to 2.5 hours
- Total Time: 2 hours 20 minutes to 2 hours 50 minutes
- Yield: 4 servings 1x
- Category: Main Course
- Cuisine: American
Ingredients
- 2 racks baby back ribs (about 3–4 pounds / 1.4–1.8 kg), trimmed of excess fat
- 2 tablespoons smoked paprika
- 2 tablespoons brown sugar
- 1 tablespoon garlic powder
- 1 tablespoon onion powder
- 1 teaspoon cayenne pepper (adjust to taste)
- 1 teaspoon freshly ground black pepper
- 1 tablespoon kosher salt
- 1 teaspoon dried oregano
- 1 teaspoon mustard powder
- 2 tablespoons olive oil
Instructions
- Prep the ribs (10 minutes): Remove the thin membrane on the back of each baby back rib rack using a butter knife and paper towel.
- Make the dry rub (5 minutes): In a mixing bowl, combine smoked paprika, brown sugar, garlic powder, onion powder, cayenne pepper, black pepper, kosher salt, dried oregano, and mustard powder. Stir well.
- Apply the rub and oil (5 minutes): Lightly brush each rack of ribs with olive oil on both sides. Generously coat the ribs with the dry rub, pressing it into the meat.
- Rest the ribs (optional, 30 minutes to overnight): Wrap ribs in plastic wrap and chill for at least 30 minutes or up to overnight for deeper flavor.
- Cook the ribs (2 to 2.5 hours): Oven method – Preheat oven to 275°F (135°C). Place ribs bone-side down on a wire rack inside a baking sheet, cover loosely with foil, and bake for 2 to 2.5 hours. Grill method – Set up indirect heat at medium-low (275°F / 135°C), place ribs bone-side down away from direct heat, cover and cook for 2 to 2.5 hours, rotating occasionally.
- Check doneness and finish (10 minutes): Ribs are done when meat pulls back from bones about 1/4 inch and feels tender. For extra crust, remove foil and increase heat to 400°F (205°C) for last 10 minutes or move ribs over direct heat on grill, watching closely.
- Rest and serve (10 minutes): Tent ribs with foil and let rest for 10 minutes before slicing between the bones.
Notes
Remove the membrane for tender ribs and better rub absorption. Cook low and slow at 275°F (135°C) for tender meat. Use a wire rack to avoid soggy bottoms. Rest ribs after cooking to redistribute juices. Adjust cayenne pepper to control heat. For faster fall-off-the-bone ribs, wrap in foil halfway through cooking (Texas crutch). Brush with olive oil before applying rub to help it stick and brown well. If ribs are dry, try mopping with apple cider vinegar during cooking.
Nutrition
- Serving Size: About 1/4 rack per s
- Calories: 450
- Fat: 30
- Protein: 35
Keywords: baby back ribs, dry rub ribs, barbecue ribs, smoked ribs, easy ribs recipe, bold dry rub, backyard barbecue, tender ribs


