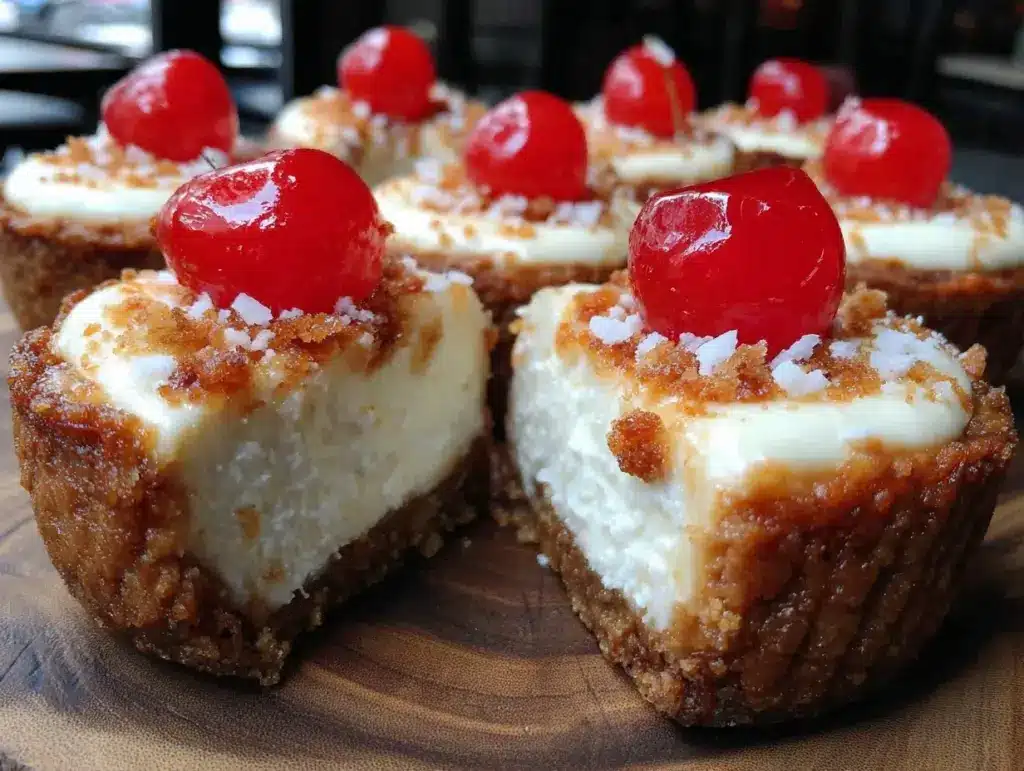
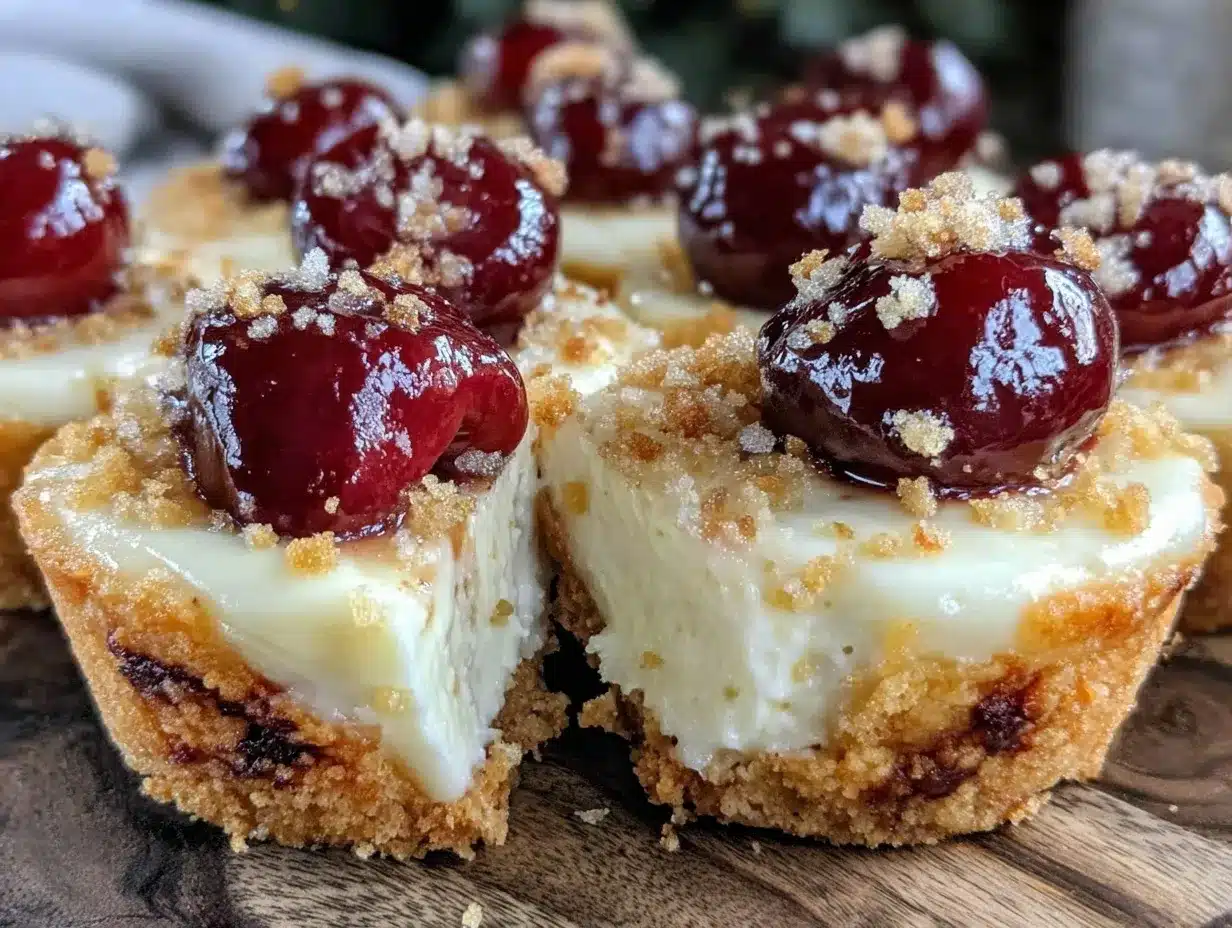
The moment you bite into these Valentine’s cherry cheesecake cookie cups, you’re hit with a burst of sweet, tangy cherry filling wrapped in soft, buttery cookie dough and creamy cheesecake goodness. Honestly, I first whipped these up when I was craving something festive but fuss-free for Valentine’s Day, and they quickly became my go-to treat for impressing friends without hours in the kitchen. The smell alone—warm cookies mingling with fresh cherries and vanilla—takes me straight back to cozy winter evenings. If you love cheesecake and cookies (and, let’s face it, who doesn’t?), this recipe is a total winner.
What makes these cherry cheesecake cookie cups so special is how they blend two classic desserts into one handheld delight. They’re sweet but not overpowering, perfect for anyone who wants a rich yet fresh dessert. After testing this recipe multiple times, tweaking the balance of cream cheese and cherry filling, and experimenting with different cookie bases, I can say it’s super reliable and always gets rave reviews at any gathering. Plus, they’re easy enough to make with just a few ingredients you probably already have in your pantry. Whether you’re baking for Valentine’s Day, a romantic dinner, or just because, these cookie cups bring a little love to your dessert table.
Why You’ll Love This Recipe
Having made these cherry cheesecake cookie cups more times than I can count, I’ve learned what makes them stand out. Here’s why you’ll want to bake a batch ASAP:
- Quick & Easy: Ready in under 45 minutes, these cookie cups are perfect for last-minute sweets that still wow.
- Simple Ingredients: No exotic items here—just pantry staples and that lovely jar of cherry pie filling.
- Perfect for Valentine’s Day: The cherry and cream cheese combo feels festive and romantic, ideal for sharing.
- Crowd-Pleaser: Kids, adults, picky eaters—everyone loves the mix of soft cookie and creamy cheesecake.
- Unbelievably Delicious: The texture contrast between the chewy cookie and smooth cheesecake filling is next-level comforting.
What sets this recipe apart is the little trick of making the cookie dough just soft enough to hold its shape while baking but still tender. Plus, blending the cream cheese with a touch of vanilla and sugar creates that dreamy cheesecake center with just the right tang. Honestly, the cherry topping isn’t just decoration; it adds freshness and a pop of color that makes the whole dessert feel special. I always get compliments on how these cookie cups look and taste like they came from a fancy bakery, but you can make them in your home kitchen without breaking a sweat.
What Ingredients You Will Need
This recipe uses simple, wholesome ingredients that combine to make a dessert bursting with flavor and texture. Most of these are pantry staples, and the cherry pie filling adds that seasonal touch. Here’s what you’ll need:
- For the Cookie Dough:
- All-purpose flour – 2 ½ cups (315g), for that perfect cookie structure
- Baking soda – 1 teaspoon, helps cookies rise just right
- Salt – ½ teaspoon, balances sweetness
- Unsalted butter – 1 cup (227g), softened (I prefer using Land O’Lakes for creaminess)
- Granulated sugar – ¾ cup (150g), for sweetness
- Brown sugar – ½ cup (100g), adds moisture and depth
- Large eggs – 2, room temperature for better mixing
- Pure vanilla extract – 2 teaspoons, brings warmth and aroma
- For the Cheesecake Filling:
- Cream cheese – 8 oz (226g), softened (use Philadelphia for best texture)
- Powdered sugar – ½ cup (60g), for smooth sweetness
- Vanilla extract – 1 teaspoon
- Heavy cream – 2 tablespoons (30ml), to lighten the filling
- Topping:
- Cherry pie filling – 1 cup (240g), drained slightly (look for small cherry pieces for best results)
If you want to swap things up, you can use gluten-free flour blends for a gluten-free version, or substitute dairy-free cream cheese and butter alternatives to fit dietary needs. Using fresh or frozen cherries cooked down with a little sugar works too if you don’t have pie filling on hand.
Equipment Needed
- Muffin tin – standard 12-cup size works perfectly for shaping the cookie cups
- Mixer – either stand or hand mixer to cream butter and sugar and whip the cream cheese filling smoothly
- Mixing bowls – at least two, one for cookie dough and another for cheesecake filling
- Measuring cups and spoons – for precise ingredient amounts
- Spatula or spoon – to fold ingredients gently
- Cooling rack – important for letting the cookie cups cool evenly without sogginess
If you don’t have a muffin tin, small ramekins can work but baking times might vary. I find silicone muffin pans great because cookies release easily, plus they’re easy to clean. Keeping your cream cheese at room temp makes mixing smoother and prevents lumps. No need for fancy gadgets here—just trusty basics that get the job done.
Detailed Preparation Method
- Preheat the oven to 350°F (175°C). Lightly grease your muffin tin or line with paper liners—this helps with cleanup and keeps cookie cups intact.
- Mix dry ingredients: In a bowl, whisk together 2 ½ cups (315g) all-purpose flour, 1 teaspoon baking soda, and ½ teaspoon salt. Set aside.
- Cream the butter and sugars: Using a mixer, beat 1 cup (227g) softened unsalted butter with ¾ cup (150g) granulated sugar and ½ cup (100g) brown sugar until light and fluffy—about 3-4 minutes. This step is key for tender cookies.
- Add eggs and vanilla: Beat in 2 large eggs (room temp) one at a time, then 2 teaspoons vanilla extract. Mix until combined but don’t overbeat.
- Combine wet and dry: Gradually add the flour mixture to the wet ingredients, mixing on low speed until just combined. The dough will be soft but hold shape.
- Shape the cookie cups: Scoop about 2 tablespoons of dough into each muffin cup. Press dough evenly along the bottom and up the sides to form a cup shape. Don’t worry if edges are a bit uneven; they bake out nicely.
- Prepare cheesecake filling: In a separate bowl, beat 8 oz (226g) softened cream cheese with ½ cup (60g) powdered sugar, 1 teaspoon vanilla, and 2 tablespoons (30ml) heavy cream until smooth and creamy. Scrape sides to ensure no lumps.
- Fill the cookie cups: Spoon about 1 tablespoon of cheesecake filling into each cookie cup, smoothing the top gently.
- Add cherry topping: Place about 1 teaspoon of cherry pie filling on top of the cheesecake layer. Be careful not to overfill to avoid overflow during baking.
- Bake: Place muffin tin in the preheated oven and bake for 18-22 minutes or until cookie edges are golden and cheesecake looks set but slightly jiggly in the center.
- Cool: Let the cookie cups cool in the pan for 10 minutes before transferring to a wire rack to cool completely. This prevents breakage and helps flavors meld.
If you notice the cheesecake filling browning too much, cover with foil halfway through baking. These cookie cups keep their shape well but avoid overbaking—too dry cheesecake is no fun! The smell of baking cherries and vanilla is your best cue that they’re almost done.
Cooking Tips & Techniques
One thing I learned early on: don’t skip softening your cream cheese and butter—they need to be room temperature for smooth mixing and tender texture. Also, be gentle folding in the flour to keep the dough soft but structured.
Pressing the dough evenly in the muffin tins is crucial; if it’s too thin on the sides, the filling can leak out. I use my fingers to gently press and shape, making sure edges aren’t paper-thin. Also, chilling the dough for 15-20 minutes before shaping can help if your kitchen is warm or the dough feels sticky.
Watch the baking time closely. The cheesecake filling should look set but still slightly jiggly—carryover heat firms it up after removing from oven. If overbaked, the filling can crack or dry out, which we don’t want.
I once forgot to grease my pan and had a few cookie cups stick badly—lesson learned! Silicone pans or greasing well with butter or non-stick spray prevents this hassle. Lastly, these cookie cups freeze really well—just wrap tightly and thaw at room temperature before serving.
Variations & Adaptations
- Flavor Variations: Swap cherry pie filling with strawberry or raspberry for a different fruity twist. You can also swirl in some chocolate chips into the cookie dough for a hint of richness.
- Dietary Adaptations: Use gluten-free flour blend to make these cookie cups gluten-free. For dairy-free, try vegan cream cheese and coconut oil instead of butter; baking time may need slight adjustment.
- Cooking Methods: Tried baking these in mini muffin tins for bite-sized treats—perfect for parties. You can also try a toaster oven, but reduce baking time to avoid overcooking.
- Personal Tried Variation: I once added a teaspoon of almond extract to the cheesecake filling, and it gave a lovely nutty aroma that paired beautifully with cherries.
Serving & Storage Suggestions
Serve these cherry cheesecake cookie cups slightly warm or at room temperature for the best flavor and texture. They’re delightful on their own but also shine with a dusting of powdered sugar or a drizzle of melted white chocolate.
Pair with a cup of coffee, tea, or even a glass of sparkling rosé for a romantic dessert experience. They also make a charming addition to brunch or dessert tables.
Store leftover cookie cups in an airtight container in the refrigerator for up to 4 days. Let them come to room temperature before serving for that soft, creamy feel. You can freeze them for up to 2 months—just thaw overnight in the fridge.
Flavors tend to deepen after resting, so if you have the patience, let them sit a day before enjoying. The cherry and cheesecake meld into each other beautifully over time.
Nutritional Information & Benefits
Each cherry cheesecake cookie cup contains roughly 220 calories, with about 10g fat, 30g carbohydrates, and 3g protein, depending on exact ingredient brands and portion sizes. The cream cheese provides calcium and protein, while cherries add antioxidants and vitamin C.
This dessert is indulgent but can fit into a balanced diet when enjoyed in moderation. Using real butter and cream cheese keeps the flavor authentic, and swapping sugars for less refined options is possible if you prefer.
For those with dietary restrictions, the recipe is adaptable for gluten-free and dairy-free diets, making it a versatile choice for many dessert lovers.
Conclusion
These Valentine’s cherry cheesecake cookie cups are a delightful treat that’s as easy to make as they are to love. They’re perfect for anyone who wants a dessert that feels special but doesn’t require hours in the kitchen. With their buttery cookie base, creamy cheesecake center, and bright cherry topping, they bring together the best of several desserts in one bite.
Feel free to customize this recipe with your favorite fruit fillings or extracts to make it truly your own. I love how these cookie cups bring a little sweetness and warmth to my Valentine’s celebrations—and I’m sure you will too!
Give them a try, and don’t forget to share how your batch turns out or any fun twists you add. Happy baking and happy Valentine’s Day!
Frequently Asked Questions
Can I make these cookie cups ahead of time?
Yes! You can prepare and bake them a day in advance. Store in an airtight container in the fridge and bring to room temperature before serving.
What if I don’t have cherry pie filling?
You can use fresh or frozen cherries cooked down with a bit of sugar until syrupy, or substitute with strawberry or raspberry pie filling.
Can I freeze the cookie cups?
Absolutely. Wrap them tightly and freeze for up to 2 months. Thaw overnight in the fridge before enjoying.
Is there a vegan version of this recipe?
Yes, by using vegan cream cheese, dairy-free butter, and a flax egg substitute, you can make a vegan-friendly version though texture and flavor may vary slightly.
How do I prevent the cheesecake filling from cracking?
Don’t overbake. The filling should still jiggle a little when you take it out, as it firms up while cooling. Also, avoid rapid temperature changes by letting them cool gradually.
Pin This Recipe!
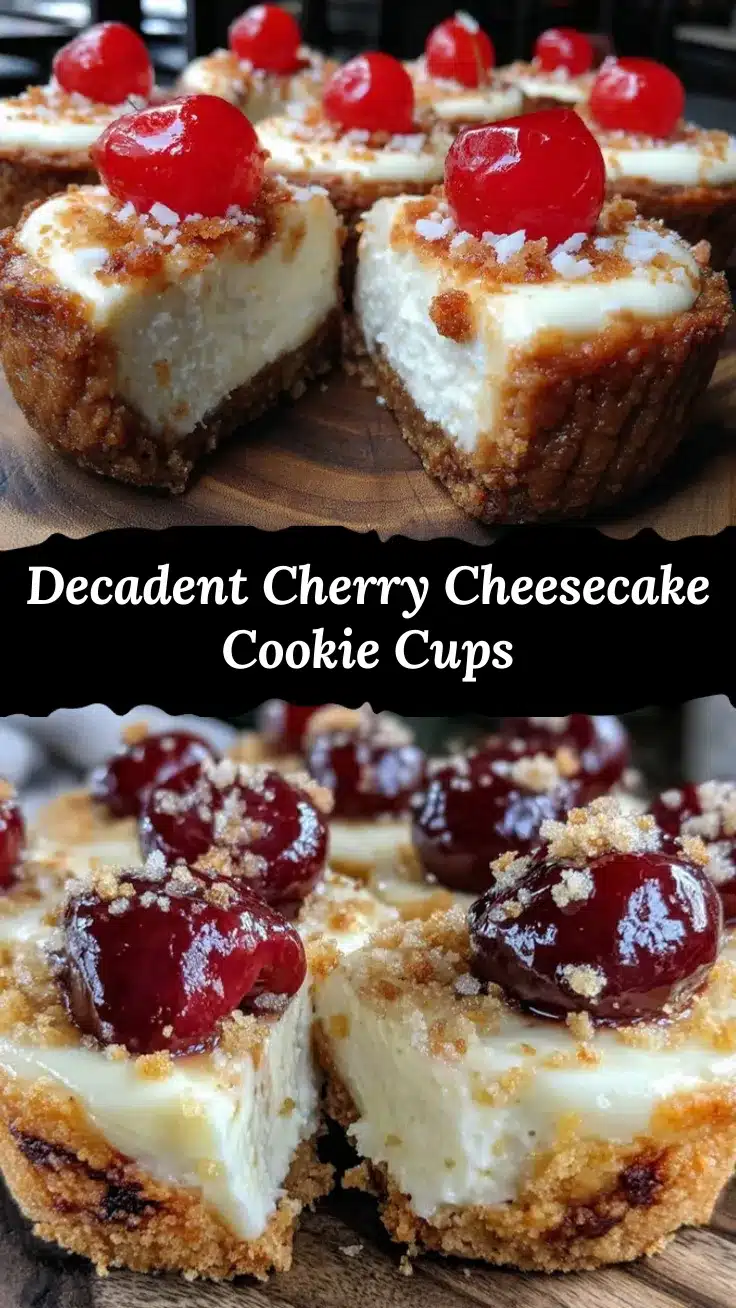
Irresistible Valentine’s Cherry Cheesecake Cookie Cups

These cherry cheesecake cookie cups combine soft, buttery cookie dough with creamy cheesecake filling and a burst of cherry pie filling, perfect for a festive and fuss-free Valentine’s Day dessert.
- Prep Time: 15 minutes
- Cook Time: 22 minutes
- Total Time: 37 minutes
- Yield: 12 servings 1x
- Category: Dessert
- Cuisine: American
Ingredients
- 2 ½ cups (315g) all-purpose flour
- 1 teaspoon baking soda
- ½ teaspoon salt
- 1 cup (227g) unsalted butter, softened
- ¾ cup (150g) granulated sugar
- ½ cup (100g) brown sugar
- 2 large eggs, room temperature
- 2 teaspoons pure vanilla extract
- 8 oz (226g) cream cheese, softened
- ½ cup (60g) powdered sugar
- 1 teaspoon vanilla extract
- 2 tablespoons (30ml) heavy cream
- 1 cup (240g) cherry pie filling, drained slightly
Instructions
- Preheat the oven to 350°F (175°C). Lightly grease your muffin tin or line with paper liners.
- In a bowl, whisk together the flour, baking soda, and salt. Set aside.
- Using a mixer, beat the softened butter with granulated sugar and brown sugar until light and fluffy, about 3-4 minutes.
- Beat in the eggs one at a time, then add 2 teaspoons vanilla extract. Mix until combined but do not overbeat.
- Gradually add the flour mixture to the wet ingredients, mixing on low speed until just combined. The dough will be soft but hold shape.
- Scoop about 2 tablespoons of dough into each muffin cup. Press dough evenly along the bottom and up the sides to form a cup shape.
- In a separate bowl, beat the softened cream cheese with powdered sugar, 1 teaspoon vanilla, and heavy cream until smooth and creamy.
- Spoon about 1 tablespoon of cheesecake filling into each cookie cup, smoothing the top gently.
- Place about 1 teaspoon of cherry pie filling on top of the cheesecake layer.
- Bake for 18-22 minutes or until cookie edges are golden and cheesecake looks set but slightly jiggly in the center.
- Let the cookie cups cool in the pan for 10 minutes before transferring to a wire rack to cool completely.
Notes
Soften cream cheese and butter to room temperature for smooth mixing and tender texture. Press dough evenly in muffin tins to avoid thin edges that can leak. Chill dough 15-20 minutes if sticky. Avoid overbaking cheesecake filling to prevent cracking or drying. Use foil to cover if filling browns too much. Silicone pans help with easy release. Cookie cups freeze well; thaw overnight in fridge before serving.
Nutrition
- Serving Size: 1 cookie cup
- Calories: 220
- Fat: 10
- Carbohydrates: 30
- Protein: 3
Keywords: cherry cheesecake cookie cups, Valentine’s Day dessert, cherry pie filling, cheesecake dessert, cookie cups, easy dessert recipe