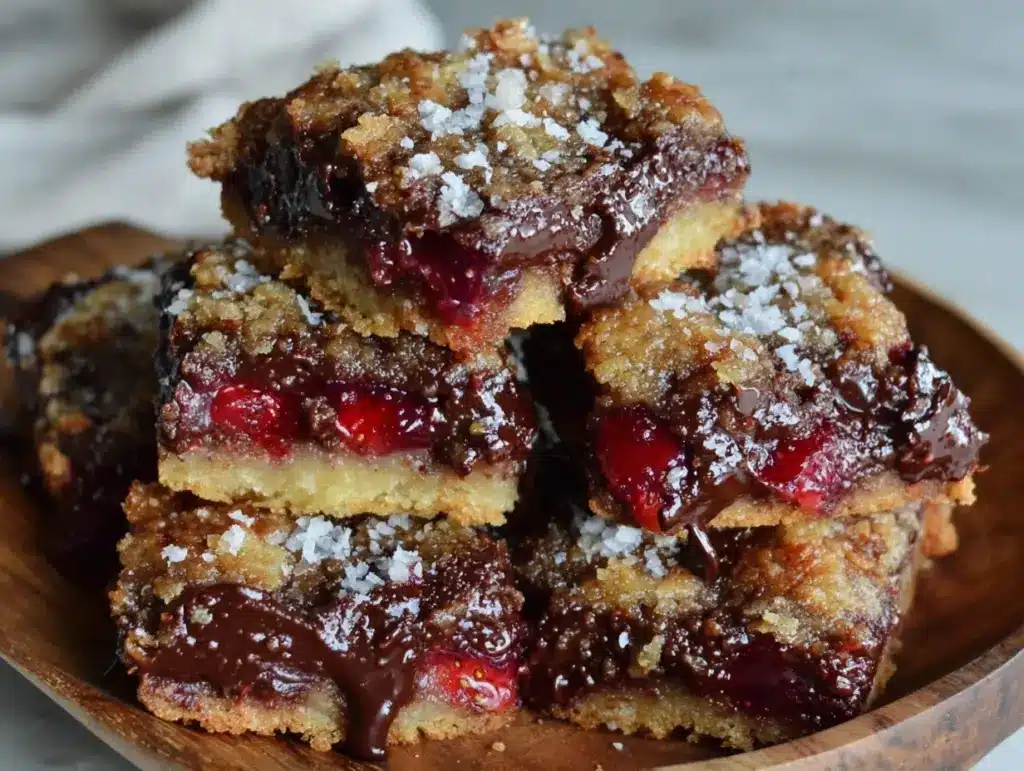
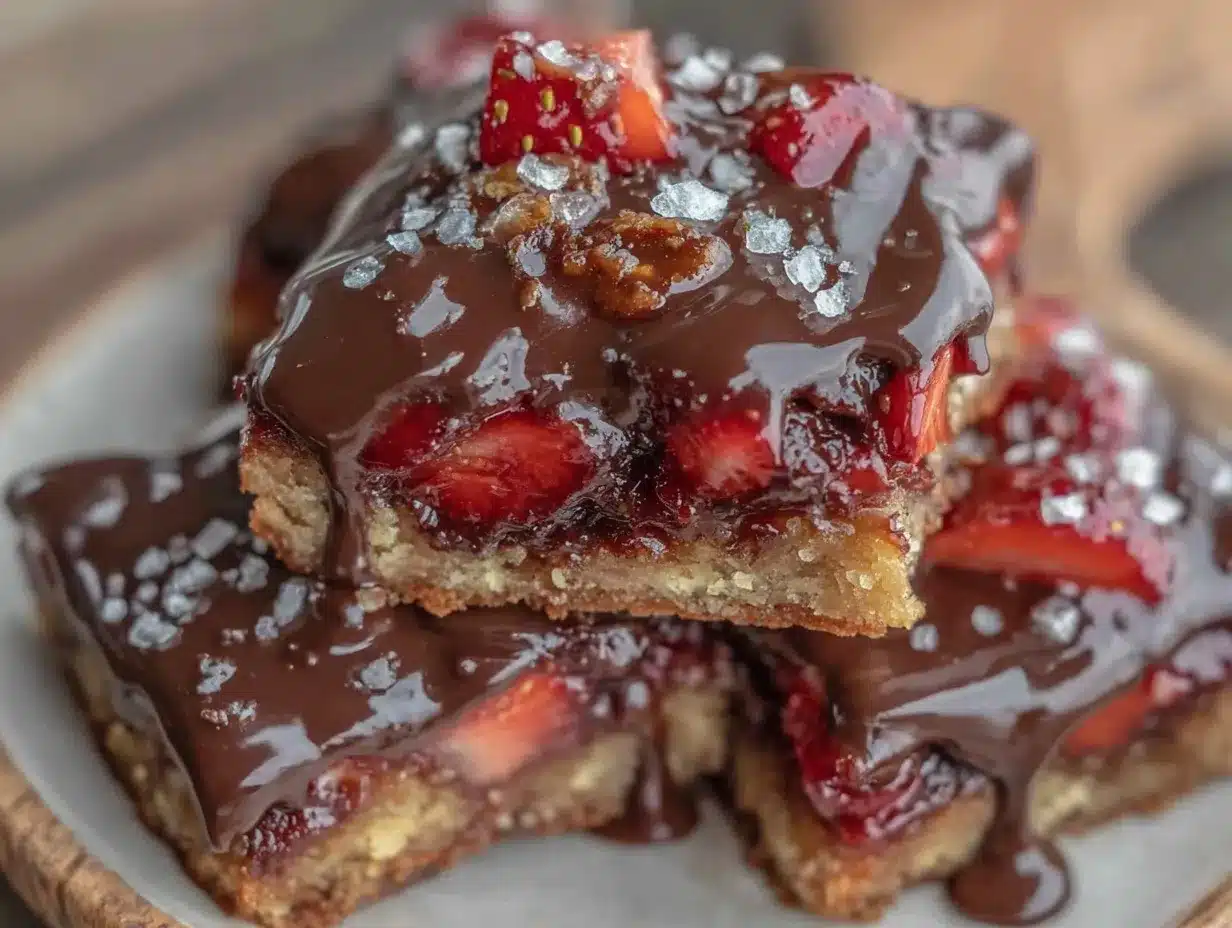
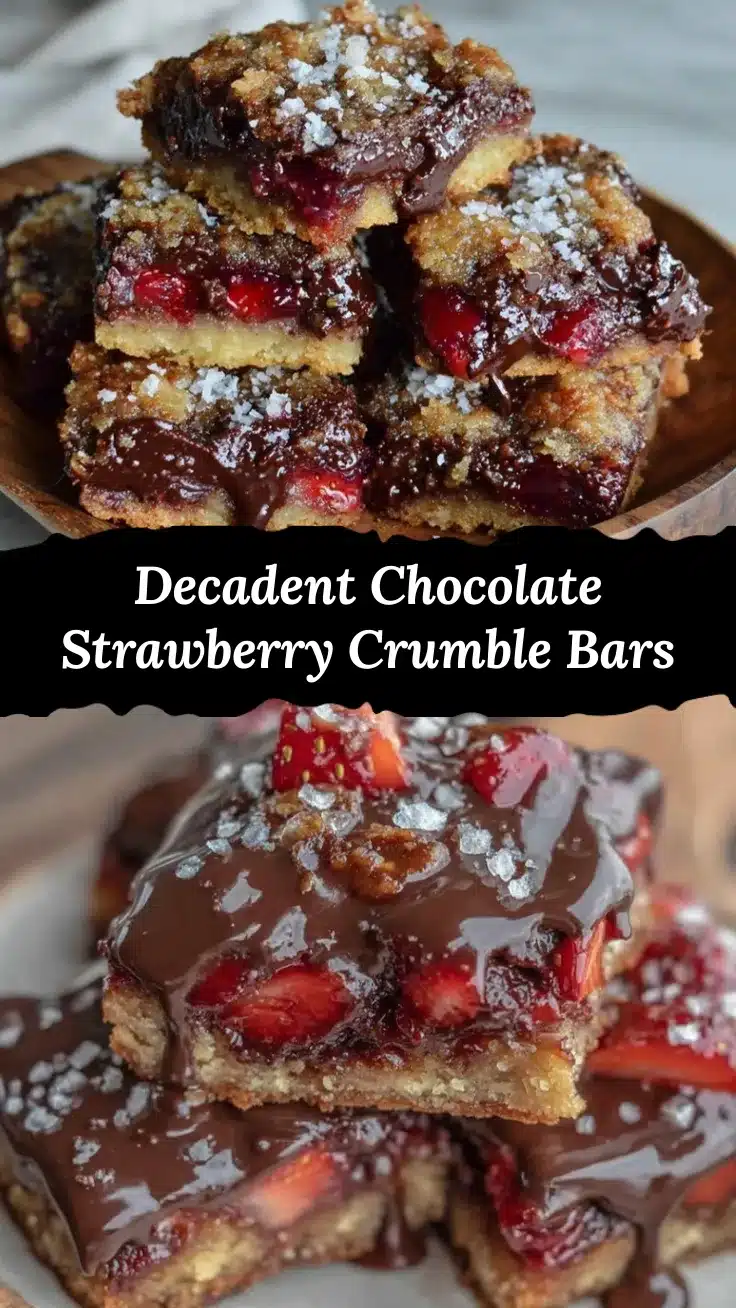
The first time I bit into these decadent chocolate-covered strawberry crumble bars, I was honestly hooked. The smell of buttery crumble mingling with fresh strawberries and rich chocolate is something that instantly transports you to a cozy, happy place. You know that feeling when dessert tastes like a warm hug? That’s exactly what these bars deliver. I stumbled upon this recipe during a weekend bakeathon, craving something that combined fruit, chocolate, and a satisfying crunch all in one bite. After tweaking it a few times (because, let’s face it, I had to get that chocolate drizzle just right), it became my go-to treat for impressing guests or just treating myself.
What’s fantastic about these decadent chocolate-covered strawberry crumble bars is how they balance indulgence with fresh fruitiness. The strawberry filling adds a juicy brightness that cuts through the richness of the chocolate and buttery crumble. Plus, they’re surprisingly easy to whip up for a homemade dessert that feels fancy. Whether you’re baking for a special occasion, a picnic, or just because you deserve it, these bars will not disappoint. After baking this recipe numerous times, I can say with confidence it’s a crowd-pleaser with a perfect mix of textures and flavors that keep people coming back for more.
If you love desserts that combine fresh fruit, chocolate, and a crumbly texture, this recipe is right up your alley. It’s a sweet treat that’s as delicious as it is visually stunning—perfect for sharing or savoring solo.
Why You’ll Love This Recipe
Let me tell you why these decadent chocolate-covered strawberry crumble bars have become a staple in my baking repertoire:
- Quick & Easy: You can have this dessert ready in under an hour, which is perfect when you want something impressive without spending hours in the kitchen.
- Simple Ingredients: No need for fancy specialty items—just pantry staples and fresh strawberries, which makes this recipe super accessible.
- Perfect for Any Occasion: Whether it’s brunch, a potluck, or a cozy night in, these bars fit the bill beautifully.
- Crowd-Pleaser: From kids to adults, everyone seems to fall in love with the combination of gooey fruit, crumbly base, and smooth chocolate.
- Unbelievably Delicious: The texture contrast—soft strawberry filling, crunchy crumble, and silky chocolate—is what really makes these bars stand out.
What sets this recipe apart is the way the crumble is perfectly buttery and crisp without being dry, and the chocolate isn’t just an afterthought. I make sure to use a high-quality semi-sweet chocolate for that rich, satisfying coating that adds depth without overpowering the fresh strawberries. The strawberry filling is just sweet enough, with a hint of tartness, so you get that lovely balance that keeps each bite interesting.
Honestly, it’s the kind of dessert that makes you close your eyes after the first bite and think, “Yep, this is exactly what I needed.” It’s comfort food with a fresh fruit twist, fast enough to throw together on a whim but special enough to impress anyone lucky enough to have a piece.
What Ingredients You Will Need
This recipe relies on straightforward, wholesome ingredients to create a bold flavor and satisfying texture without fuss. Here’s what you’ll need:
- For the Crumble Base & Topping:
- All-purpose flour (2 cups / 250 g) – provides the structure
- Granulated sugar (¾ cup / 150 g) – adds sweetness
- Cold unsalted butter (1 cup / 225 g), cubed – for that buttery, flaky crumble texture (I prefer Kerrygold for richness)
- Salt (¼ tsp) – balances flavor
- Vanilla extract (1 tsp) – gives a warm aroma
- For the Strawberry Filling:
- Fresh strawberries (3 cups / about 450 g), hulled and chopped – the star ingredient! Use ripe, fragrant berries for best flavor.
- Granulated sugar (⅓ cup / 65 g) – sweetens the fruit
- Fresh lemon juice (1 tbsp) – adds a bright, tangy note
- Cornstarch (2 tbsp) – thickens the filling to prevent sogginess
- For the Chocolate Coating:
- Semi-sweet chocolate chips or chopped chocolate (6 oz / 170 g) – quality matters here, so I usually choose Ghirardelli or Valrhona
- Heavy cream (2 tbsp) – optional, for smoother ganache texture
If you want to tweak the recipe, fresh or frozen strawberries both work well (just thaw and drain excess liquid if using frozen). For a gluten-free option, swap the all-purpose flour with a 1:1 gluten-free baking flour blend. I’ve also tried using coconut sugar instead of granulated sugar for a deeper flavor.
Equipment Needed
Here’s what you’ll want to have handy before you start baking these decadent chocolate-covered strawberry crumble bars:
- 8×8 inch (20×20 cm) baking pan: I recommend a metal pan for even baking, but glass works too.
- Mixing bowls: At least two – one for the crumble and one for the strawberry filling.
- Pastry cutter or food processor: Helpful for cutting cold butter into flour quickly, but you can use two forks or your fingers if needed.
- Spoon or spatula: For mixing and spreading the filling.
- Measuring cups and spoons: Accurate measuring will make a big difference in texture.
- Microwave-safe bowl or double boiler: For melting the chocolate smoothly.
If you don’t have a pastry cutter, no worries—I often just use my fingers to rub the butter into the flour until it looks like coarse crumbs. For melting chocolate, a microwave is my go-to for quick convenience, but watch it closely to prevent burning. If you’re budget-conscious, these tools are pretty standard and won’t break the bank, but investing in a good baking pan can really help with even cooking.
Detailed Preparation Method
- Preheat your oven to 350°F (175°C). Line your 8×8 inch baking pan with parchment paper, leaving some overhang to easily lift the bars out later. This step saves you from any sticky situations.
- Make the crumble base: In a large bowl, combine 2 cups (250 g) all-purpose flour, ¾ cup (150 g) sugar, and ¼ tsp salt. Add the cold, cubed butter and vanilla extract. Using a pastry cutter or your fingertips, cut the butter into the dry ingredients until the mixture looks like coarse crumbs with some pea-sized pieces. This texture is key for that perfect crumble.
- Press half of the crumble mixture evenly into the bottom of your prepared pan. Use the back of a spoon or your fingers to pack it down firmly but don’t over-compact it—some air helps with the texture. Bake this for 15 minutes until it’s just starting to turn golden around the edges.
- Prepare the strawberry filling while the base bakes: In a medium bowl, toss together the chopped strawberries, ⅓ cup (65 g) sugar, 1 tbsp fresh lemon juice, and 2 tbsp cornstarch. Mix gently until well combined. The cornstarch will thicken the juicy fruit during baking.
- Once the base is partially baked, remove it from the oven. Immediately spread the strawberry filling evenly over the warm crust. Then sprinkle the remaining crumble mixture over the top, breaking it up so it covers the fruit but still lets some of it peek through.
- Return the pan to the oven and bake for another 35-40 minutes. The topping should be golden brown, and the filling bubbly around the edges. You’ll smell that wonderful strawberry-and-butter aroma filling your kitchen.
- Cool the bars completely in the pan on a wire rack. This cooling step is crucial to let the filling set so the bars slice neatly.
- Prepare the chocolate coating: In a microwave-safe bowl, combine 6 oz (170 g) semi-sweet chocolate and 2 tbsp heavy cream (optional). Microwave in 20-second bursts, stirring after each, until smooth and glossy. Be careful not to overheat the chocolate, or it can seize up.
- Drizzle or spread the melted chocolate evenly over the cooled bars. If you want a neat drizzle effect, use a spoon or a piping bag. Let the chocolate set at room temperature or pop the bars in the fridge for 10-15 minutes.
- Once the chocolate is set, use the parchment paper overhang to lift the bars out of the pan. Slice into squares or rectangles with a sharp knife. For clean cuts, wipe your knife between slices.
Pro Tip: If your crumble feels too dry or powdery, a tiny pinch more salt or a splash of vanilla can really bring out the flavors. Also, don’t skip chilling the bars before adding chocolate; warm bars can melt your topping.
Cooking Tips & Techniques
Through countless attempts, here’s what I’ve learned about making these strawberry crumble bars just right:
- Keep the butter cold: Cold butter makes all the difference in achieving that crumbly, flaky texture. If it melts too soon, the crumble may turn out dense.
- Don’t overmix: When combining ingredients, mix just until they come together. Overworking the dough can lead to tough bars.
- Use fresh, ripe strawberries: They provide the best natural sweetness and juiciness. If using frozen, thaw and drain excess liquid to avoid soggy bars.
- Watch your oven temperature: Oven temps vary, so check the bars at 35 minutes for doneness. The topping should be golden, and the filling bubbling.
- Chocolate melting tips: Use short bursts in the microwave and stir often. A double boiler works well if you prefer.
- Multitasking: While the base is baking, prepare your filling to save time. This keeps the process smooth and efficient.
On my first try, I didn’t chill the bars before adding chocolate, and the topping melted messily—lesson learned! Also, slicing when fully cooled produces cleaner edges and fewer crumbs. Trust me, patience pays off here.
Variations & Adaptations
Want to switch things up? Here are some tasty ways to adapt this recipe:
- Berry Mix: Substitute or add in raspberries, blueberries, or blackberries to the strawberry filling for a mixed berry crumble bar.
- Gluten-Free: Swap the all-purpose flour for a gluten-free blend like Bob’s Red Mill 1-to-1 baking flour. Just keep an eye on texture as some blends absorb more liquid.
- Dairy-Free: Use coconut oil or a vegan butter alternative instead of butter, and swap heavy cream with coconut cream for the chocolate topping.
- Chocolate Variations: Try white chocolate or dark chocolate instead of semi-sweet for a different flavor profile.
- Nutty Twist: Add chopped toasted almonds or pecans to the crumble for extra crunch and flavor.
I’ve personally tried adding a pinch of cinnamon to the crumble once, which gave a subtle warmth that paired beautifully with the strawberries. Feel free to experiment with your favorites!
Serving & Storage Suggestions
These decadent chocolate-covered strawberry crumble bars are best served slightly chilled or at room temperature. The chocolate topping firms up beautifully in the fridge but softens nicely if left out for 15-20 minutes before serving.
They pair wonderfully with a cup of coffee or a glass of cold milk. For an extra special touch, try serving with a dollop of whipped cream or a scoop of vanilla ice cream—because why not?
To store, keep the bars in an airtight container in the refrigerator for up to 4 days. They also freeze well—wrap individual bars in plastic wrap and place in a freezer-safe container for up to 3 months. Thaw overnight in the fridge before enjoying.
Flavors tend to meld and deepen after a day or two, so don’t hesitate to make them ahead for your next gathering. Just let the chocolate set fully before stacking the bars to prevent sticking.
Nutritional Information & Benefits
Each bar (assuming 12 servings) contains approximately:
| Calories | Fat | Carbohydrates | Protein | Fiber |
|---|---|---|---|---|
| 280 kcal | 15 g | 32 g | 3 g | 2 g |
The fresh strawberries bring antioxidants and vitamin C, while the butter and chocolate provide satisfying fats that keep you full. Using real ingredients means you know exactly what’s going in—no hidden additives. These bars are gluten-friendly if you swap for gluten-free flour and can be adapted for dairy-free diets easily.
As someone who enjoys balancing indulgence with wellness, I find these bars a perfect treat to satisfy sweet cravings without going overboard. The fruit adds a fresh note, making it feel less heavy than typical chocolate desserts.
Conclusion
To sum it up, these decadent chocolate-covered strawberry crumble bars are a delicious way to bring fresh fruit and chocolate together in a buttery, crumbly package. Whether you’re new to baking crumble bars or a seasoned pro, this recipe offers a straightforward, enjoyable baking experience that yields impressive results every time.
Feel free to customize the filling, crumble, or chocolate to suit your tastes—it’s a recipe that welcomes your personal touch. I love this recipe because it’s flexible, fun, and always a hit with friends and family.
If you try it out, I’d love to hear how your bars turned out or what variations you enjoyed. Don’t forget to share this recipe with your baking buddies who’d appreciate a little homemade decadence in their lives. Happy baking!
FAQs
Can I use frozen strawberries for this recipe?
Yes! Just be sure to thaw and drain any excess liquid before mixing with sugar and cornstarch to avoid a soggy filling.
How do I get clean slices when cutting the bars?
Make sure the bars are completely cooled and the chocolate is set. Use a sharp knife and wipe it clean between cuts for the best results.
Can I make these bars ahead of time?
Absolutely! They store well in the fridge for up to 4 days and actually taste better after the flavors meld. You can freeze them for longer storage too.
What’s the best chocolate to use for the topping?
Semi-sweet chocolate chips or chopped bars from brands like Ghirardelli or Valrhona work great for a smooth, rich coating.
Can I add nuts or other mix-ins to the crumble?
Yes! Chopped toasted almonds, pecans, or even shredded coconut can add texture and flavor. Just sprinkle them in with the crumble topping before baking.
Pin This Recipe!
Decadent Chocolate-Covered Strawberry Crumble Bars

These bars combine a buttery crumble base, fresh strawberry filling, and a rich semi-sweet chocolate coating for a delicious, crowd-pleasing dessert that’s quick and easy to make.
- Prep Time: 15 minutes
- Cook Time: 50 minutes
- Total Time: 1 hour 5 minutes
- Yield: 12 servings 1x
- Category: Dessert
- Cuisine: American
Ingredients
- 2 cups (250 g) all-purpose flour
- 3/4 cup (150 g) granulated sugar
- 1 cup (225 g) cold unsalted butter, cubed
- 1/4 tsp salt
- 1 tsp vanilla extract
- 3 cups (about 450 g) fresh strawberries, hulled and chopped
- 1/3 cup (65 g) granulated sugar
- 1 tbsp fresh lemon juice
- 2 tbsp cornstarch
- 6 oz (170 g) semi-sweet chocolate chips or chopped chocolate
- 2 tbsp heavy cream (optional)
Instructions
- Preheat your oven to 350°F (175°C). Line an 8×8 inch baking pan with parchment paper, leaving some overhang for easy removal.
- In a large bowl, combine flour, sugar, and salt. Add cold, cubed butter and vanilla extract. Cut the butter into the dry ingredients using a pastry cutter or fingertips until mixture resembles coarse crumbs with some pea-sized pieces.
- Press half of the crumble mixture evenly into the bottom of the prepared pan. Bake for 15 minutes until edges start to turn golden.
- While the base bakes, mix chopped strawberries, sugar, lemon juice, and cornstarch in a medium bowl until well combined.
- Remove the partially baked base from the oven. Spread the strawberry filling evenly over it. Sprinkle the remaining crumble mixture over the filling, breaking it up to cover but allowing some fruit to peek through.
- Return the pan to the oven and bake for another 35-40 minutes until the topping is golden brown and the filling is bubbly.
- Cool the bars completely in the pan on a wire rack to let the filling set.
- Melt the chocolate and heavy cream (if using) in a microwave-safe bowl in 20-second bursts, stirring until smooth and glossy.
- Drizzle or spread the melted chocolate evenly over the cooled bars. Let the chocolate set at room temperature or refrigerate for 10-15 minutes.
- Use the parchment paper overhang to lift the bars out of the pan. Slice into squares or rectangles with a sharp knife, wiping the knife clean between cuts for neat slices.
Notes
Keep the butter cold to achieve a flaky crumble texture. Do not overmix the dough to avoid tough bars. Use fresh ripe strawberries for best flavor; if using frozen, thaw and drain excess liquid. Let bars cool completely before adding chocolate to prevent melting. For gluten-free, substitute flour with a 1:1 gluten-free baking blend. For dairy-free, use coconut oil instead of butter and coconut cream instead of heavy cream.
Nutrition
- Serving Size: 1 bar (1/12 of recip
- Calories: 280
- Fat: 15
- Carbohydrates: 32
- Fiber: 2
- Protein: 3
Keywords: chocolate, strawberry, crumble bars, dessert, easy recipe, homemade, baking, fruit dessert, chocolate-covered, crumble