Introduction
The moment you step into the room and catch the scent of fresh berries, juicy citrus, and a hint of mint, you know something special is happening. I first created this Fresh Galentine’s Build-Your-Own Fruit Board during a last-minute get-together with my closest friends, and honestly, it was a total hit. There’s just something so inviting about a colorful spread where everyone can pick and choose their favorites — plus, it feels festive without any fuss.
As someone who loves simple, fresh snacks that bring people together, this fruit board quickly became my go-to for Galentine’s Day celebrations. It’s bright, healthy, and versatile enough to please even the pickiest eaters. Over the years, I’ve tweaked the selection and arrangement, making sure it’s as visually stunning as it is delicious. This build-your-own fruit board isn’t just a snack—it’s an experience that sparks conversation and smiles.
If you’re looking for a fresh, fun, and easy way to celebrate friendship, this recipe is definitely worth trying. Whether you’re hosting a brunch, a casual hangout, or just craving a sweet treat, this fruit board checks all the boxes. Ready to learn how to make your own Fresh Galentine’s Build-Your-Own Fruit Board? Let’s get to it!
Why You’ll Love This Recipe
After making this fruit board for various gatherings, I can confidently say it’s one of the most crowd-pleasing snacks out there. Here’s why it stands out:
- Quick & Easy: You can put this together in under 20 minutes — no complicated prep or baking needed.
- Simple Ingredients: Most of these fruits and toppings are pantry staples or easy to find at any market.
- Perfect for Galentine’s Day: It’s festive, fresh, and encourages everyone to mingle and customize their plates.
- Crowd-Pleaser: Kids, adults, healthy eaters, and dessert lovers all rave about it.
- Unbelievably Delicious: The juicy sweetness paired with optional dips and toppings makes every bite a delight.
What makes this fruit board different is the build-your-own concept coupled with a vibrant mix of seasonal fruits and unexpected extras like toasted nuts and a hint of fresh herbs. I’ve found blending textures and colors really make it pop — it’s not just a fruit platter; it’s a little celebration on a board. Plus, it’s a healthier way to indulge without feeling guilty, which is a big win in my book!
What Ingredients You Will Need
This recipe uses simple, wholesome ingredients to deliver bold flavor and satisfying texture without the fuss. Most of the fruits are easy to find year-round, but I’ll also mention some seasonal swaps if you want to mix things up.
- Fresh Fruits for the Board:
- Strawberries, hulled and halved (adds vibrant color and sweetness)
- Blueberries (bursting with antioxidants, perfect for snacking)
- Green grapes, washed and left whole (adds a juicy crunch)
- Red grapes, washed and left whole (for color contrast)
- Kiwi, peeled and sliced (brings a tangy, tropical flavor)
- Orange segments or clementines, peeled (adds bright citrus notes)
- Pineapple chunks (fresh or frozen, thawed — for tropical sweetness)
- Raspberries (delicate and tart, great for texture variety)
- Optional Toppings & Extras:
- Toasted almonds or walnuts (adds crunch and nuttiness)
- Fresh mint leaves (for a refreshing herbal touch)
- Honey or agave drizzle (for those who want extra sweetness)
- Dark chocolate chips or shavings (for a touch of indulgence)
- Dip Options (Choose one or both):
- Greek yogurt mixed with a teaspoon of honey and vanilla extract (creamy and slightly sweet)
- Whipped cream or mascarpone cheese (for a richer, dessert-like experience)
For the best texture, I recommend using firm, ripe fruits. Strawberries should be bright red and fragrant, while grapes should be plump and smooth. If you want to swap ingredients, frozen berries work fine once thawed, and you can swap nuts for seeds if preferred. I often use Stonyfield Organic Greek yogurt for the dip — it strikes the perfect balance of creaminess and tang.
Equipment Needed
- A large wooden or marble serving board – it’s the perfect canvas for arranging your fruit and adds rustic charm.
- Sharp paring knife – essential for slicing fruits neatly without squishing them.
- Small bowls or ramekins – great for holding dips and smaller toppings like nuts or chocolate chips.
- Tongs or small spoons – handy for guests to pick toppings without using fingers.
- Cutting board – makes prepping fruits easier and keeps your workspace clean.
- Optional: A small citrus zester or grater – nice for adding a sprinkle of zest on top for extra aroma.
If you don’t have a fancy serving board, a clean platter or even a large plate works just fine. For knives, I personally rely on a trusty Wüsthof paring knife — it’s sharp, durable, and makes slicing effortless. Just remember to wash and dry your tools thoroughly to keep everything fresh and hygienic!
Detailed Preparation Method
- Wash and prep all fruits: Rinse berries and grapes under cold water and pat dry gently. Hull strawberries and slice them in halves or quarters depending on size. Peel kiwis and oranges, then slice or segment them carefully. Cut pineapple into bite-sized chunks. This step should take about 10–15 minutes.
- Toast nuts (optional): Place almonds or walnuts in a dry skillet over medium heat and toast for 3–5 minutes, stirring frequently until fragrant and lightly browned. Be careful not to burn them! Let cool completely before adding to the board.
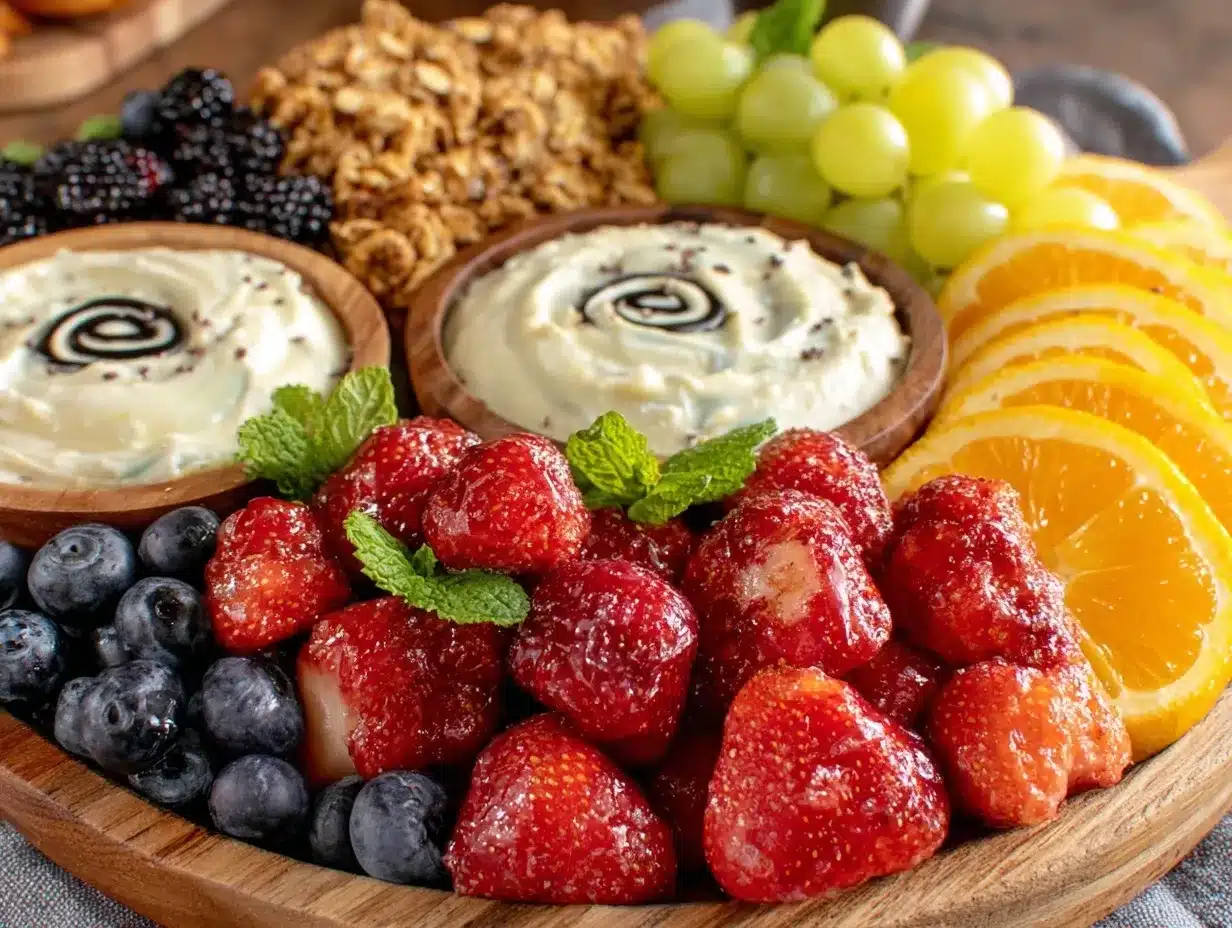
- Prepare dips: In small bowls, mix Greek yogurt with honey and a splash of vanilla. Whip mascarpone or cream separately if using. Set aside. This takes about 5 minutes.
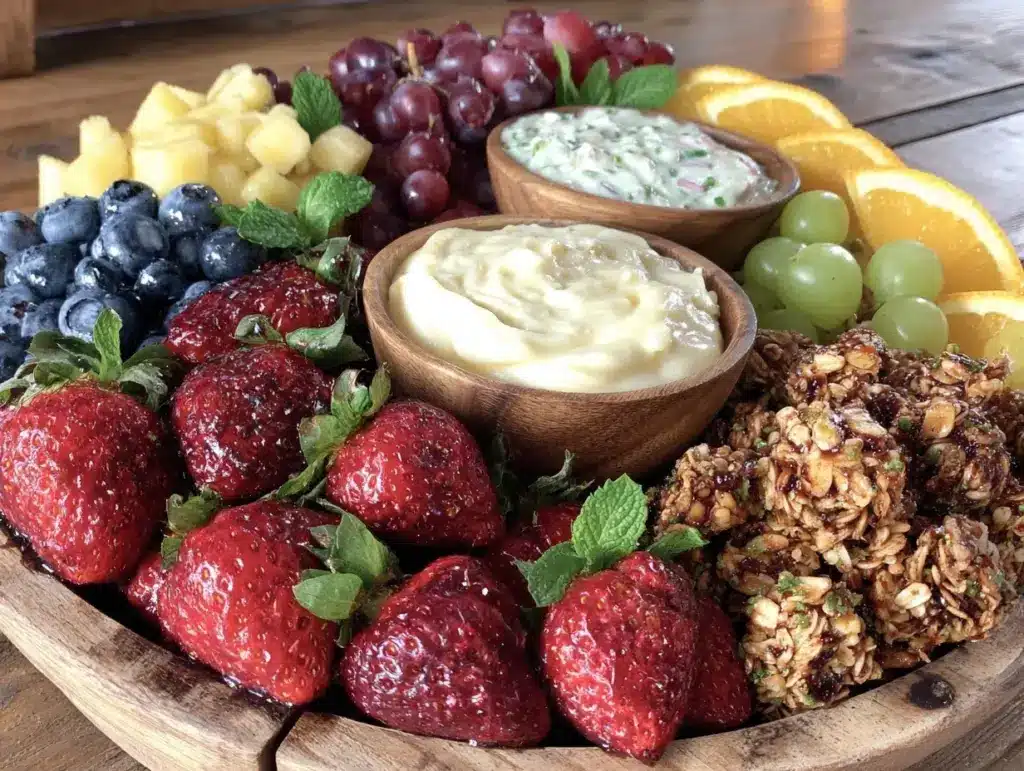
- Arrange the fruit on the board: Start by placing larger fruits like pineapple chunks and orange segments as base clusters. Then add berries and grapes in clusters around them, mixing colors and shapes for visual appeal. Fill gaps with smaller fruits like raspberries and kiwi slices. Remember, variety is your friend here — it’s as much about looks as it is about taste.
- Add toppings and garnishes: Scatter toasted nuts and chocolate shavings over the fruit clusters. Tuck fresh mint leaves in between for a pop of green and fresh aroma. Place dips in ramekins around the board so guests can easily access them.
- Final touches: Drizzle honey lightly over some fruit sections if desired, and consider zesting a bit of lemon or orange peel on top for a fresh twist. Serve immediately or keep refrigerated until guests arrive.
Pro tip: If you’re prepping ahead, keep fruits that brown (like kiwi and bananas if you add them) separate and add just before serving. Also, check the board periodically if serving over a longer period to swap out any mushy pieces.
Cooking Tips & Techniques
Since this recipe is all about fresh, no-cook ingredients, technique mostly revolves around presentation and freshness. One trick I learned is to slice fruits just before serving to keep them vibrant and juicy. If you slice too early, fruits like strawberries and kiwi can get soggy or oxidize, which kills the freshness.
Another tip is to balance sweet and tart fruits. For example, pairing grapes with kiwi or orange segments creates a flavor pop that keeps every bite interesting. It’s tempting to pile on a ton of fruit, but leaving some space on the board actually makes it look more inviting and accessible.
When toasting nuts, keep a close eye—they can go from toasted to burnt in seconds. Stir frequently and remove from heat as soon as you smell that nutty aroma. Also, for a more elegant touch, tear mint leaves by hand instead of cutting them to release more oils and aroma.
For cleanup, line your prep area with parchment paper when slicing juicy fruits—less mess, way easier cleanup. And honestly, don’t stress about perfection here; the charm is in the casual, inviting vibe that lets everyone feel comfortable building their own plate.
Variations & Adaptations
- Seasonal Switch-Up: In fall or winter, swap out berries for sliced pears, pomegranate seeds, or persimmons. Citrus fruits are always great winter picks too.
- Dietary Adjustments: For nut allergies, replace toasted nuts with pumpkin or sunflower seeds. Use coconut yogurt or almond milk-based dips for dairy-free options.
- Flavor Boost: Add a sprinkle of chili powder or Tajín seasoning to some fruit sections for a surprising kick. You could also add a splash of balsamic glaze drizzled over strawberries for a gourmet twist.
- Cooking Method Change: Though this is a no-cook board, you can grill pineapple slices or peaches briefly for a smoky note if you want to mix things up.
- Personal Variation: I once tried adding chunks of fresh mozzarella and basil leaves to create a fruit and cheese board combo — it was unexpectedly delicious and perfect for a more savory twist on the classic.
Serving & Storage Suggestions
This fruit board is best served fresh and chilled but not ice-cold. Let it sit at room temperature for about 10 minutes before serving to bring out the full fruit flavors. Presentation-wise, colorful plates or rustic boards add extra charm. Pair the board with light sparkling water, herbal teas, or a refreshing mimosa to complete your Galentine’s vibe.
If you have leftovers (which is rare!), keep the fruit components refrigerated in airtight containers for up to 2 days. Store the dips separately to prevent sogginess. To re-serve, gently stir the dips and add any fresh mint or nuts again for a crisp touch.
Flavors actually develop nicely if the fruit rests a bit — the honey drizzle seeps in and the aromas meld, making it even tastier a little later. Just keep an eye on delicate fruits like berries, which can get mushy if left out too long.
Nutritional Information & Benefits
This Fresh Galentine’s Build-Your-Own Fruit Board is packed with vitamins, antioxidants, and fiber thanks to the colorful mix of fruits. Berries and citrus fruits provide a boost of vitamin C, great for immune support. Grapes contain resveratrol, a powerful antioxidant linked to heart health.
The nuts add healthy fats and protein, making this snack satisfying and balanced. Greek yogurt dip contributes calcium and probiotics, supporting digestion and bone strength. Overall, this fruit board is naturally gluten-free, low in calories, and can easily fit into most dietary plans.
Personally, I love how this recipe lets me indulge my sweet tooth while still feeling nourished and energized. It’s one of those snacks that tastes like a treat but leaves you feeling good afterward.
Conclusion
This Fresh Galentine’s Build-Your-Own Fruit Board is a fantastic way to bring friends together over something fresh, fun, and delicious. It’s simple to make but looks and tastes like you put in way more effort — trust me, I’ve been there! The best part is how customizable it is, so you can tailor it to your crowd’s tastes or whatever fruits you have on hand.
I always look forward to making this for my closest girlfriends because it sparks joy and conversation in the best way. If you try it, don’t hesitate to experiment with different fruits or toppings and let me know what combos you loved! Your perfect party snack is just a fruit board away.
Go ahead, gather your favorite fruits, invite your friends, and get ready to snack happy. And hey, if you enjoyed this recipe, please drop a comment or share your own Galentine’s fruit board ideas — I’d love to hear all about them!
FAQs
What fruits work best on a build-your-own fruit board?
Fruits that hold their shape and are easy to pick, like berries, grapes, kiwi, pineapple, and citrus segments, work best. Feel free to add seasonal favorites or whatever you love!
Can I prepare the fruit board in advance?
You can prep most fruits a few hours ahead but slice delicate fruits like kiwi and berries just before serving to keep them fresh and vibrant.
What are some good dip options for a fruit board?
Greek yogurt mixed with honey and vanilla, whipped cream, mascarpone, or even a chocolate hazelnut spread are all delicious choices.
How do I keep the fruit from browning?
Use citrus juice like lemon or lime on fruits prone to browning (like apples or bananas), and add them just before serving to minimize discoloration.
Can I make this fruit board vegan?
Absolutely! Skip dairy dips or use plant-based yogurts and creams. Stick to fresh fruits and nuts, and choose vegan-friendly sweeteners like agave.
Pin This Recipe!
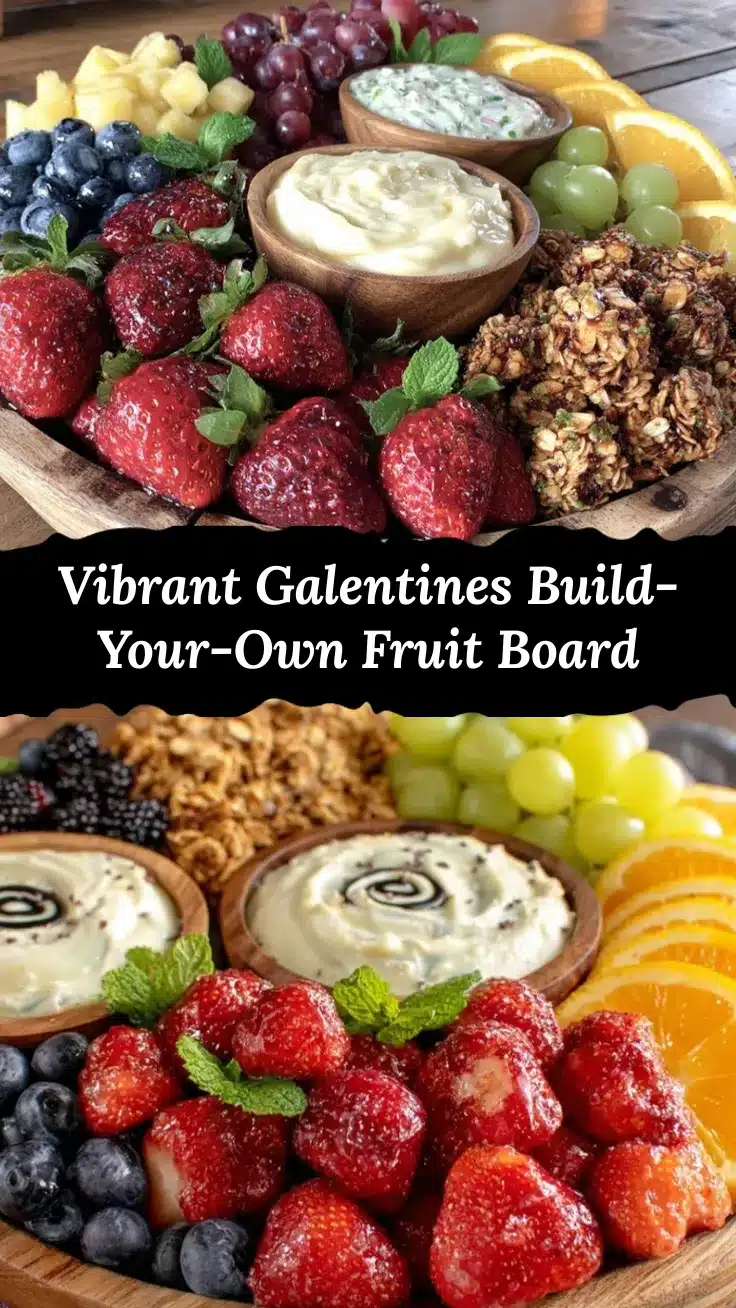
Fresh Galentines Build-Your-Own Fruit Board

A colorful, fresh, and easy-to-assemble fruit board perfect for Galentine’s Day celebrations or any casual gathering. This build-your-own fruit board features a vibrant mix of seasonal fruits, optional toppings, and dips for a customizable and crowd-pleasing snack.
- Prep Time: 15 minutes
- Cook Time: 5 minutes (toasting nuts and preparing dips)
- Total Time: 20 minutes
- Yield: 6-8 servings
- Category: Snack
- Cuisine: American
Ingredients
- Strawberries, hulled and halved
- Blueberries
- Green grapes, washed and left whole
- Red grapes, washed and left whole
- Kiwi, peeled and sliced
- Orange segments or clementines, peeled
- Pineapple chunks (fresh or frozen, thawed)
- Raspberries
- Toasted almonds or walnuts (optional)
- Fresh mint leaves (optional)
- Honey or agave drizzle (optional)
- Dark chocolate chips or shavings (optional)
- Greek yogurt mixed with 1 teaspoon honey and vanilla extract (for dip)
- Whipped cream or mascarpone cheese (for dip)
Instructions
- Wash and prep all fruits: rinse berries and grapes under cold water and pat dry gently. Hull strawberries and slice them in halves or quarters depending on size. Peel kiwis and oranges, then slice or segment them carefully. Cut pineapple into bite-sized chunks. This step should take about 10–15 minutes.
- Toast nuts (optional): place almonds or walnuts in a dry skillet over medium heat and toast for 3–5 minutes, stirring frequently until fragrant and lightly browned. Be careful not to burn them! Let cool completely before adding to the board.
- Prepare dips: in small bowls, mix Greek yogurt with honey and a splash of vanilla. Whip mascarpone or cream separately if using. Set aside. This takes about 5 minutes.
- Arrange the fruit on the board: start by placing larger fruits like pineapple chunks and orange segments as base clusters. Then add berries and grapes in clusters around them, mixing colors and shapes for visual appeal. Fill gaps with smaller fruits like raspberries and kiwi slices.
- Add toppings and garnishes: scatter toasted nuts and chocolate shavings over the fruit clusters. Tuck fresh mint leaves in between for a pop of green and fresh aroma. Place dips in ramekins around the board so guests can easily access them.
- Final touches: drizzle honey lightly over some fruit sections if desired, and consider zesting a bit of lemon or orange peel on top for a fresh twist. Serve immediately or keep refrigerated until guests arrive.
Notes
Slice fruits like strawberries and kiwi just before serving to keep them fresh and vibrant. Toast nuts carefully to avoid burning. For nut allergies, substitute nuts with pumpkin or sunflower seeds. Use plant-based yogurts and creams for vegan options. Keep fruits that brown separate until serving. Presentation is key—leave some space on the board for an inviting look.
Nutrition
- Serving Size: Approximately 1 cup
- Calories: 150
- Sugar: 18
- Sodium: 30
- Fat: 5
- Saturated Fat: 1
- Carbohydrates: 25
- Fiber: 4
- Protein: 3
Keywords: fruit board, Galentines, party snack, build-your-own, fresh fruit, healthy snack, easy recipe, crowd-pleaser


