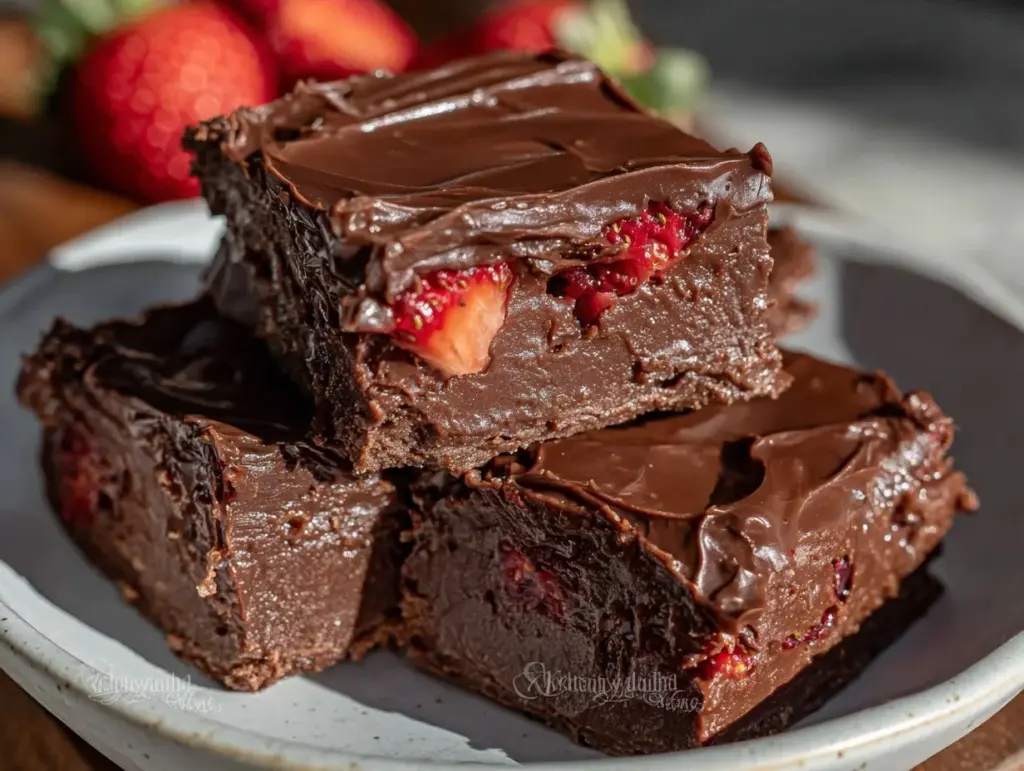
The first time I bit into these decadent chocolate-covered strawberry fudge bars, I was honestly floored. You know that moment when a dessert just hits every note perfectly? That’s exactly what these bars do. The rich, silky fudge melts in your mouth, while the fresh strawberry flavor pops through with a sweet tang that keeps you coming back for more. I stumbled upon this recipe during a weekend baking spree when I wanted to treat my friends to something truly special but fuss-free.
What’s cool about these chocolate-covered strawberry fudge bars is how they combine the classic allure of strawberries and chocolate in a way that feels both nostalgic and fresh. Plus, they’re homemade, so you avoid all those weird preservatives and get to control the sweetness. I’ve made this recipe more times than I can count, tweaking it slightly each time to make it just right. Whether you’re aiming to impress at a potluck or just craving a cozy dessert to savor with a cup of tea, these bars won’t disappoint.
This recipe is perfect for anyone who loves a luscious, melt-in-your-mouth treat with a fruity twist. It’s indulgent but not overwhelming, and it’s surprisingly simple to pull together. Trust me, once you make these chocolate-covered strawberry fudge bars, they’ll become your go-to dessert for celebrations or whenever you want to feel a little fancy at home.
Why You’ll Love This Recipe
- Quick & Easy: Ready in under an hour, these bars are ideal for last-minute dessert cravings or spontaneous gatherings.
- Simple Ingredients: No hunting for obscure items—just everyday staples like chocolate, strawberries, and sweetened condensed milk.
- Perfect for Any Occasion: Whether it’s Valentine’s Day, a summer picnic, or a cozy night in, these fudge bars fit right in.
- Crowd-Pleaser: Kids and adults alike rave about the perfect balance of creamy fudge and fruity freshness.
- Unbelievably Delicious: The velvety chocolate coating paired with the bright strawberry fudge center is pure magic.
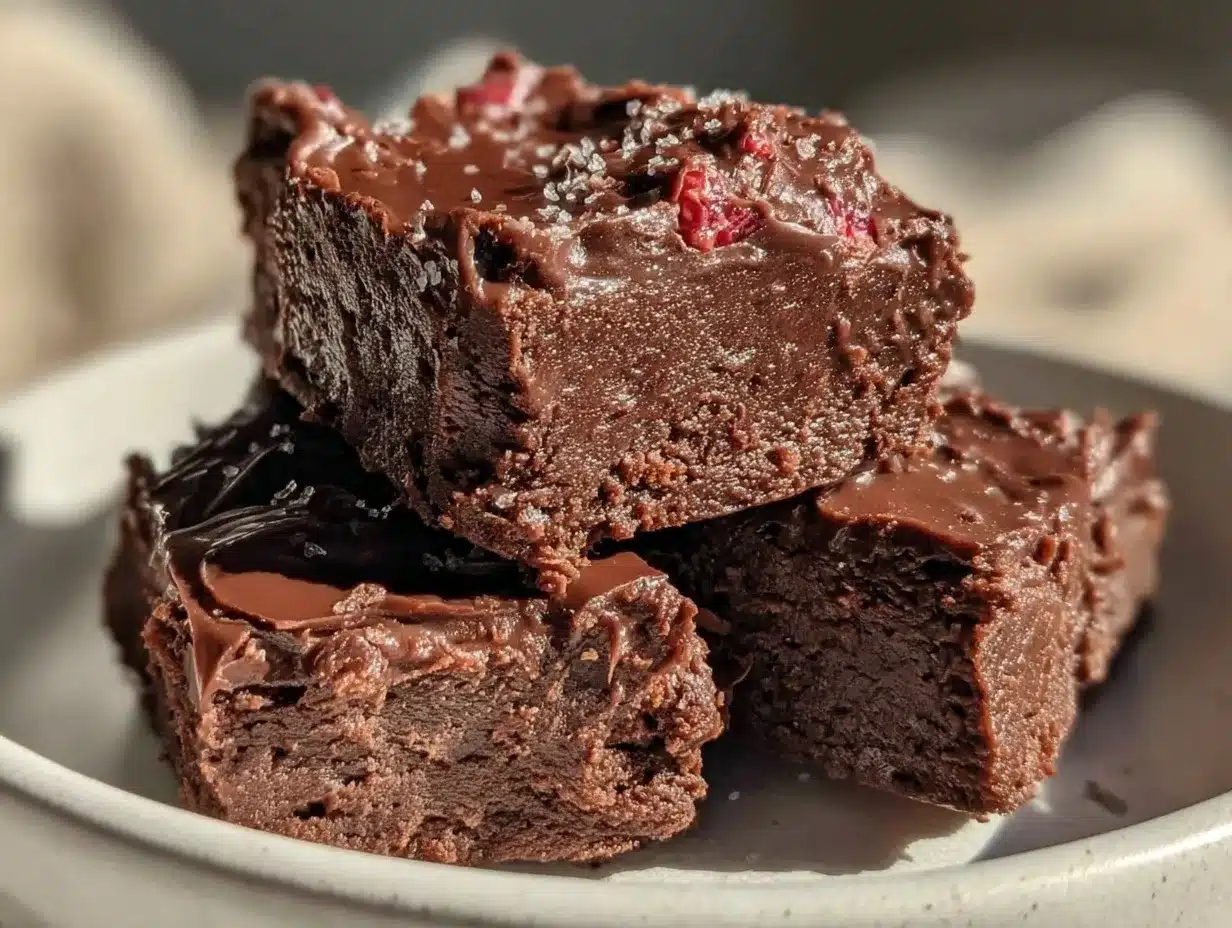
What truly makes these chocolate-covered strawberry fudge bars stand out is the texture contrast. I usually blend freeze-dried strawberries into the fudge for an intense berry flavor without adding moisture, which keeps the fudge silky rather than gooey. Plus, the chocolate shell that hardens around the fudge creates that satisfying snap you don’t get in regular fudge recipes. Honestly, making these feels like crafting a candy shop treat right in your kitchen.
It’s not just dessert; it’s an experience. You’ll find yourself closing your eyes after the first bite, savoring the sweet, rich flavors. This recipe brings the best of both worlds—comfort food with a fresh twist—making it ideal for impressing guests or indulging yourself with zero guilt.
What Ingredients You Will Need
This recipe uses straightforward ingredients to create a bold flavor with a luscious texture. Most of these are pantry basics, and substitutions are easy if you need them.
- White chocolate chips (12 oz / 340 g) – Choose a high-quality brand like Ghirardelli for best melt and flavor.
- Sweetened condensed milk (1 can, 14 oz / 396 g) – Adds creaminess and sweetness; you can use a dairy-free version if needed.
- Freeze-dried strawberries (1 cup / 30 g, crushed) – Provides intense strawberry flavor without making the fudge runny. You can substitute with finely chopped fresh strawberries but reduce moisture elsewhere.
- Vanilla extract (1 tsp) – For depth of flavor and warmth.
- Salt (a pinch) – Balances sweetness.
- Dark chocolate (8 oz / 225 g) – For coating; a bittersweet variety works best to contrast the sweet fudge.
- Coconut oil (1 tbsp) – Helps the chocolate coating set shiny and smooth. You can swap with vegetable oil if preferred.
Optional toppings or mix-ins:
- Chopped freeze-dried raspberries for extra tartness
- Toasted coconut flakes for crunch
- Mini chocolate chips folded into the fudge for texture
When selecting ingredients, look for firm, high-quality chocolate and fresh freeze-dried strawberries without added sugar. These choices make a real difference in flavor and texture. If fresh strawberries are your only option, just be sure to dry them well to avoid a too-soft fudge base.
Equipment Needed
- 8×8-inch (20×20 cm) baking pan: Ideal size for evenly thick bars.
- Parchment paper: Essential for easy removal of fudge bars from the pan without sticking.
- Mixing bowls: One for melting chocolate and another for combining ingredients.
- Double boiler or microwave-safe bowl: For gently melting white and dark chocolate. I prefer a double boiler to avoid scorching, but a microwave in 20-second bursts works too.
- Spatula: For smooth mixing and spreading fudge evenly.
- Food processor or zip-top bag and rolling pin: For crushing freeze-dried strawberries into fine pieces.
- Cooling rack: Helpful for setting the chocolate coating once the bars are dipped or coated.
For budget-friendly alternatives, a heatproof glass bowl over a saucepan of simmering water works perfectly as a double boiler. Parchment paper is a must, but if you don’t have it, greasing the pan thoroughly can work in a pinch—though I don’t recommend it for fudge.
Maintaining your chocolate melting tools clean and dry is key; even a drop of water can cause chocolate to seize, turning it grainy and unusable, which I learned the hard way!
Detailed Preparation Method
- Prepare the pan: Line your 8×8-inch baking pan with parchment paper, leaving an overhang on two sides for easy removal. This step saves you from a sticky situation later. Preheat your oven to 200°F (95°C) if you want to warm the pan slightly, which can help the fudge set evenly.
- Crush the freeze-dried strawberries: Place the freeze-dried strawberries in a food processor and pulse until finely crushed. If you don’t have one, put them in a zip-top bag and crush with a rolling pin. The finer, the better for smooth fudge texture.
- Melt the white chocolate and condensed milk: In a double boiler or microwave-safe bowl, combine white chocolate chips and sweetened condensed milk. Stir gently and continuously until smooth and silky, about 3-5 minutes over gentle heat or 20-second microwave bursts. Avoid overheating to prevent graininess.
- Add flavors: Remove from heat and stir in vanilla extract, a pinch of salt, and crushed freeze-dried strawberries. Mix until everything is fully incorporated and you can see the pretty pink flecks from the strawberries. This is where the magic happens!
- Pour the fudge mixture: Transfer the fudge mixture into the prepared pan. Use a spatula to smooth the top evenly. Tap the pan gently on the counter to release any air bubbles. Let it cool at room temperature for 10 minutes before refrigerating.
- Chill the fudge: Refrigerate the fudge for at least 2 hours or until firm. This step is critical for the fudge to set properly and hold together when coated.
- Prepare the chocolate coating: Melt the dark chocolate and coconut oil together using the same gentle method as step 3. Stir until glossy and smooth.
- Cut and coat the bars: Lift the fudge out of the pan using the parchment overhang. Cut into 16 equal squares using a sharp knife. One by one, dip each fudge square into the melted dark chocolate, ensuring full coverage. Use a fork to lift them out, letting excess drip off, then place on a parchment-lined tray.
- Set the coating: Place the coated bars in the refrigerator for 15-20 minutes to allow the chocolate shell to harden with that perfect snap.
- Serve and enjoy: Bring the bars to room temperature for a few minutes before serving for the best flavor and texture.
Quick tip: If your chocolate starts to firm up while dipping, briefly warm it again in the microwave for 10 seconds. Also, keep your knife warm when cutting the fudge to avoid crumbly edges—just run it under hot water and dry it between cuts.
Cooking Tips & Techniques
One of the trickiest parts of making these chocolate-covered strawberry fudge bars is getting that smooth, shiny chocolate coating. I’ve learned that melting your chocolate slowly and stirring constantly prevents burning and grainy texture. Always avoid water contact with chocolate; even steam can cause it to seize.
When mixing your fudge base, be gentle but thorough to avoid trapping air bubbles, which can cause cracks in the final bars. If you notice any bubbles, tap the pan lightly on the counter to coax them out.
Cutting fudge can be a challenge if your knife isn’t warm. I once tried slicing with a cold knife and ended up with a crumbly mess—lesson learned! Warming your knife under hot water (and drying it off) before slicing will give you clean, sharp edges every time.
Timing is everything. Let the fudge set fully in the fridge before dipping. If you rush this step, your bars might fall apart or the chocolate won’t stick well. Multitask by preparing the chocolate coating while the fudge chills to save time.
Finally, store your bars in an airtight container in the fridge, but serve them slightly warmed to bring out their full flavor and keep the texture silky. I promise, this little step makes a big difference!
Variations & Adaptations
Want to switch things up? Here are some fun ways to customize these chocolate-covered strawberry fudge bars:
- Dietary Adaptation: Use dairy-free white chocolate and coconut condensed milk for a vegan-friendly version. Just be mindful that texture might be a bit different but still delicious.
- Seasonal Twist: Swap freeze-dried strawberries for freeze-dried raspberries or blueberries for a different berry burst. In winter, crushed peppermint candies can add a festive flair.
- Flavor Boost: Add a teaspoon of almond extract or a splash of lemon juice to the fudge base to intensify the fruitiness and add complexity.
- Nutty Addition: Fold in chopped toasted pistachios or almonds into the fudge before chilling for a satisfying crunch.
- Cooking Method Variation: Instead of coating in chocolate, drizzle melted chocolate over the top and sprinkle with freeze-dried strawberry pieces or edible flowers for a delicate finish.
Personally, I once tried adding a pinch of chili powder to the chocolate coating for a subtle heat that paired surprisingly well with the sweet strawberry fudge. It’s a little adventurous, but totally worth trying if you’re feeling bold!
Serving & Storage Suggestions
These chocolate-covered strawberry fudge bars are best enjoyed slightly chilled or at room temperature. Serving them too cold mutes the flavors, but too warm and the chocolate coating gets soft.
Present them on a pretty platter with a garnish of fresh strawberries or a dusting of powdered sugar for an elegant touch. Pair with a cup of black coffee or a light rosé for a delightful dessert experience.
Store leftover bars in an airtight container in the refrigerator for up to one week. For longer storage, freeze them in a single layer on a baking sheet, then transfer to a freezer-safe container for up to 3 months. Thaw in the fridge overnight before serving.
Reheating is simple: just let them sit at room temperature for 15-20 minutes before digging in. Over time, the fudge flavor deepens, making these bars taste even better the next day—if you can wait that long!
Nutritional Information & Benefits
Each chocolate-covered strawberry fudge bar (assuming 16 bars per batch) contains approximately:
| Calories | 160 |
|---|---|
| Fat | 9g |
| Sugar | 18g |
| Protein | 1g |
While these bars are a treat, they do bring some nutritional perks. Strawberries are rich in vitamin C and antioxidants, and using high-quality dark chocolate adds beneficial flavonoids compared to milk chocolate. The sweetened condensed milk provides calcium and protein, making it a little more satisfying than your average candy bar.
This recipe is naturally gluten-free, but contains dairy and soy (from chocolate), so adjust accordingly if allergies are a concern. For a lower-sugar option, try using sugar-free white chocolate and condensed milk alternatives—but the texture might vary.
From my perspective as someone who enjoys desserts mindfully, these bars are a lovely once-in-a-while indulgence that balances decadence with simple ingredients you can feel good about.
Conclusion
To wrap things up, these decadent chocolate-covered strawberry fudge bars are definitely worth your time and love in the kitchen. They bring together the richness of chocolate and the bright zing of strawberries in a way that feels special but is surprisingly straightforward to make.
Feel free to tweak the recipe to your liking—add nuts, try different berries, or play with extracts until it feels like your perfect dessert. I love this recipe because it’s flexible, delicious, and always impresses whoever I share it with.
If you give these bars a try, I’d love to hear how you make them your own! Drop a comment below or share your favorite variations. Trust me, once you taste that first bite, these chocolate-covered strawberry fudge bars will become a favorite in your recipe rotation.
Happy baking and sweet snacking!
FAQs
Can I use fresh strawberries instead of freeze-dried?
Fresh strawberries add moisture and can make the fudge too soft or cause it not to set properly. If you do use fresh, finely chop and reduce other liquids slightly, but freeze-dried is best for texture.
How long do these fudge bars last?
Stored in an airtight container in the fridge, they keep well for up to one week. You can also freeze them for up to 3 months.
Can I make these bars without the chocolate coating?
Yes! You can skip the dark chocolate coating and just chill the fudge in the pan. The bars will be creamy and delicious but without the crisp outer shell.
Is there a vegan version of this recipe?
You can substitute vegan white chocolate and use sweetened condensed coconut milk or similar alternatives. The texture might differ slightly but will still be tasty.
Why is my chocolate coating not shiny?
Chocolate can lose its shine if overheated or if water gets into it. Make sure to melt gently, stir constantly, and keep tools dry. Adding a bit of coconut oil also helps achieve a glossy finish.
Pin This Recipe!
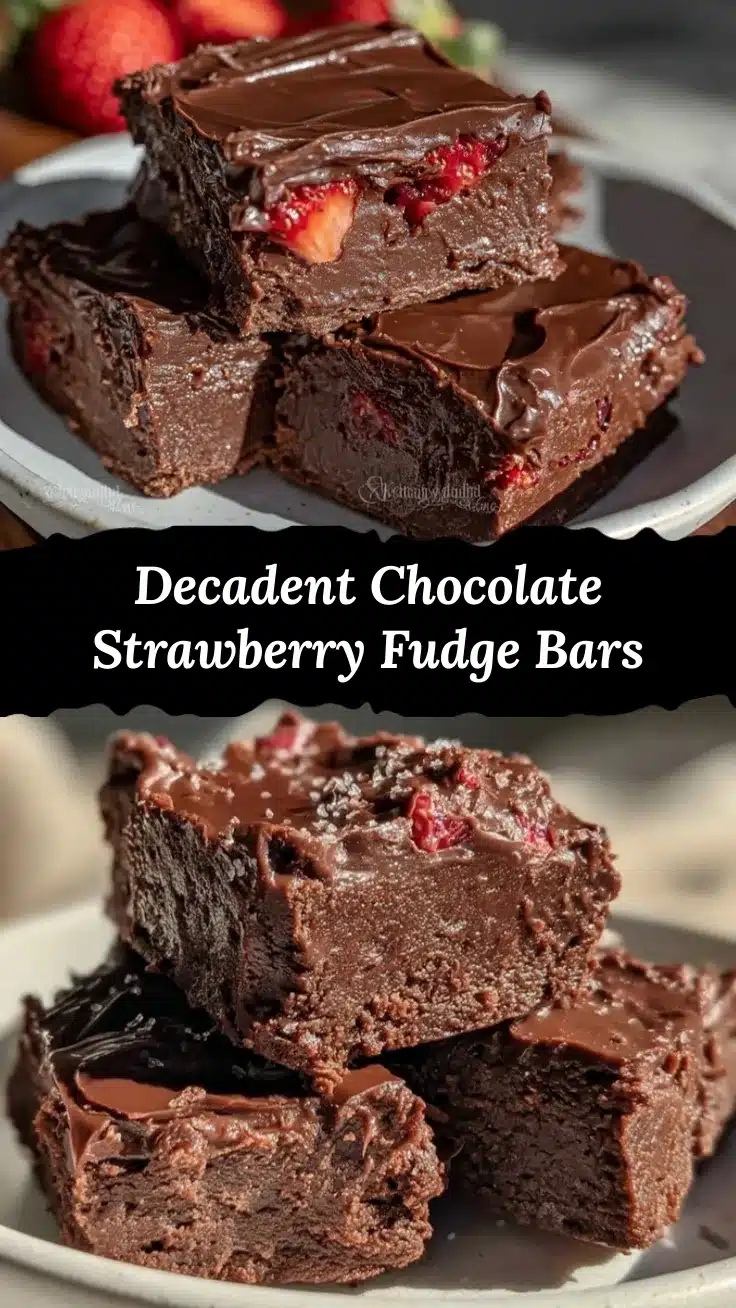
Decadent Chocolate-Covered Strawberry Fudge Bars

These decadent chocolate-covered strawberry fudge bars combine rich, silky fudge with fresh strawberry flavor and a shiny dark chocolate coating for a perfect, indulgent dessert.
- Prep Time: 15 minutes
- Cook Time: 5 minutes
- Total Time: 2 hours 20 minutes
- Yield: 16 bars 1x
- Category: Dessert
- Cuisine: American
Ingredients
- 12 oz white chocolate chips
- 1 can (14 oz) sweetened condensed milk
- 1 cup freeze-dried strawberries, crushed
- 1 tsp vanilla extract
- Pinch of salt
- 8 oz dark chocolate
- 1 tbsp coconut oil
- Optional toppings: chopped freeze-dried raspberries, toasted coconut flakes, mini chocolate chips
Instructions
- Line an 8×8-inch baking pan with parchment paper, leaving an overhang on two sides for easy removal. Optionally preheat oven to 200°F to warm the pan slightly.
- Crush freeze-dried strawberries finely using a food processor or a zip-top bag and rolling pin.
- Melt white chocolate chips and sweetened condensed milk together in a double boiler or microwave in 20-second bursts, stirring until smooth and silky.
- Remove from heat and stir in vanilla extract, pinch of salt, and crushed freeze-dried strawberries until fully incorporated.
- Pour fudge mixture into prepared pan, smooth the top with a spatula, and tap gently to release air bubbles. Let cool at room temperature for 10 minutes.
- Refrigerate fudge for at least 2 hours or until firm.
- Melt dark chocolate and coconut oil together gently until glossy and smooth.
- Lift fudge from pan using parchment overhang and cut into 16 equal squares with a warm knife.
- Dip each fudge square into melted dark chocolate to coat fully, letting excess drip off, then place on parchment-lined tray.
- Refrigerate coated bars for 15-20 minutes to set the chocolate shell.
- Bring bars to room temperature for a few minutes before serving.
Notes
Use freeze-dried strawberries for best texture; fresh strawberries add moisture and may prevent proper setting. Keep chocolate melting tools dry to avoid seizing. Warm knife before cutting fudge for clean edges. Store bars in airtight container in fridge up to one week or freeze up to 3 months.
Nutrition
- Serving Size: 1 bar (1/16 of batch
- Calories: 160
- Sugar: 18
- Fat: 9
- Protein: 1
Keywords: chocolate fudge bars, strawberry fudge, chocolate-covered strawberries, homemade fudge, easy dessert, no bake fudge, strawberry dessert


