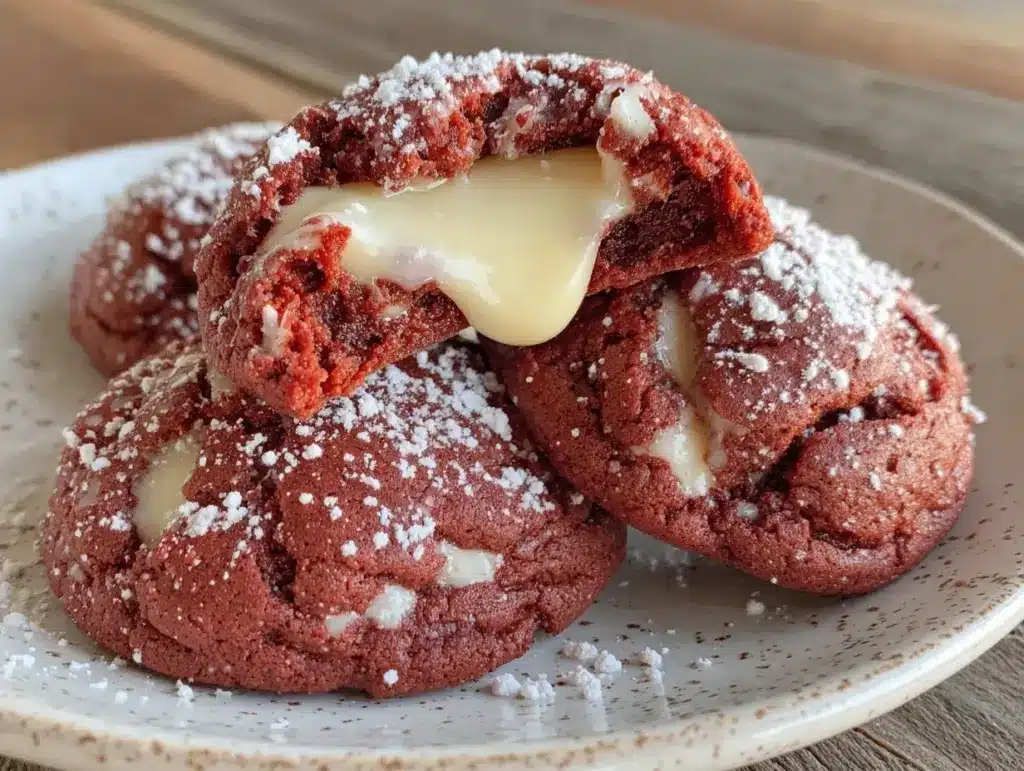
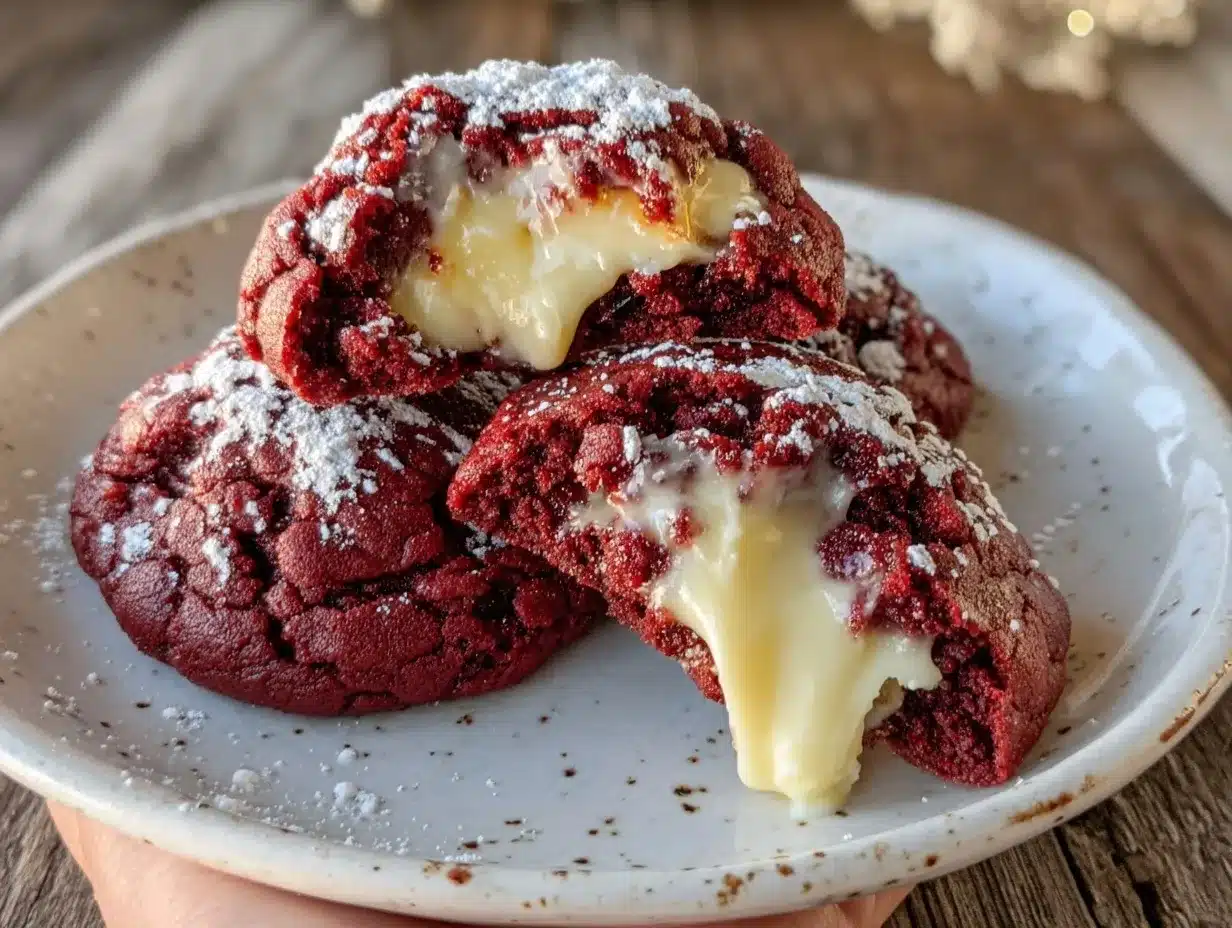
The moment you bite into a Decadent Red Velvet Lava Cookie with Cream Cheese Center, it’s like a little party in your mouth—rich, gooey, and totally blissful. Honestly, the smell of these cookies baking fills the kitchen with that classic red velvet sweetness, mixed with the tangy allure of cream cheese. I first stumbled upon this recipe during a chilly winter evening when I craved something warm, comforting, yet a bit fancy. After tweaking it a few times, it quickly became a household favorite.
These cookies are truly a treat for anyone who loves that velvety softness paired with a molten surprise inside. They’re not just any cookie—you know, the kind you grab at a cafe or bakery—they’re homemade magic, perfect for sharing or indulging solo (I won’t judge!). What I love most is how this recipe brings together the nostalgic red velvet flavor with that luscious cream cheese center, making it an irresistible combination.
Whether you’re baking for a special occasion, a cozy night in, or just because, these red velvet lava cookies deliver a unique, indulgent experience. I’ve made these dozens of times now—each batch better than the last—and I’m excited to share the recipe with you. If you enjoy baking and want a cookie that’s both visually stunning and mouth-wateringly delicious, this is your go-to recipe.
Why You’ll Love This Recipe
After baking countless batches of red velvet cookies, this version with cream cheese centers stands out for so many reasons:
- Quick & Easy: You can whip up the dough in under 20 minutes—perfect when you’re short on time but want a homemade treat.
- Simple Ingredients: No need for fancy or hard-to-find items. Most are pantry staples, making it super convenient.
- Perfect for Every Occasion: Whether it’s Valentine’s Day, a birthday, or just a weekend indulgence, these cookies steal the show.
- Crowd-Pleaser: I’ve served these at family gatherings and watch them disappear fast—kids and adults can’t get enough!
- Unbelievably Delicious: The balance between the slightly crispy edges and the molten cream cheese center is just heavenly.
What really sets this recipe apart is the technique of gently wrapping the cream cheese filling inside the red velvet dough, creating that perfect lava effect when baked. It’s not just a cookie; it’s an experience. The red velvet batter’s subtle cocoa notes combined with the tangy cream cheese make every bite unforgettable. You’ll find yourself closing your eyes, savoring the texture and flavors—trust me, it’s that good. Plus, it’s a recipe that’s as impressive as it is easy, so you can wow guests without breaking a sweat.
What Ingredients You Will Need
This recipe uses straightforward, wholesome ingredients that come together beautifully to create satisfying texture and flavor. Here’s what you’ll need:
- For the Red Velvet Cookie Batter:
- 1 cup (225g) unsalted butter, softened (adds richness and moisture)
- 1 cup (200g) granulated sugar
- 2 large eggs, room temperature
- 2 tablespoons (30ml) red food coloring (gel recommended for vibrant color)
- 1 teaspoon vanilla extract
- 2 ½ cups (315g) all-purpose flour
- 2 tablespoons (15g) unsweetened cocoa powder (for that classic red velvet hint)
- 1 teaspoon baking soda
- ½ teaspoon salt
- 1 cup (240ml) buttermilk, room temperature (helps keep cookies tender)
- For the Cream Cheese Centers:
- 8 oz (225g) cream cheese, softened (I like Philadelphia brand for smooth texture)
- ¼ cup (30g) powdered sugar
- 1 teaspoon vanilla extract
Feel free to substitute the all-purpose flour with a gluten-free blend for a gluten-sensitive crowd. If you don’t have buttermilk on hand, a quick homemade version using milk + vinegar or lemon juice works just fine. For a dairy-free option, swap cream cheese with a plant-based cream cheese alternative, but keep in mind the flavor and texture may shift slightly.
Equipment Needed
- Stand mixer or hand mixer: Makes creaming butter and sugar effortless, though you can mix by hand with some elbow grease.
- Mixing bowls: At least two, one for dry ingredients and one for wet.
- Measuring cups and spoons: Accuracy matters here for consistent results.
- Baking sheets: Use heavy-duty, rimmed sheets so cookies don’t spread too thin.
- Parchment paper or silicone baking mats: Prevents sticking and promotes even baking.
- Cookie scoop or tablespoon: For portioning dough evenly and shaping cookies.
- Cooling rack: Helps cookies cool evenly and keeps bottoms from getting soggy.
If you don’t have a cookie scoop, a spoon works just as well—just try to keep the dough portions uniform. I’ve found that using silicone mats not only makes cleanup easier but also helps achieve the perfect cookie bottom texture. A stand mixer is my favorite for this recipe, but a sturdy bowl and wooden spoon can handle the job if needed.
Detailed Preparation Method
- Prep your ingredients and oven: Preheat your oven to 350°F (175°C). Line two baking sheets with parchment paper or silicone mats. Make sure your butter, eggs, and buttermilk are at room temperature for smooth mixing. This usually takes about 15-20 minutes.
- Make the cream cheese filling: In a medium bowl, beat together 8 oz (225g) softened cream cheese, ¼ cup (30g) powdered sugar, and 1 teaspoon vanilla extract until smooth and creamy. Cover and chill this in the fridge while you prepare the dough—this step is key to prevent the filling from melting too quickly during baking.
- Mix the dry ingredients: In a separate bowl, sift together 2 ½ cups (315g) all-purpose flour, 2 tablespoons (15g) cocoa powder, 1 teaspoon baking soda, and ½ teaspoon salt. Set aside.
- Cream butter and sugar: Using a stand or hand mixer, beat 1 cup (225g) softened unsalted butter and 1 cup (200g) granulated sugar on medium speed until light and fluffy, about 3-4 minutes. This aerates the dough, making the cookies soft and tender.
- Add eggs, color, and vanilla: Beat in 2 large eggs one at a time, then mix in 2 tablespoons (30ml) red food coloring and 1 teaspoon vanilla extract until fully combined. The batter will turn a rich, vibrant red.
- Alternate adding dry ingredients and buttermilk: With the mixer on low, add the flour mixture in three parts, alternating with 1 cup (240ml) buttermilk, starting and ending with the flour. Mix just until combined—overmixing can make the cookies tough.
- Shape the cookies: Scoop about 2 tablespoons of dough onto your palm. Flatten it slightly, then place about a teaspoon of the chilled cream cheese filling in the center. Gently fold the dough around the cream cheese, sealing it completely. Roll into a smooth ball and place on the prepared baking sheet. Repeat with remaining dough and filling, spacing cookies about 2 inches apart.
- Bake: Bake in the preheated oven for 12-14 minutes. The edges should be set but the center still look slightly soft and gooey. This is your cue that the cream cheese lava center is perfectly molten.
- Cool: Allow cookies to cool on the baking sheet for 5 minutes before transferring to a wire rack. This rest time helps the lava centers set just enough to avoid too much oozing, but they’ll still be delightfully soft inside.
If you find your cream cheese filling leaking, make sure it’s well chilled before baking and that you seal the dough tightly around it. Slightly underbaking also helps keep that molten effect. Trust me on this—patience with chilling and careful shaping are what make these cookies unforgettable.
Cooking Tips & Techniques
One trick I learned the hard way is to chill your cream cheese filling thoroughly. If it’s too soft, it’ll melt out during baking and create a mess. Also, don’t skip sifting the dry ingredients; it prevents clumps and ensures even mixing.
When mixing the batter, low and slow is your friend. Overmixing the flour can lead to dense cookies, and nobody wants that. Instead, mix just until you see no streaks of flour. I like to scrape the bowl occasionally to make sure everything is evenly combined.
Another tip? Use a cookie scoop to get uniform sizes. That way, all cookies bake evenly, and nobody ends up with a burnt edge or a raw center. If you’re multitasking, prepare the cream cheese filling first so it can chill while you make the dough—time saver!
Lastly, watch your baking time closely. These cookies can go from gooey to dry in a minute or two, so start checking at the 12-minute mark. The edges should look set but the middle still soft. That’s when you pull them out for the perfect lava effect.
Variations & Adaptations
- Chocolate Lovers’ Twist: Add mini chocolate chips to the red velvet dough for extra melty goodness.
- Seasonal Flair: In fall, sprinkle a pinch of cinnamon or pumpkin pie spice into the dough for subtle warmth.
- Vegan Adaptation: Use a vegan butter substitute, aquafaba or flax eggs, and a dairy-free cream cheese to keep things plant-based.
- Nutty Upgrade: Roll the cookie balls in crushed pecans or walnuts before baking for a crunchy contrast.
- Fruit Infusion: Mix in finely chopped dried cranberries or cherries to add a tart burst with every bite.
Personally, I once swapped the cream cheese filling for a peanut butter center—unexpected but surprisingly delicious! Feel free to experiment with your favorite fillings or toppings to make this recipe truly yours.
Serving & Storage Suggestions
Serve these cookies warm or at room temperature for the best lava effect. They pair beautifully with a glass of cold milk or a cup of rich coffee. For a festive touch, dust them lightly with powdered sugar or drizzle melted white chocolate on top.
Store any leftovers in an airtight container at room temperature for up to 3 days. If you want to keep them longer, freeze the baked cookies in a single layer, then transfer to a freezer-safe bag for up to 2 months. To reheat, pop them in the microwave for 15-20 seconds or warm in a 300°F (150°C) oven for about 5 minutes—just enough to bring back that gooey center.
Fun fact: letting the cookies rest overnight actually deepens the flavors and softens the texture, so if you can wait, they taste even better the next day.
Nutritional Information & Benefits
Each Decadent Red Velvet Lava Cookie with Cream Cheese Center contains approximately 250-280 calories, with a balanced blend of fats from butter and cream cheese, and moderate carbs from flour and sugar. The cream cheese adds a bit of protein and calcium, which is a nice bonus for a dessert.
This recipe isn’t low-calorie, but it provides a satisfying treat that feels indulgent without going overboard when enjoyed in moderation. For those watching gluten, a gluten-free flour swap works well, and dairy-free cream cheese options make it accessible for lactose intolerance.
From my perspective, these cookies hit that sweet spot between comfort and quality, making them a wonderful occasional treat that brings joy and a touch of luxury to your day.
Conclusion
If you’re looking to impress with a dessert that’s as stunning as it is delicious, these Decadent Red Velvet Lava Cookies with Cream Cheese Centers are a perfect choice. They’re straightforward enough for a beginner, yet special enough to serve at any gathering. I love how each bite melts in your mouth, delivering that signature red velvet flavor with a surprise creamy center.
Feel free to tweak the recipe to match your taste or dietary needs—this cookie is flexible and forgiving. I hope you enjoy baking and sharing this recipe as much as I do. Don’t forget to leave a comment below and tell me how your cookies turned out or any fun twists you tried!
Happy baking, and remember: sometimes, the best desserts are the ones made with a little love and a lot of cream cheese lava!
FAQs
Can I make these cookies ahead of time?
Yes! You can prepare the dough and cream cheese filling separately, chill them overnight, then assemble and bake fresh the next day.
What if I don’t have red food coloring?
You can skip the food coloring, but the cookies won’t have that classic red velvet hue. For a natural alternative, try beet juice powder, but it might slightly affect flavor.
How do I prevent the cream cheese from leaking out during baking?
Make sure your cream cheese filling is well chilled and that you seal the cookie dough completely around it. Avoid overfilling to reduce leaks.
Can I freeze the raw cookie dough?
Absolutely! Freeze the assembled cookie balls on a baking sheet, then transfer to a freezer bag. Bake directly from frozen, adding a couple of extra minutes to baking time.
What’s the best way to reheat these cookies?
Warm them briefly in the microwave (about 15-20 seconds) or in a low oven (300°F/150°C) for 5 minutes to revive that molten cream cheese center.
Pin This Recipe!

Decadent Red Velvet Lava Cookies with Cream Cheese Centers

Rich, gooey red velvet cookies with a molten cream cheese center, perfect for any occasion and easy to make at home.
- Prep Time: 20 minutes
- Cook Time: 14 minutes
- Total Time: 34 minutes
- Yield: 24 cookies 1x
- Category: Dessert
- Cuisine: American
Ingredients
- 1 cup (225g) unsalted butter, softened
- 1 cup (200g) granulated sugar
- 2 large eggs, room temperature
- 2 tablespoons (30ml) red food coloring (gel recommended)
- 1 teaspoon vanilla extract
- 2 ½ cups (315g) all-purpose flour
- 2 tablespoons (15g) unsweetened cocoa powder
- 1 teaspoon baking soda
- ½ teaspoon salt
- 1 cup (240ml) buttermilk, room temperature
- 8 oz (225g) cream cheese, softened
- ¼ cup (30g) powdered sugar
- 1 teaspoon vanilla extract
Instructions
- Preheat oven to 350°F (175°C). Line two baking sheets with parchment paper or silicone mats. Ensure butter, eggs, and buttermilk are at room temperature (about 15-20 minutes).
- In a medium bowl, beat together softened cream cheese, powdered sugar, and vanilla extract until smooth and creamy. Cover and chill in the fridge.
- In a separate bowl, sift together flour, cocoa powder, baking soda, and salt. Set aside.
- Using a mixer, beat softened butter and granulated sugar on medium speed until light and fluffy, about 3-4 minutes.
- Beat in eggs one at a time, then mix in red food coloring and vanilla extract until fully combined.
- With mixer on low, add flour mixture in three parts, alternating with buttermilk, starting and ending with flour. Mix just until combined.
- Scoop about 2 tablespoons of dough onto your palm, flatten slightly, place about a teaspoon of chilled cream cheese filling in the center, fold dough around filling, seal completely, and roll into a smooth ball. Place on baking sheet about 2 inches apart. Repeat.
- Bake for 12-14 minutes until edges are set but centers look slightly soft and gooey.
- Cool on baking sheet for 5 minutes, then transfer to a wire rack to cool completely.
Notes
Chill cream cheese filling thoroughly to prevent leaking. Seal dough tightly around filling. Slightly underbake for perfect molten center. Use a cookie scoop for uniform size. Let cookies rest overnight for deeper flavor and softer texture.
Nutrition
- Serving Size: 1 cookie
- Calories: 265
- Sugar: 18
- Sodium: 150
- Fat: 14
- Saturated Fat: 8
- Carbohydrates: 32
- Fiber: 1
- Protein: 3
Keywords: red velvet cookies, lava cookies, cream cheese center, easy cookies, homemade dessert, red velvet dessert


