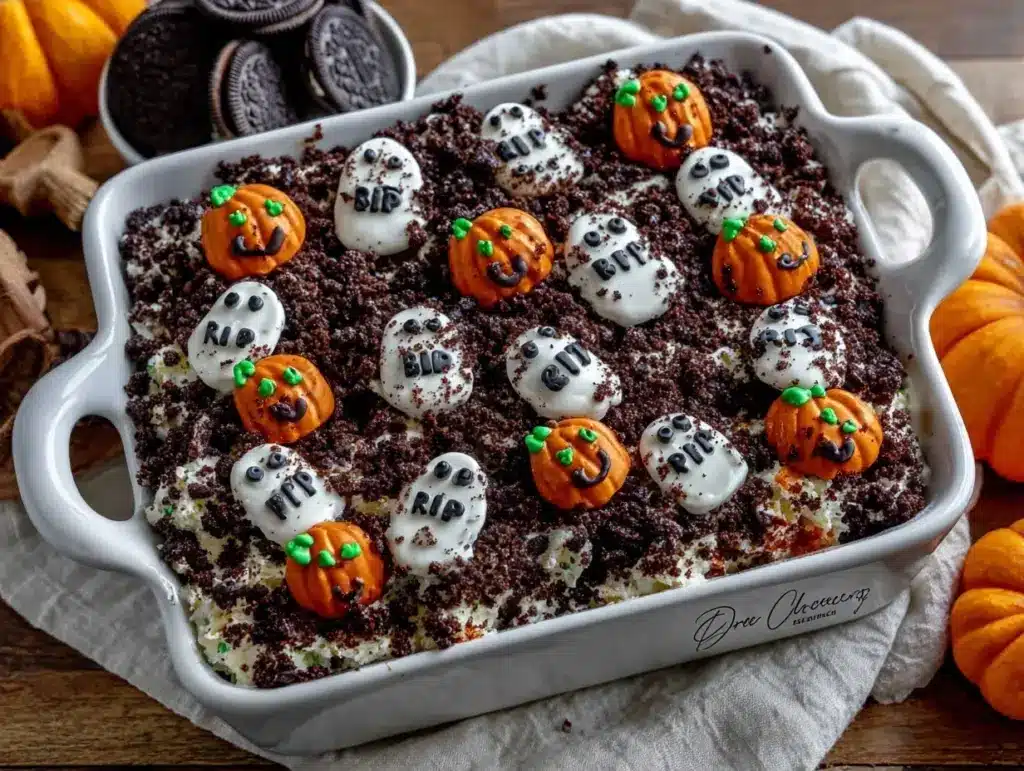
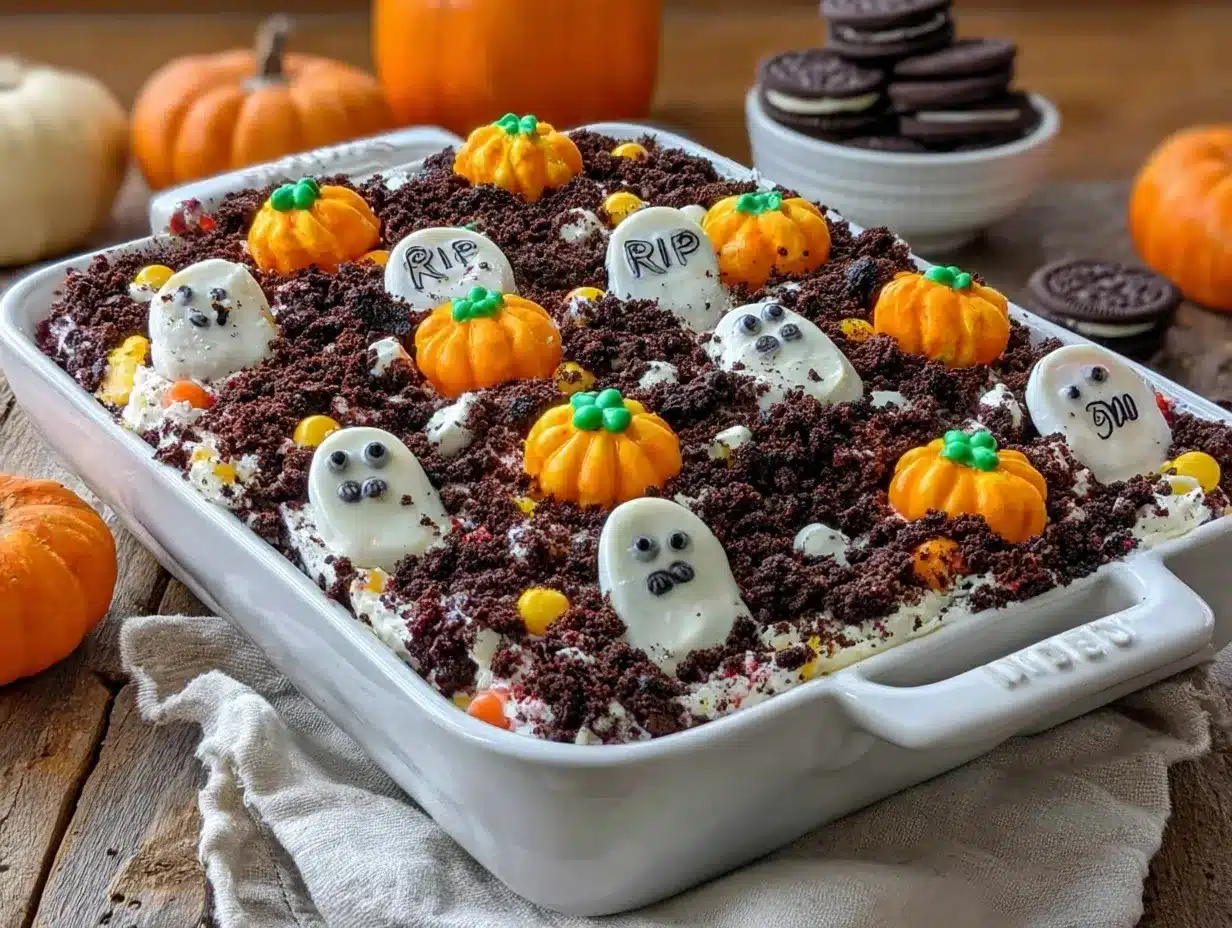
When I think of Halloween, I instantly picture spooky decorations, creative costumes, and of course, all the fun treats! This Spooky Oreo Dirt Dessert is the ultimate Halloween indulgence that’s equal parts delicious and festive. Picture layers of crushed Oreos (that look just like dirt), creamy pudding, and creepy gummy worms crawling out—it’s a dessert that’s as fun to make as it is to eat! Trust me, once you whip up this treat, it’ll be a hit with kids and adults alike.
I first made this dessert for a Halloween party a few years ago, and it’s been an annual tradition ever since. There’s something magical about watching guests light up when they see a dish that’s both spooky and scrumptious. Plus, it’s super versatile—you can customize the toppings to fit your Halloween theme, whether it’s ghosts, pumpkins, or creepy critters. And don’t worry, it’s ridiculously easy to make. Let’s dive into this sweet and spooky creation!
Why You’ll Love This Recipe
- Quick & Easy: This recipe comes together in under 30 minutes, making it perfect for last-minute Halloween parties or a fun weekend treat.
- No Baking Required: Skip the oven and enjoy a stress-free dessert prep—perfect for those busy Halloween evenings.
- Kid-Friendly: Kids will love getting involved in assembling the layers and decorating with gummy worms and spooky toppings!
- Customizable: Whether you’re going for a haunted graveyard look or a cute pumpkin patch, you can tailor this dessert to fit your Halloween vision.
- Crowd-Pleaser: The combination of creamy pudding, crunchy Oreo crumbs, and chewy gummies is a surefire hit for all ages.
What sets this recipe apart is its simplicity and creative flair. You don’t need fancy ingredients or special skills—just a little imagination! Plus, crushed Oreos make the perfect “dirt” texture, and the gummy worms add an extra creepy-crawly touch. It’s Halloween comfort food that’s also visually stunning. Let’s just say, this dessert will be the centerpiece of your spooky spread!
What Ingredients You Will Need
This Spooky Oreo Dirt Dessert uses simple, easy-to-find ingredients that pack a punch in both flavor and presentation. Here’s what you’ll need:
- Oreos: About 20 cookies, crushed into fine crumbs. (I recommend using a food processor for the perfect dirt texture.)
- Chocolate pudding mix: Two 3.9 oz packets. (You can use instant pudding for a quick prep or cook-and-serve for a richer texture.)
- Milk: 4 cups of cold milk according to pudding package instructions.
- Whipped topping: One 8 oz container, thawed. (Feel free to use homemade whipped cream if you prefer.)
- Cream cheese: One 8 oz block, softened. (Adds a tangy richness to balance the sweetness.)
- Powdered sugar: 1 cup, to sweeten the cream cheese mixture.
- Gummy worms: A handful for decoration—you can also use gummy spiders, eyeballs, or candy pumpkins for variety.
- Halloween decorations: Optional, but little tombstones, candy bones, or skulls can make this dessert extra spooky!
All of these items can be found at your local grocery store, and if you’re feeling adventurous, you can swap some ingredients to make it dairy-free or gluten-free. For example, use gluten-free Oreos or plant-based milk and whipped topping!
Equipment Needed
- Mixing bowls: At least two large bowls for mixing the pudding and cream cheese mixtures.
- Hand mixer: To whip the cream cheese and powdered sugar into a smooth, creamy texture. (A stand mixer works too!)
- Food processor: For easily crushing the Oreos into perfect, fine crumbs. Alternatively, you can use a zip-top bag and rolling pin.
- Serving dish: A large glass trifle bowl or individual cups for personal servings.
- Spatula: Perfect for spreading layers evenly.
If you don’t have a food processor, don’t worry! Crushing the Oreos with a rolling pin in a sealed bag works just as well. And if you don’t have a trifle dish, individual cups make adorable single servings.
Preparation Method
- Prepare the pudding: In a large mixing bowl, whisk together the pudding mix and cold milk for about 2 minutes until it thickens. Set aside in the fridge to chill.
- Make the cream cheese layer: In another bowl, beat the softened cream cheese with powdered sugar using a hand mixer until smooth and creamy. Gently fold in the whipped topping until well combined.
- Crush the Oreos: Using a food processor, pulse the Oreos until they resemble fine crumbs. If you don’t have a processor, place the cookies in a zip-top bag and crush them with a rolling pin.
- Layer the dessert: Start with a layer of Oreo crumbs at the bottom of your serving dish or cups. Add a layer of the cream cheese mixture, followed by a layer of chocolate pudding. Repeat the layers until the dish is full, finishing with a thick layer of Oreo crumbs on top.
- Decorate: Add gummy worms crawling out of the “dirt” and arrange any additional Halloween-themed candy decorations on top. Be as creative as you want!
- Chill: Cover the dish with plastic wrap and refrigerate for at least 2 hours to allow the flavors to meld together.
- Serve: Scoop into bowls or let guests dig right in with spoons—it’s a true crowd-pleaser!
Cooking Tips & Techniques
- Get the perfect Oreo crumbs: If using a food processor, pulse the cookies instead of blending them to avoid turning them into powder. You want the crumbs to resemble dirt.
- Softened cream cheese is key: If your cream cheese isn’t soft enough, it might result in a lumpy mixture. Let it sit at room temperature for about 30 minutes before mixing.
- Chill the pudding completely: Make sure the pudding is fully set before layering—this will prevent it from mixing into the cream cheese layer.
- Customize the decorations: Add a spooky twist by using candy pumpkins, crushed chocolate cookies for tombstones, or even edible glitter for a magical touch.
- Make ahead of time: This dessert tastes even better when prepared a day in advance, as the flavors have more time to meld together.
Variations & Adaptations
- Dairy-Free Option: Use dairy-free pudding mix, almond or oat milk, and coconut whipped cream for a lactose-free version.
- Gluten-Free Adaptation: Replace regular Oreos with gluten-free chocolate sandwich cookies to cater to dietary restrictions.
- Seasonal Twist: Swap gummy worms for candy canes and snowflake sprinkles to transform this into a winter wonderland dessert for Christmas!
- Add a fruity layer: Incorporate a layer of chopped strawberries or raspberries for a tart contrast to the sweet chocolate.
- Make it boozy: Add a splash of Kahlúa or Baileys to the pudding for an adult-friendly version. Just don’t serve this one to the kids!
Serving & Storage Suggestions
This Spooky Oreo Dirt Dessert is best served chilled for maximum flavor and texture. Scoop it into bowls or set the dish out with spoons for guests to dig in—it’s totally up to you! For added flair, serve it alongside Halloween-themed drinks like pumpkin spice lattes or spooky punch.
If you have leftovers, cover the dish tightly with plastic wrap and store it in the refrigerator for up to 3 days. The flavors will deepen over time, making this dessert even more delicious the next day. For individual cups, simply cover each with plastic wrap or lids for easy storage. Avoid freezing, as the pudding and whipped topping may lose their creamy texture.
Nutritional Information & Benefits
While this dessert is definitely a treat, it’s surprisingly lighter than many baked goods thanks to the absence of butter and heavy cream. The whipped topping adds fluffiness without being overly rich, and you can use reduced-fat cream cheese if you’re looking to cut calories. Here’s an estimate per serving:
- Calories: Around 290
- Fat: 12g
- Carbs: 40g
- Protein: 3g
Keep in mind, the gummy worms and decorations add extra sugar, but hey—it’s Halloween, so treat yourself!
Conclusion
This Spooky Oreo Dirt Dessert is your ticket to a memorable Halloween treat that’s fun, festive, and downright delicious! Whether you’re hosting a party, spending time with family, or just craving something sweet, this recipe is sure to bring smiles and spooky vibes to your table.
FAQs
Can I make this recipe ahead of time?
Absolutely! This dessert actually tastes better when made a day in advance, as the flavors meld together beautifully.
What’s the best way to crush Oreos without a food processor?
Place the cookies in a zip-top bag and crush them with a rolling pin for a quick and easy solution.
Can I use vanilla pudding instead of chocolate?
Yes, you can! Vanilla pudding works well and gives the dessert a lighter color, but chocolate is perfect for the “dirt” effect.
Are there vegan substitutes for this recipe?
Yes! Use dairy-free pudding mix, almond or oat milk, and coconut whipped cream. Swap the Oreos for a vegan-friendly cookie option.
How long can I store leftovers?
Store leftovers in the refrigerator for up to 3 days. Just be sure to cover the dish tightly with plastic wrap.
Pin This Recipe!

Spooky Oreo Dirt Dessert Recipe for Perfect Halloween Treats

A fun and festive Halloween dessert featuring layers of crushed Oreos, creamy pudding, and creepy gummy worms. Perfect for kids and adults alike!
- Prep Time: 15 minutes
- Cook Time: 0 minutes
- Total Time: 15 minutes
- Yield: 8 servings 1x
- Category: Dessert
- Cuisine: American
Ingredients
- 20 Oreos, crushed into fine crumbs
- Two 3.9 oz packets of chocolate pudding mix
- 4 cups cold milk
- One 8 oz container of whipped topping, thawed
- One 8 oz block of cream cheese, softened
- 1 cup powdered sugar
- Gummy worms for decoration
- Optional Halloween decorations (e.g., tombstones, candy bones, skulls)
Instructions
- Prepare the pudding: In a large mixing bowl, whisk together the pudding mix and cold milk for about 2 minutes until it thickens. Set aside in the fridge to chill.
- Make the cream cheese layer: In another bowl, beat the softened cream cheese with powdered sugar using a hand mixer until smooth and creamy. Gently fold in the whipped topping until well combined.
- Crush the Oreos: Using a food processor, pulse the Oreos until they resemble fine crumbs. Alternatively, place the cookies in a zip-top bag and crush them with a rolling pin.
- Layer the dessert: Start with a layer of Oreo crumbs at the bottom of your serving dish or cups. Add a layer of the cream cheese mixture, followed by a layer of chocolate pudding. Repeat the layers until the dish is full, finishing with a thick layer of Oreo crumbs on top.
- Decorate: Add gummy worms crawling out of the ‘dirt’ and arrange any additional Halloween-themed candy decorations on top.
- Chill: Cover the dish with plastic wrap and refrigerate for at least 2 hours to allow the flavors to meld together.
- Serve: Scoop into bowls or let guests dig right in with spoons.
Notes
[‘Pulse Oreos in a food processor for perfect crumbs.’, ‘Let cream cheese soften at room temperature for 30 minutes before mixing.’, ‘Chill pudding completely before layering.’, ‘Customize decorations with candy pumpkins, tombstones, or edible glitter.’, ‘Prepare a day in advance for enhanced flavor.’]
Nutrition
- Serving Size: 1 cup
- Calories: 290
- Sugar: 30
- Sodium: 250
- Fat: 12
- Saturated Fat: 6
- Carbohydrates: 40
- Fiber: 1
- Protein: 3
Keywords: Halloween dessert, Oreo dirt dessert, spooky treats, kid-friendly dessert, no-bake recipe


