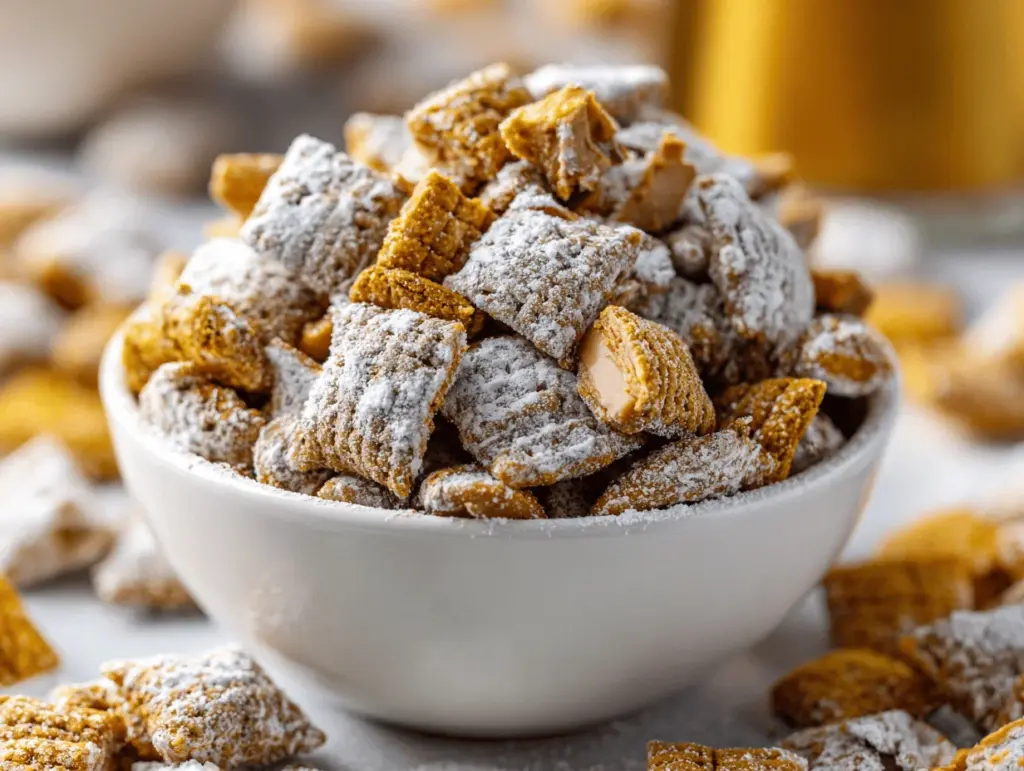
The first time I made Butterfinger Puppy Chow Snack Mix, the sweet peanut buttery aroma literally stopped my kids mid-cartwheel in the living room. You know that feeling when you taste something so good, you have to pause and go, “Wait, what is this magic?” That’s exactly what happened the first time we tried this. It’s crunchy, chocolatey, loaded with Butterfinger bits, and honestly—dangerously snackable.
I stumbled onto this recipe by accident, rummaging through the pantry for a quick treat before a movie night. All I had was a box of Chex, some chocolate chips, and a couple of those fun-sized Butterfinger bars leftover from Halloween. Fast-forward, and now this Butterfinger Puppy Chow Snack Mix is a family favorite for every get-together, bake sale, and cozy night in.
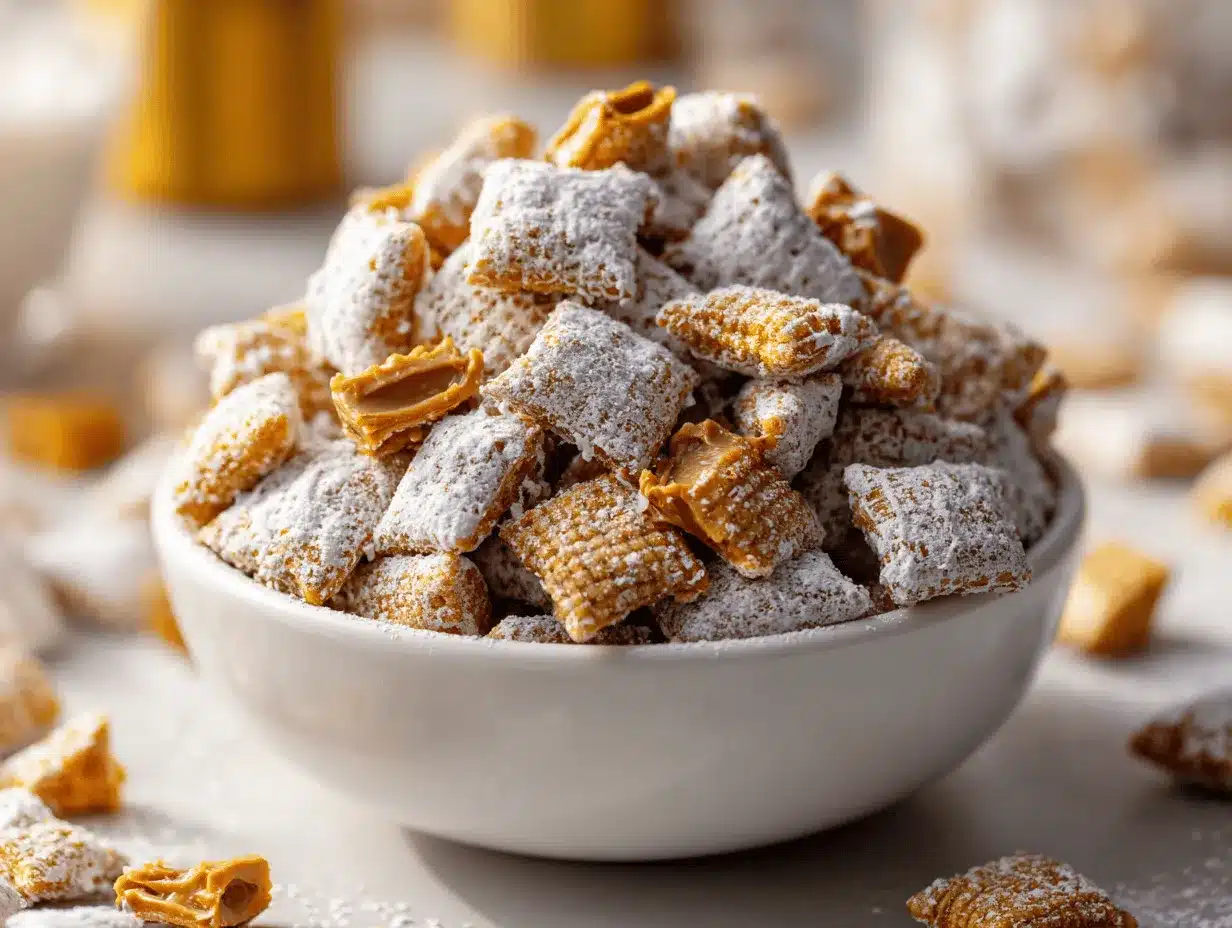
If you love classic muddy buddies, you’re going to flip for this recipe. The combination of crispy Chex, melty chocolate, and crushed Butterfinger bars is unreal. Plus, it’s the kind of recipe you can whip up in minutes—no oven, no fuss, just sweet, peanut buttery happiness in every handful. Whether you’re looking for something to wow a crowd or just a way to treat yourself, this snack mix is a total win. And for all the Chex lovers out there, it’s basically a love letter to everything you adore about sweet party snacks, but with a Butterfinger twist.
After testing this recipe more times than I care to admit (quality control, right?), I can say with confidence: this Butterfinger Puppy Chow Snack Mix is foolproof. It’s a snack that brings everyone together and makes you the hero of the kitchen—no advanced skills required.
Why You’ll Love This Butterfinger Puppy Chow Snack Mix
Honestly, I could make a whole list of reasons why this recipe has a permanent spot in my snack rotation. But if you’re wondering what makes this Butterfinger Puppy Chow Snack Mix so much better than the rest, here’s my take after dozens of batches and too many taste tests to count:
- Quick & Easy: This snack mix comes together in under 15 minutes—no baking, no waiting, just mix and go.
- Simple Ingredients: You probably already have most of the ingredients hiding in your pantry. No special grocery runs!
- Perfect for Every Occasion: Whether it’s a birthday party, holiday get-together, school snack, or cozy movie marathon, this recipe fits right in.
- Crowd-Pleaser: Kids, adults, picky eaters—everyone loves this stuff. It’s the first thing to disappear at every party I bring it to.
- Unbelievably Delicious: The marriage of crunchy cereal, velvety chocolate, and Butterfinger bits is pure happiness. You know that “just one more handful” feeling? Yeah, that’s this snack.
What really sets this Butterfinger Puppy Chow Snack Mix apart is the way the Butterfinger flavor sneaks into every bite. Instead of just tossing in candy, you’ll actually melt Butterfinger bars into the chocolate coating, so every piece is kissed with that iconic peanut-buttery crunch. I’ve tried other versions, but none have this much Butterfinger flavor in every mouthful.
It’s comfort food, but with a fun, playful twist. There’s nothing fussy or complicated, and it’s a total lifesaver for last-minute gatherings or those “I need something sweet now” cravings. This is the recipe that makes people ask for seconds—and then the recipe. Trust me, you’ll want to keep this one bookmarked.
What Ingredients You Will Need
This Butterfinger Puppy Chow Snack Mix keeps things simple, using easy-to-find ingredients that come together for that signature sweet-salty, crunchy vibe. Here’s what you’ll need—and a few of my hard-earned tips for ingredient success:
- Rice Chex Cereal (about 9 cups/255g) – The classic base for any puppy chow. I prefer Rice Chex for its lightness, but Corn Chex or a mix works too. Just make sure the pieces are fresh and crispy—stale cereal is a no-go.
- Semi-Sweet Chocolate Chips (1 cup/170g) – I usually grab Ghirardelli or Nestlé for reliable melting. You can use milk chocolate if you want things even sweeter.
- Creamy Peanut Butter (1/2 cup/120g) – Go with a classic, smooth peanut butter like Jif or Skippy. Natural peanut butters can make things a bit oily and harder to coat evenly.
- Butter (1/4 cup/56g, unsalted) – Adds richness and helps the chocolate coat every piece. If you only have salted, just skip adding extra salt later.
- Vanilla Extract (1 teaspoon/5ml) – A splash of vanilla brings everything together. I love using real vanilla for the best flavor, but imitation works in a pinch.
- Butterfinger Candy Bars (6 fun-size bars or 2 full-size, about 90g, crushed) – The star of the show! You’ll melt some into the chocolate and sprinkle the rest over the top for double Butterfinger goodness. If you want even more crunch, grab an extra bar for garnish.
- Powdered Sugar (1 1/2 cups/180g) – This is what gives puppy chow its snowy look and keeps everything from sticking together. Don’t skimp—if you want a thick, sweet coating, add a little extra.
- Pinch of Salt (optional) – Not totally required, but a tiny bit of salt can really make all the flavors pop, especially if your peanut butter is unsalted.
Ingredient Tips & Swaps:
- If you need a nut-free version, use sunflower seed butter in place of peanut butter (I’ve done it for school snacks—works great!)
- Want it gluten-free? Use certified gluten-free Chex and double-check your candy bars and chocolate chips.
- For a dairy-free option, use vegan butter and dairy-free chocolate chips. Butterfinger bars do contain dairy, but you can substitute with a peanut butter candy if needed.
- No Butterfinger bars? I’ve tried this with chopped Reese’s or even toffee bits—the result is different, but still seriously delicious.
This recipe is all about easy, so don’t be afraid to make it your own based on what you have.
Equipment Needed
One of my favorite things about this Butterfinger Puppy Chow Snack Mix is you don’t need any fancy gadgets—just a few basics you probably already own:
- Large Mixing Bowl: You’ll need something big enough to toss the cereal without making a mess. I use my giant salad bowl for this job.
- Microwave-Safe Bowl: For melting the chocolate, peanut butter, and butter. Glass or heavy-duty plastic works well—just make sure it’s microwave-safe.
- Measuring Cups & Spoons: Nothing fancy needed, but accuracy helps for getting the coating just right.
- Rubber Spatula or Wooden Spoon: For stirring and folding the mixture gently.
- Zip-Top Gallon Bag or Large Food Storage Container: This is the secret to getting every piece coated in powdered sugar without a cloud of sugar dust all over your kitchen. If you don’t have a bag, use a big container with a tight lid and shake it like crazy.
- Rolling Pin or Heavy Pan (optional): For crushing the Butterfinger bars. I’ve even used the bottom of a mug in a pinch—just get those pieces nice and small.
I’ve tried making puppy chow in a too-small bowl and ended up with cereal everywhere, so trust me: go big or grab a second bowl if you need. For keeping costs down, dollar store mixing bowls and reusable bags work perfectly. And if you love making snack mixes, having a dedicated “snack mix bowl” is a game-changer—easy to clean, and always ready for the next batch.
How to Make Butterfinger Puppy Chow Snack Mix
-
Measure Out Your Cereal
Place 9 cups (about 255g) of Rice Chex cereal into a large mixing bowl. Set aside. (If your bowl isn’t big enough, split into two batches. Trying to stir too much at once = cereal all over the counter. Been there.)
-
Melt Chocolate, Peanut Butter & Butter
In a microwave-safe bowl, combine 1 cup (170g) semi-sweet chocolate chips, 1/2 cup (120g) creamy peanut butter, and 1/4 cup (56g) unsalted butter. Microwave in 30-second bursts, stirring after each, until the mixture is smooth and fully melted (about 1.5 to 2 minutes total). Don’t overheat—if the chocolate seizes, add a teaspoon of oil and stir gently. The mixture should be shiny and pourable.
-
Add Vanilla & Melted Butterfinger
Stir in 1 teaspoon (5ml) vanilla extract. Reserve 1/3 of the crushed Butterfinger bars for topping. Add the rest (about 60g) into the melted chocolate mixture and stir until combined. This is where that Butterfinger flavor gets infused into every bite.
-
Coat the Cereal
Pour the chocolate-Butterfinger mixture over the cereal. Use a rubber spatula to fold gently until every piece is evenly coated. Work slowly to avoid crushing the cereal. If some pieces look a little bare, drizzle a bit more chocolate over the top and toss again.
-
Powdered Sugar Magic
Transfer the coated cereal into a large zip-top bag or food storage container. Add 1 1/2 cups (180g) powdered sugar. Seal and shake vigorously until all pieces are coated. If you like it extra sweet, add another 1/2 cup (60g) powdered sugar and shake again. You want every piece to look snowy and separated.
-
Add the Final Butterfinger Crunch
Open the bag and sprinkle in the reserved crushed Butterfinger bars (about 30g). Seal and give one last gentle shake or toss. This step gives you those irresistible bits of Butterfinger in every handful.
-
Cool & Serve
Spread the snack mix out on a parchment-lined baking sheet to cool and set for 10-15 minutes. This helps keep the pieces from clumping. Once cooled, transfer to a serving bowl and dig in! (Or, if you’re prepping ahead, store in an airtight container right away.)
Troubleshooting: If your coating feels too thick, add a splash of melted butter or microwave for 10 seconds to loosen it up. If it’s too thin, toss with a bit more cereal before sugaring. And if you see big clumps, break them up with your hands while the mix is still warm.
Butterfinger Puppy Chow Cooking Tips & Techniques
After lots of trial and error (including one microwave explosion—don’t ask), I’ve picked up a few tricks for perfect Butterfinger Puppy Chow Snack Mix every time:
- Don’t Overheat the Chocolate: Chocolate burns quickly in the microwave. Stir every 30 seconds and stop as soon as most chips are melted. The residual heat will finish the job.
- Gentle Mixing is Key: Chex cereal is sturdy, but too much force will crush it. Use a folding motion rather than stirring hard. If you spot a few broken pieces, no worries—they’re still tasty!
- Crush Butterfinger Bars Finely: Large chunks are great for garnish, but smaller bits blend better into the coating. I put the bars in a plastic bag and pound them with a rolling pin—fun and effective.
- Use Enough Powdered Sugar: Don’t be shy! It’s what keeps the snack mix from sticking together and gives that classic puppy chow finish. If things look sticky, add more and shake again.
- Let It Cool Before Storing: Warm puppy chow will stick together in big clumps. Spread it out on a baking sheet for a few minutes before packing away.
- Timing & Multitasking: While your chocolate is melting, crush the Butterfinger bars and measure out your cereal. Having everything prepped means the process is smooth and mess-free.
I’ve found that the snack mix actually tastes even better after sitting for a few hours—the flavors meld, and the texture settles into crunchy perfection. If you run into any issues (like clumpy sugar or soggy cereal), just sift through and re-coat or let it air dry a bit longer. Practice makes perfect, and honestly, even the “mistakes” taste amazing!
Variations & Adaptations
One of the best parts about Butterfinger Puppy Chow Snack Mix is how customizable it is. Here are a few of my favorite twists and adaptations:
- Gluten-Free: Use certified gluten-free Chex cereal and double-check your chocolate chips and Butterfinger bars. I’ve made it this way for friends with celiac, and no one can tell the difference.
- Nut-Free: Swap out the peanut butter for sunflower seed butter (like SunButter) and make sure your chocolate and candy bars are nut-safe. It’s perfect for school parties where allergies are a concern.
- Double Chocolate: Mix in 1/2 cup (90g) mini chocolate chips or add a drizzle of melted white chocolate over the finished snack mix for an extra chocolate kick.
- Holiday Twist: Toss in seasonal sprinkles or colored chocolate candies (like orange and black for Halloween, red and green for Christmas) for a festive look.
- Mix Up the Candy: No Butterfinger bars? Use crushed Reese’s, Heath bars, or even chopped Snickers for a totally new flavor. I once tried it with mini peanut butter cups—so good!
- Cooking Methods: If you don’t have a microwave, melt your chocolate and peanut butter in a double boiler on the stove over low heat, stirring constantly.
Personally, my go-to twist is adding a handful of mini pretzels to the mix before coating for a salty crunch. Every batch is a little different—and that’s part of the fun!
Serving & Storage Suggestions
This Butterfinger Puppy Chow Snack Mix is best served at room temperature, right out of a big bowl where everyone can grab a handful (or three). For fancier occasions, scoop into cupcake liners or small jars for individual servings—super cute for parties or gift bags.
I love pairing this snack mix with cold milk, hot cocoa, or coffee for a sweet treat. It’s also awesome alongside salty snacks like popcorn or pretzels for a sweet-salty snack spread. For movie nights, pour into a giant mixing bowl and let everyone dig in!
To store, keep the puppy chow in an airtight container at room temperature for up to a week. If your kitchen is warm, pop it in the fridge to keep the chocolate from melting. For longer storage, freeze in a zip-top bag for up to 2 months. Just let it thaw at room temp before serving—no need to reheat. The flavor gets even better after a day or two, as the Butterfinger bits really settle into the chocolate coating.
Nutritional Information & Benefits
Each serving (about 1 cup/45g) of Butterfinger Puppy Chow Snack Mix contains roughly:
- Calories: 320
- Total Fat: 13g
- Saturated Fat: 5g
- Carbohydrates: 48g
- Sugar: 28g
- Protein: 4g
- Sodium: 200mg
This snack mix is definitely more treat than health food, but it does offer a little protein from the peanut butter, and you can make it gluten-free or nut-free if needed. The main allergens are peanuts, dairy, and possibly gluten (depending on your ingredients), so always check labels for sensitive eaters.
As someone who tries to balance fun snacks with smarter choices, I find this recipe is great for sharing—one handful is super satisfying, and it’s a nice way to treat yourself without going overboard. Plus, making it at home means you control the quality and portion sizes!
Conclusion
So, why is this Butterfinger Puppy Chow Snack Mix recipe a must-try? It’s easy, fast, totally customizable, and loaded with that unmistakable Butterfinger flavor. Whether you’re making it for a party, a bake sale, or just a snacky night in, it never fails to bring smiles (and requests for the recipe).
I love how simple it is to swap in your favorite candy bars or tuck in some extra crunch with pretzels or nuts. Every batch is a chance to play—and honestly, that’s half the fun. This recipe is proof that sometimes the best treats are the ones you make in your own kitchen, with a little creativity and a lot of chocolate.
Give it a try! Let me know how yours turns out, or share your favorite puppy chow twist in the comments below. If you’re a fellow Chex lover, I promise—you’ll want to keep this recipe on repeat. Happy snacking!
FAQs About Butterfinger Puppy Chow Snack Mix
Can I make Butterfinger Puppy Chow Snack Mix ahead of time?
Absolutely! It actually tastes even better after a day, as the flavors have time to meld. Just store in an airtight container at room temperature for up to a week.
What if I don’t have Butterfinger bars?
No problem—you can use any crunchy peanut butter candy (like Reese’s or Heath) or even a mix of chocolate and peanut butter chips for a slightly different twist.
Is Butterfinger Puppy Chow gluten-free?
It can be! Use certified gluten-free Chex and check the other ingredients to make sure they’re safe. Always read labels if you’re making it for someone with celiac or gluten sensitivity.
How do I keep the puppy chow from getting soggy?
Make sure the cereal is fresh and let the coated mix cool completely before storing. If it feels sticky, add a bit more powdered sugar and let it air dry for 10-15 minutes before packing away.
Can I freeze Butterfinger Puppy Chow Snack Mix?
Yes! Freeze in a zip-top bag or airtight container for up to 2 months. Thaw at room temperature—no need to reheat. It’ll taste just as good (maybe even better) after a quick thaw.
Pin This Recipe!
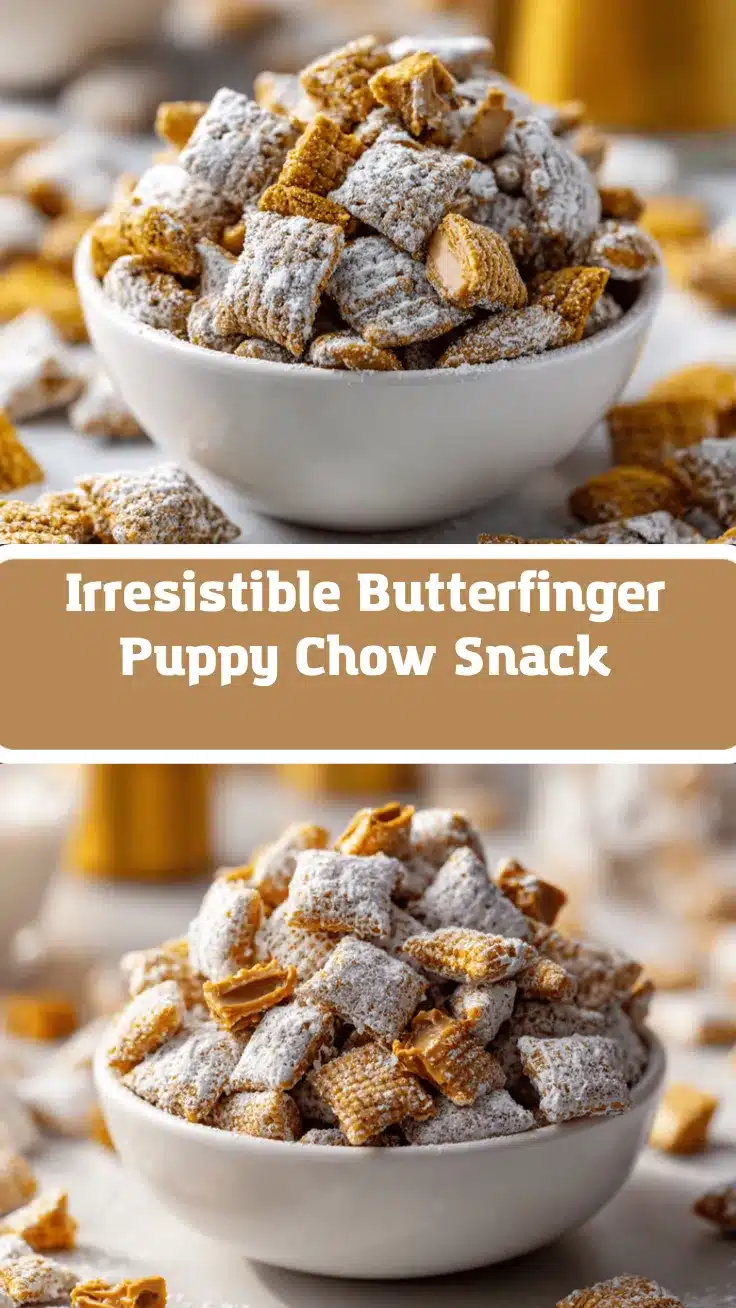
Butterfinger Puppy Chow Snack Mix

This easy, no-bake snack mix combines crispy Chex cereal, melty chocolate, creamy peanut butter, and loads of Butterfinger bits for a dangerously snackable treat. Perfect for parties, movie nights, or anytime you need a sweet, crunchy fix.
- Prep Time: 10 minutes
- Cook Time: 2 minutes
- Total Time: 15 minutes
- Yield: 10 servings 1x
- Category: Snack
- Cuisine: American
Ingredients
- 9 cups Rice Chex cereal (about 255g)
- 1 cup semi-sweet chocolate chips (170g)
- 1/2 cup creamy peanut butter (120g)
- 1/4 cup unsalted butter (56g)
- 1 teaspoon vanilla extract (5ml)
- 6 fun-size Butterfinger candy bars or 2 full-size (about 90g), crushed
- 1 1/2 cups powdered sugar (180g), plus more if needed
- Pinch of salt (optional)
Instructions
- Place 9 cups of Rice Chex cereal into a large mixing bowl and set aside.
- In a microwave-safe bowl, combine chocolate chips, peanut butter, and butter. Microwave in 30-second bursts, stirring after each, until smooth and melted (about 1.5 to 2 minutes total).
- Stir in vanilla extract. Reserve 1/3 of the crushed Butterfinger bars for topping; add the rest to the melted chocolate mixture and stir to combine.
- Pour the chocolate-Butterfinger mixture over the cereal. Gently fold with a spatula until all pieces are evenly coated.
- Transfer the coated cereal to a large zip-top bag or food storage container. Add powdered sugar, seal, and shake vigorously until all pieces are coated. Add more powdered sugar if needed for a thick, snowy coating.
- Open the bag and sprinkle in the reserved Butterfinger bits. Seal and gently shake or toss to distribute.
- Spread the snack mix on a parchment-lined baking sheet to cool and set for 10-15 minutes. Once cooled, transfer to a serving bowl or store in an airtight container.
Notes
For gluten-free, use certified gluten-free Chex and check all other ingredients. For nut-free, substitute sunflower seed butter for peanut butter. Let the mix cool completely before storing to prevent clumping. Add extra powdered sugar if the mix is sticky. Store in an airtight container at room temperature for up to a week or freeze for up to 2 months.
Nutrition
- Serving Size: About 1 cup (45g)
- Calories: 320
- Sugar: 28
- Sodium: 200
- Fat: 13
- Saturated Fat: 5
- Carbohydrates: 48
- Protein: 4
Keywords: Butterfinger puppy chow, snack mix, muddy buddies, Chex mix, easy party snack, no bake, chocolate peanut butter, Butterfinger dessert, sweet snack, movie night treat


