
The smell of warm apple pie wafting through the kitchen—that cozy, cinnamon-spiced aroma instantly brings back memories of family gatherings and chilly autumn afternoons. Honestly, I first made this classic apple pie recipe during a weekend when I craved something comforting but didn’t want to fuss over complicated steps. It became an instant favorite, not just for me but for everyone who tasted it.
This irresistible classic apple pie recipe has been a staple in my kitchen for years. After testing it multiple times and tweaking the balance of spices and crust flakiness, I’m confident this is the perfect homemade dessert you can rely on. It’s a recipe that’s approachable enough for beginners but yields a pie that tastes like it came from a bakery.
Whether you’re baking for a holiday, a potluck, or just because you deserve a treat, this apple pie fits the bill. The blend of tart and sweet apples with that buttery, flaky crust is the kind of dessert that makes you pause and savor each bite. Plus, it’s a great way to use up all those apples piling up in your fruit bowl. I promise, once you try this classic apple pie recipe, it’ll become your go-to for any dessert occasion.
Why You’ll Love This Recipe
- Quick & Easy: Comes together in under 1 hour prep time, so you can enjoy your pie sooner rather than later.
- Simple Ingredients: No fancy or hard-to-find items here—just pantry staples and fresh apples.
- Perfect for Any Occasion: Whether it’s a casual weeknight dessert or a festive holiday centerpiece, this apple pie shines.
- Crowd-Pleaser: Kids and adults alike rave about the perfectly balanced sweetness and spice.
- Unbelievably Delicious: The buttery crust and tender apple filling create a texture and flavor combo that’s just irresistible.
What sets this classic apple pie recipe apart is the way the apples are sliced thin but keep their shape after baking, thanks to a quick toss in a cinnamon-sugar mixture that locks in flavor. The crust is flaky without being greasy—a result of chilling the dough properly and using just the right amount of butter. Honestly, the technique of blind baking the bottom crust for a few minutes before adding the filling keeps the base from getting soggy, which was a game changer for me.
This isn’t just any apple pie—it’s the one that makes you close your eyes after the first bite and smile. It’s comfort food with a little homemade magic, perfect for impressing guests or treating yourself after a long day.
What Ingredients You Will Need
This recipe uses simple, wholesome ingredients to deliver bold flavor and a satisfying texture without fuss. Most of these are likely already in your kitchen, making it perfect for spontaneous baking sessions.
- For the crust:
- All-purpose flour – 2 ½ cups (312 g), sifted for a tender crust
- Unsalted butter – 1 cup (226 g), cold and cubed (I prefer Kerrygold for its richness)
- Granulated sugar – 2 tablespoons (adds a touch of sweetness)
- Salt – 1 teaspoon
- Ice water – 6 to 8 tablespoons (chilled, to bring the dough together without melting the butter)
- For the filling:
- Granny Smith apples – 3 medium (about 1 ½ pounds or 680 g), peeled, cored, and thinly sliced (for tartness and firmness)
- Honeycrisp apples – 3 medium (about 1 ½ pounds or 680 g), peeled, cored, and thinly sliced (adds sweetness)
- Granulated sugar – ½ cup (100 g)
- Brown sugar – ¼ cup packed (55 g), for depth of flavor
- Ground cinnamon – 1 ½ teaspoons
- Ground nutmeg – ½ teaspoon
- Fresh lemon juice – 1 tablespoon (to prevent browning and brighten flavors)
- All-purpose flour – 3 tablespoons (for thickening the filling)
- Unsalted butter – 2 tablespoons, cut into small pieces (for dotting on top of the filling)
- For the egg wash (optional):
- Large egg – 1, beaten with 1 tablespoon water (for a golden crust)
Tip: If you want a gluten-free version, swap the all-purpose flour with a 1:1 gluten-free baking mix. For a vegan twist, use coconut oil instead of butter in the crust and skip the egg wash or use a plant-based milk glaze.
Equipment Needed
- 9-inch (23 cm) pie dish – I like ceramic for even heat distribution, but glass works fine too.
- Mixing bowls – One large for dough, one medium for filling.
- Pastry blender or food processor – To cut butter into flour efficiently. I’ve used both; a food processor speeds things up but a pastry blender gives you more control.
- Rolling pin – Essential for rolling out the dough evenly. Wooden or silicone both work well.
- Sharp knife or mandoline – For slicing apples thinly and uniformly.
- Pastry brush – For applying the egg wash to get that beautiful golden finish.
- Baking sheet – To place under the pie dish and catch any drips while baking.
If you don’t have a pastry blender, two forks can work in a pinch. For rolling dough, if you don’t have a rolling pin, a clean wine bottle is a handy substitute. Keeping your tools and ingredients cold helps achieve that flaky crust every time.
Detailed Preparation Method
- Make the pie crust: In a large bowl, mix the sifted flour, sugar, and salt. Add the cold, cubed butter. Use a pastry blender or your fingers to cut the butter into the flour until the mixture looks like coarse crumbs with pea-sized pieces. This usually takes about 5 minutes.
- Add ice water: Gradually sprinkle 6 tablespoons of ice water over the mixture, tossing gently with a fork. Add more water, one tablespoon at a time, just until the dough starts to come together when pressed. Avoid overworking the dough; it should be crumbly but hold together when pinched.
- Form and chill the dough: Divide the dough into two equal disks, wrap each in plastic wrap, and refrigerate for at least 1 hour. Chilling helps relax the gluten and keeps the butter cold, resulting in a flaky crust.
- Prepare the filling: In a large bowl, toss the sliced apples with lemon juice, granulated sugar, brown sugar, cinnamon, nutmeg, and flour. Make sure the apples are evenly coated. Let this sit while you roll out the dough; this step takes about 10 minutes.
- Roll out the bottom crust: On a lightly floured surface, roll one dough disk into a 12-inch (30 cm) circle. Transfer it carefully to your 9-inch pie dish, letting the excess dough hang over the edges. Chill for 15 minutes if it feels too soft.
- Blind bake the bottom crust: Preheat your oven to 375°F (190°C). Line the crust with parchment paper and fill with pie weights or dried beans. Bake for 15 minutes, then remove the weights and parchment. Bake for another 5 minutes to dry the crust slightly. This prevents sogginess.
- Assemble the pie: Pour the apple filling into the pre-baked crust, spreading evenly. Dot the filling with the 2 tablespoons of butter pieces.
- Roll out the top crust: Roll out the second dough disk into a 12-inch circle. You can do a classic full top crust, or cut strips for a lattice design. Place the top crust or lattice over the filling.
- Seal and crimp the edges: Trim excess dough, then press edges together with your fingers or a fork to create a seal. Cut slits in the top crust if using a full cover to allow steam to escape.
- Apply egg wash: Brush the top crust with the beaten egg wash for a golden, glossy finish. Sprinkle a little sugar on top if you like a sweet crunch.
- Bake the pie: Place the pie on a baking sheet and bake at 375°F (190°C) for 50-60 minutes. The crust should be golden brown and the filling bubbly. If the edges brown too quickly, cover them with foil halfway through baking.
- Cool and serve: Let the pie cool on a wire rack for at least 2 hours to let the filling set. This step is crucial; cutting too soon can make the filling runny.
Note: Oven temperatures vary, so keep an eye on the pie during the last 20 minutes. If the crust browns too fast, a simple foil tent does wonders. I learned this the hard way after a few burned edges!
Cooking Tips & Techniques
- Keep everything cold: Cold butter and ice water are your crust’s best friends. Warm ingredients lead to a tough crust.
- Don’t overwork the dough: Handle it just enough to bring it together. Overmixing develops gluten, which can make the crust chewy instead of flaky.
- Use a mix of apples: Combining tart and sweet apples gives your filling complexity. I always use Granny Smith and Honeycrisp for the best balance.
- Blind baking the crust: This prevents soggy bottoms, especially with juicy fruit fillings like apples.
- Let the pie cool: I know it’s tempting, but patience pays off. The filling firms up as it cools, making slices cleaner and tastier.
- Multitasking: While the dough chills, slice your apples and prep the filling. This saves time and keeps everything running smoothly.
I once skipped chilling the dough, thinking it was no big deal. Big mistake. The crust was tough and crumbly. Now, chilling is a non-negotiable step that makes all the difference.
Variations & Adaptations
- Gluten-Free Apple Pie: Use a gluten-free all-purpose flour blend in the crust. Make sure it contains xanthan gum for structure.
- Vegan Version: Substitute butter with coconut oil or vegan butter, and replace the egg wash with plant-based milk or a maple syrup glaze.
- Spiced Up: Add a pinch of ground cloves or cardamom to the filling for a warm, aromatic twist.
- Different Fruit Mix: Swap half the apples for pears or add a handful of fresh cranberries for tartness and color.
- Lattice Top: For a classic look, weave strips of dough over the filling instead of a full crust. It crisps up nicely and showcases the filling.
One time, I tried adding chopped walnuts to the filling for crunch—it was surprisingly good! Just sprinkle them over the apples before topping with the crust.
Serving & Storage Suggestions
Serve this classic apple pie warm or at room temperature. A scoop of vanilla ice cream or a dollop of whipped cream alongside takes it over the top. Hot coffee or spicy chai tea pairs beautifully with the cinnamon notes.
Leftovers can be stored covered at room temperature for 1-2 days or refrigerated for up to 4 days. To freeze, wrap the cooled pie tightly in plastic wrap and aluminum foil, then freeze for up to 3 months. Thaw overnight in the fridge before reheating.
To reheat, warm slices in a 350°F (175°C) oven for 10-15 minutes or microwave briefly (though oven reheating keeps the crust crisp). The flavors often deepen after a day, making the pie even better the next day.
Nutritional Information & Benefits
Each slice (1/8 of pie) contains approximately 320 calories, 12g fat, 48g carbohydrates, 3g fiber, and 3g protein. Apples provide a good source of dietary fiber and vitamin C, while cinnamon adds antioxidants and may help regulate blood sugar.
This pie is naturally free from artificial preservatives and dyes. For those watching carbs, using less sugar or alternative sweeteners can make it more diet-friendly. The recipe contains gluten and dairy, so swap these if you have allergies.
As someone who enjoys balanced eating, I find this apple pie a satisfying treat that fits well into a mostly whole-foods diet. It’s a dessert that feels indulgent but still uses real, wholesome ingredients.
Conclusion
This classic apple pie recipe is my tried-and-true favorite for good reason. It’s approachable, uses everyday ingredients, and delivers that perfect mix of flaky crust and tender, flavorful filling. You can customize it to suit your tastes or dietary needs and still end up with a dessert that feels special.
I love how this pie brings people together—whether it’s a family dinner or an impromptu gathering. Baking it always feels like a warm hug from the inside out. Give it a try, make it your own, and don’t forget to share how it turned out!
If you bake this irresistible classic apple pie, drop a comment below or tag me on social media. I’d love to hear your twists or tips. Happy baking!
FAQs
How do I prevent the pie crust from getting soggy?
Blind bake the bottom crust for 15-20 minutes before adding the filling. This helps create a barrier that keeps moisture from soaking in.
Can I use frozen apples for this recipe?
Fresh apples are best for texture, but if you must use frozen, thaw and drain them thoroughly to avoid a watery filling.
What’s the best way to slice apples evenly?
A sharp knife works fine, but a mandoline slicer can make uniform slices quickly and safely.
Can I make the pie crust ahead of time?
Yes! You can prepare the dough up to 2 days in advance and keep it wrapped in the fridge, or freeze for longer storage.
How do I fix a pie crust that’s too tough?
It usually means the dough was overworked or the butter got too warm. Next time, handle the dough gently and keep ingredients cold.
Pin This Recipe!

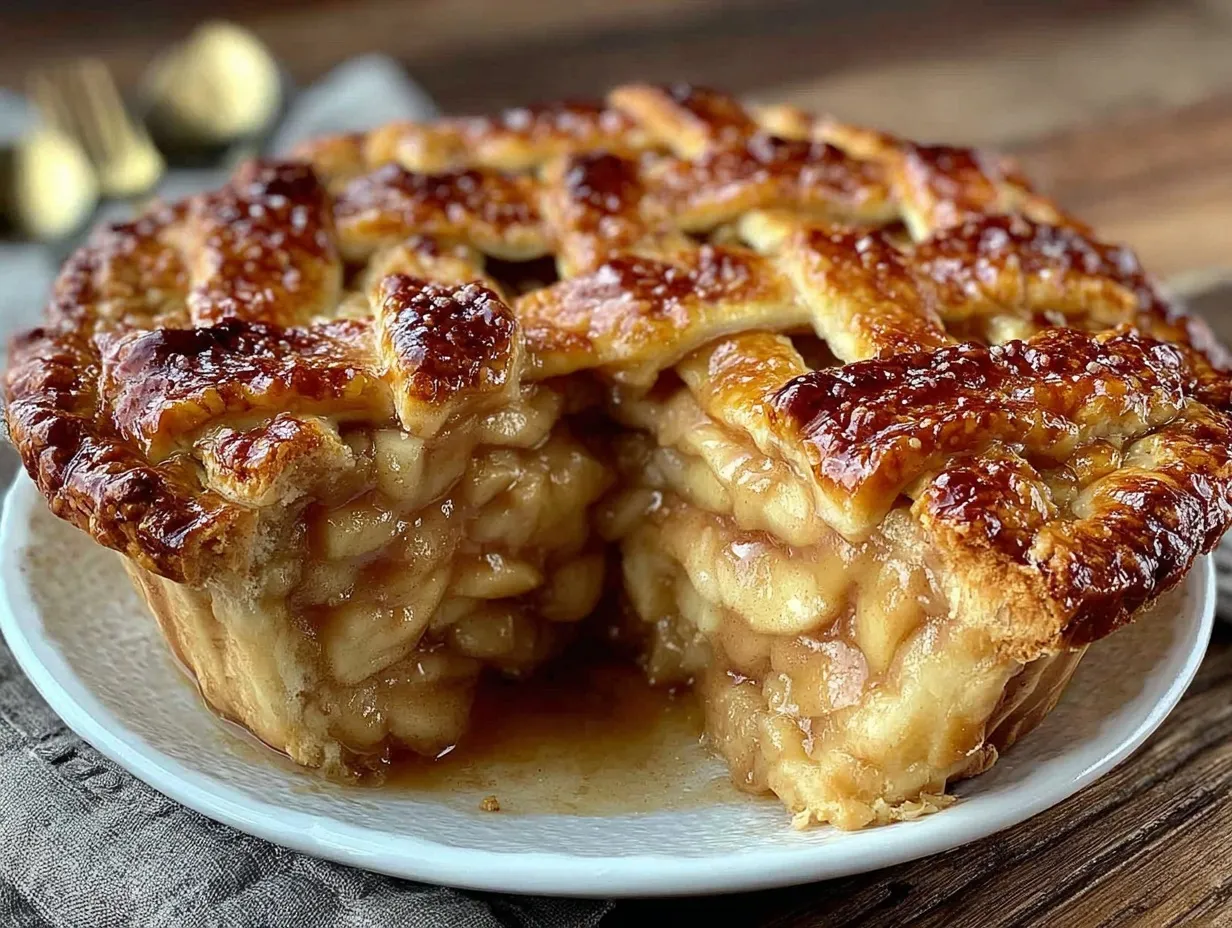
Classic Apple Pie

A comforting and easy homemade apple pie with a flaky buttery crust and a perfectly spiced apple filling, ideal for any occasion.
- Prep Time: 1 hour 20 minutes
- Cook Time: 1 hour
- Total Time: 2 hours 20 minutes
- Yield: 8 servings 1x
- Category: Dessert
- Cuisine: American
Ingredients
- 2 ½ cups all-purpose flour (312 g), sifted
- 1 cup unsalted butter (226 g), cold and cubed
- 2 tablespoons granulated sugar (for crust)
- 1 teaspoon salt
- 6 to 8 tablespoons ice water, chilled
- 3 medium Granny Smith apples (about 1 ½ pounds or 680 g), peeled, cored, and thinly sliced
- 3 medium Honeycrisp apples (about 1 ½ pounds or 680 g), peeled, cored, and thinly sliced
- ½ cup granulated sugar (100 g)
- ¼ cup packed brown sugar (55 g)
- 1 ½ teaspoons ground cinnamon
- ½ teaspoon ground nutmeg
- 1 tablespoon fresh lemon juice
- 3 tablespoons all-purpose flour (for filling thickening)
- 2 tablespoons unsalted butter, cut into small pieces (for dotting filling)
- 1 large egg, beaten with 1 tablespoon water (optional egg wash)
Instructions
- In a large bowl, mix sifted flour, sugar, and salt for the crust. Add cold cubed butter and cut into flour using a pastry blender or fingers until mixture resembles coarse crumbs with pea-sized pieces.
- Gradually sprinkle 6 tablespoons ice water over mixture, tossing gently with a fork. Add more water one tablespoon at a time until dough holds together when pressed but is not overworked.
- Divide dough into two equal disks, wrap in plastic wrap, and refrigerate for at least 1 hour.
- In a large bowl, toss sliced apples with lemon juice, granulated sugar, brown sugar, cinnamon, nutmeg, and flour. Let sit while rolling dough.
- Roll one dough disk on a lightly floured surface into a 12-inch circle. Transfer to a 9-inch pie dish with excess dough hanging over edges. Chill 15 minutes if too soft.
- Preheat oven to 375°F (190°C). Line crust with parchment paper and fill with pie weights or dried beans. Blind bake for 15 minutes, remove weights and parchment, then bake 5 more minutes to dry crust.
- Pour apple filling into pre-baked crust and dot with 2 tablespoons butter pieces.
- Roll out second dough disk into a 12-inch circle. Place full top crust or lattice strips over filling.
- Trim excess dough and seal edges by pressing with fingers or fork. Cut slits in top crust if using full cover to allow steam to escape.
- Brush top crust with beaten egg wash for a golden finish. Optionally sprinkle sugar on top.
- Place pie on baking sheet and bake at 375°F (190°C) for 50-60 minutes until crust is golden and filling bubbly. Cover edges with foil if browning too fast.
- Cool pie on wire rack for at least 2 hours before slicing to let filling set.
Notes
Keep ingredients cold to ensure a flaky crust. Blind bake the bottom crust to prevent sogginess. Let the pie cool completely before slicing to avoid runny filling. Use a mix of tart and sweet apples for best flavor. For gluten-free, substitute flour with gluten-free baking mix. For vegan, use coconut oil instead of butter and skip egg wash or use plant-based milk glaze.
Nutrition
- Serving Size: 1 slice (1/8 of pie)
- Calories: 320
- Fat: 12
- Carbohydrates: 48
- Fiber: 3
- Protein: 3
Keywords: apple pie, classic apple pie, homemade apple pie, easy apple pie, fall dessert, pie crust, cinnamon apple pie


